My Hoplon: reconstruction experience.
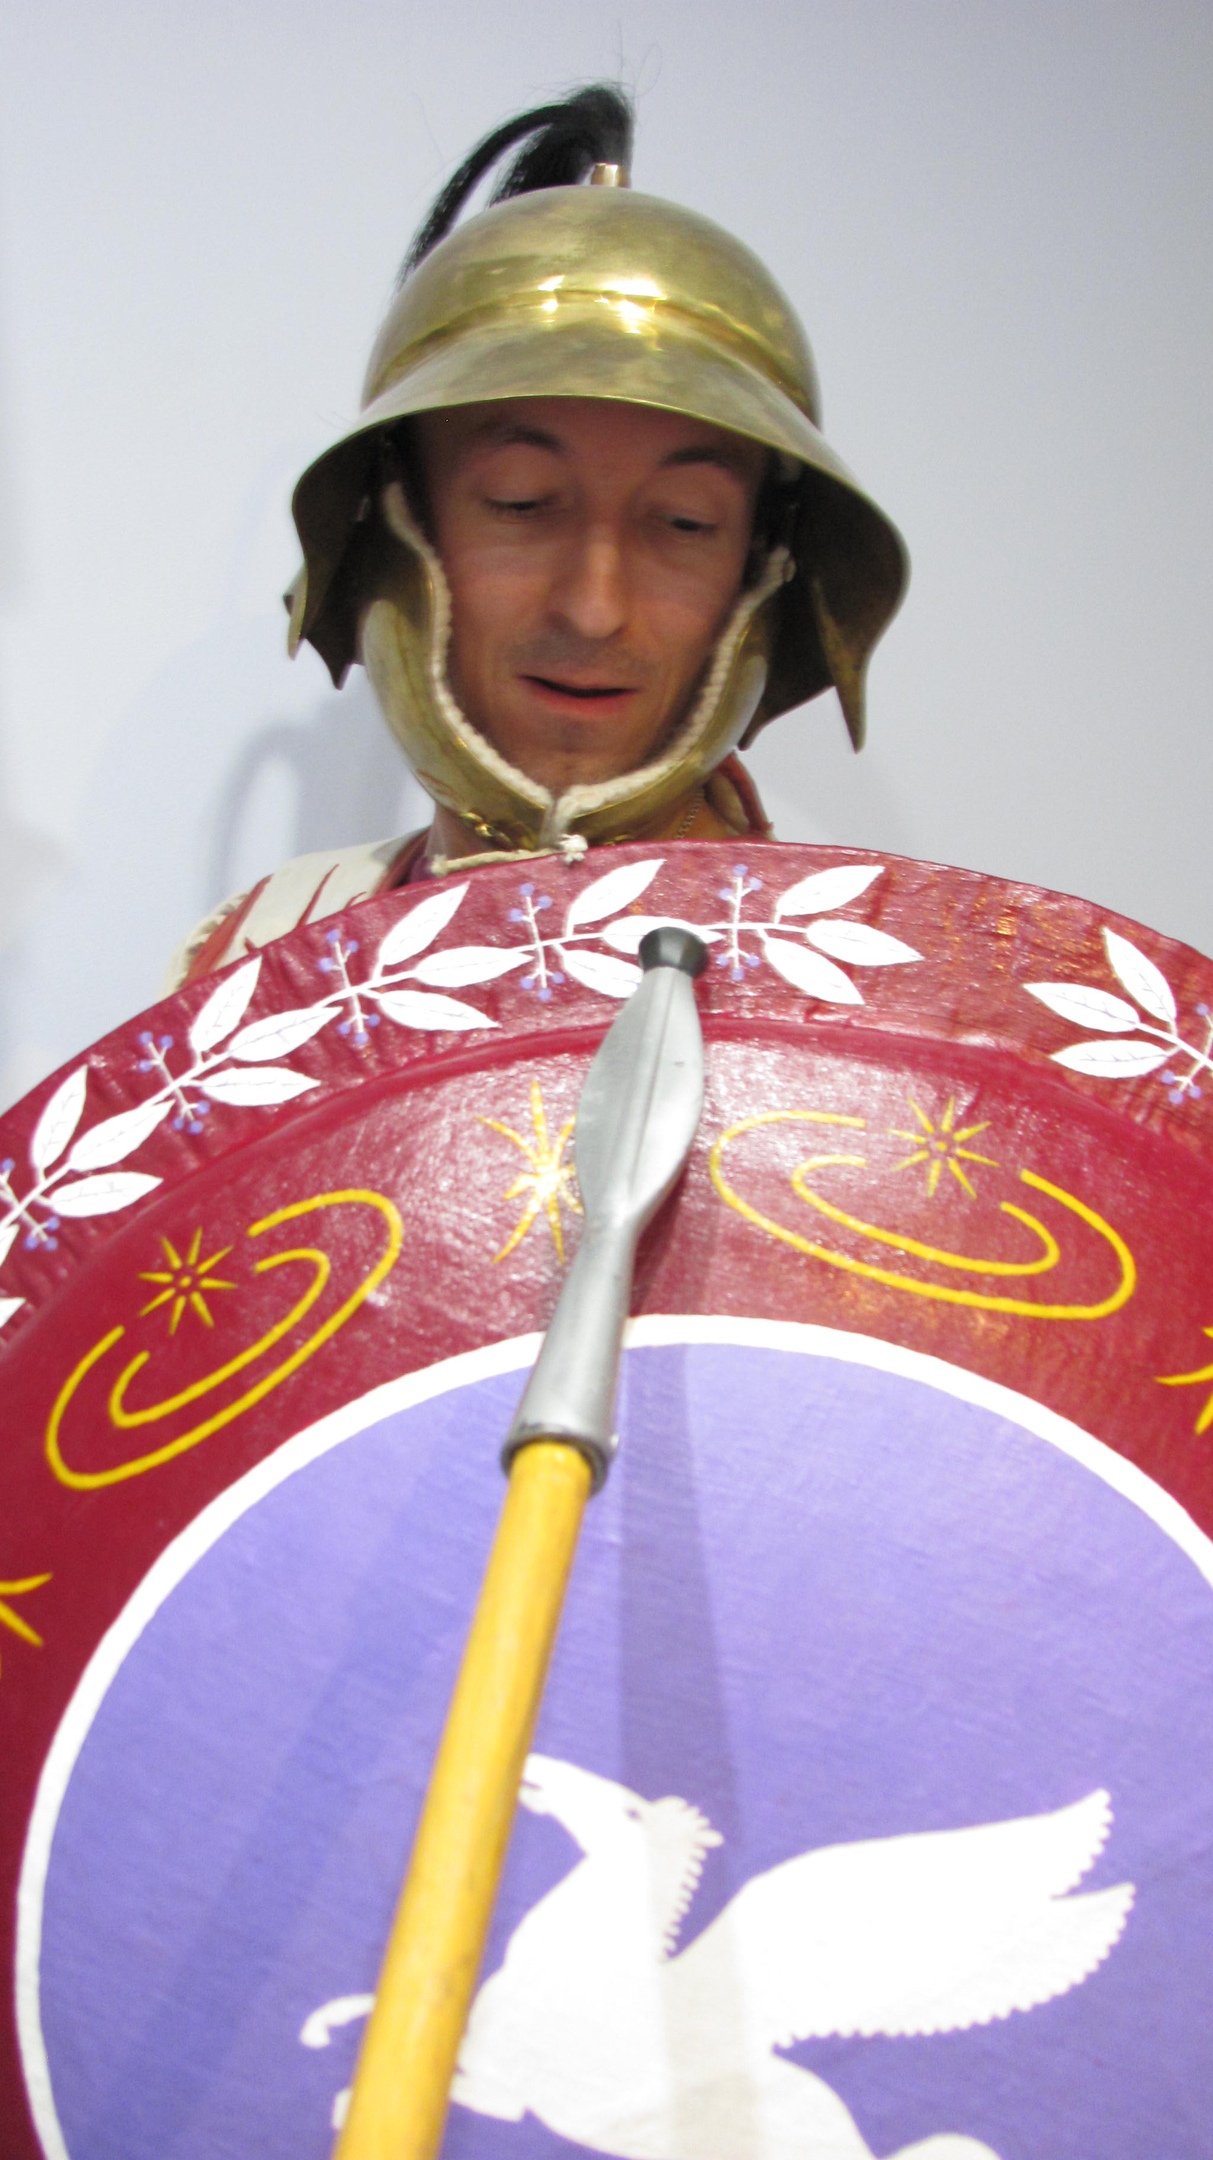
I want to share my experience of reconstruction,I hope this article will encourage someone else to make a hoplon,as well as be useful for those who have already moved. First of all,let's try to determine what hoplon (aka aspis) is. It would seem that everything is simple – this is a large round curved shield used by hoplites. However,if you look at it from a different angle,namely from the side,you can find a number of design differences in the preserved sources..
In most classic hoplons,the following elements can be distinguished: a curved base (we will call it a lens for convenience),a flat rim that is thinned to the outer edge and a ring-like section connecting them. Such a division of the hoplon into parts is conjectural,I can not say that in antiquity shields structurally consisted of such parts,although in my experience this is very natural and convenient.
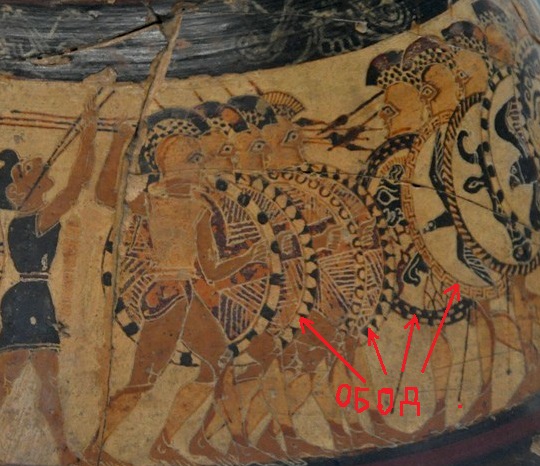
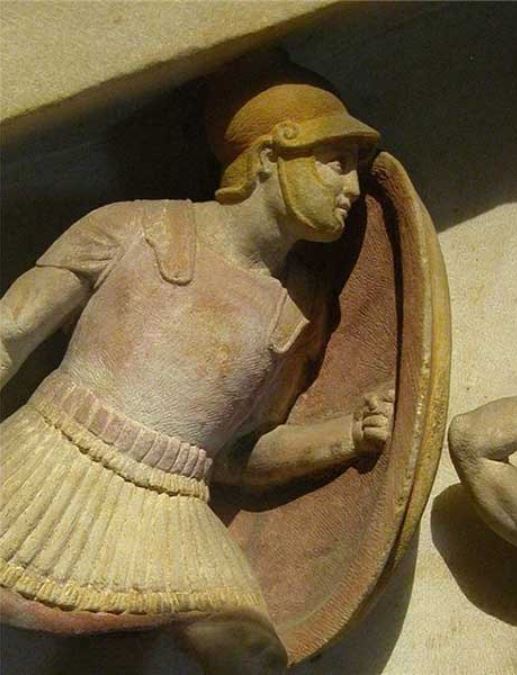
The rim,obviously,is needed to ensure that the piercing blow that comes at a tangent does not slide off the edge of the shield up – in the neck and head,down – in the legs,or to the right and left – in comrades in the ranks. When the formation is closed,the shields of the comrades will be on the right and left,but when the formation is open,a slid blow can also hit a comrade-in-arms.
 Hoplon rim
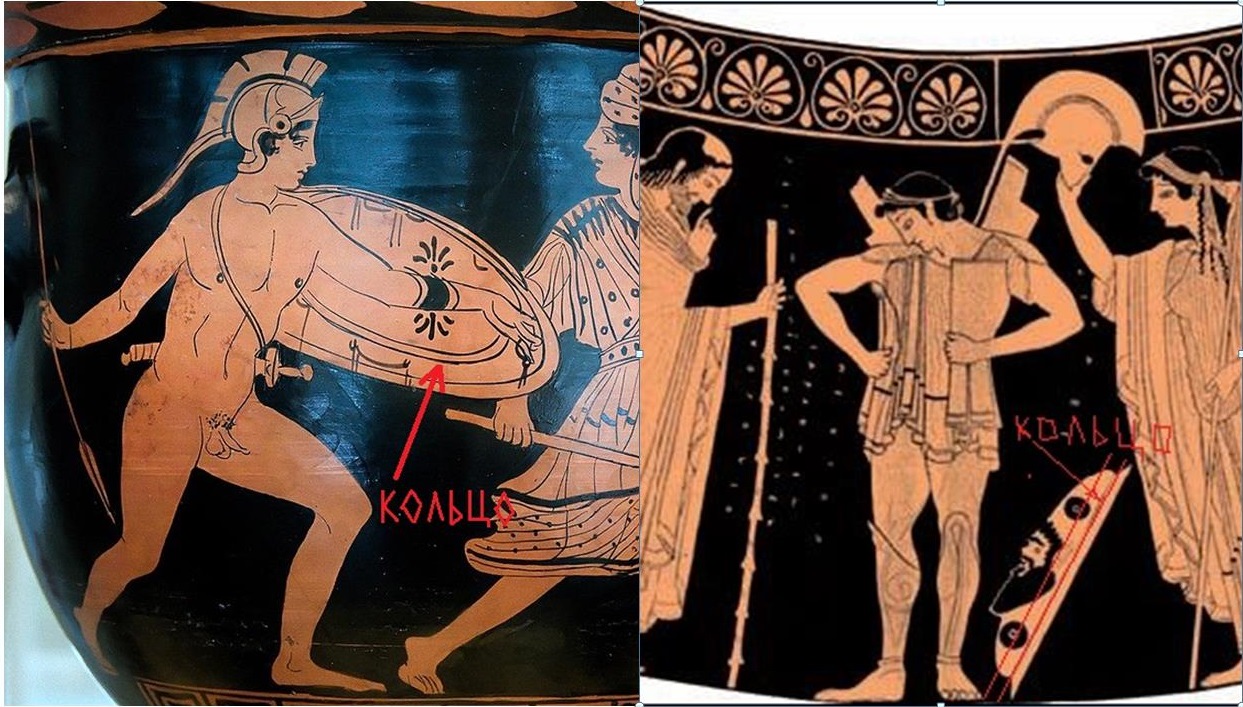
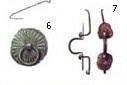
 Example of using a hoplon ring
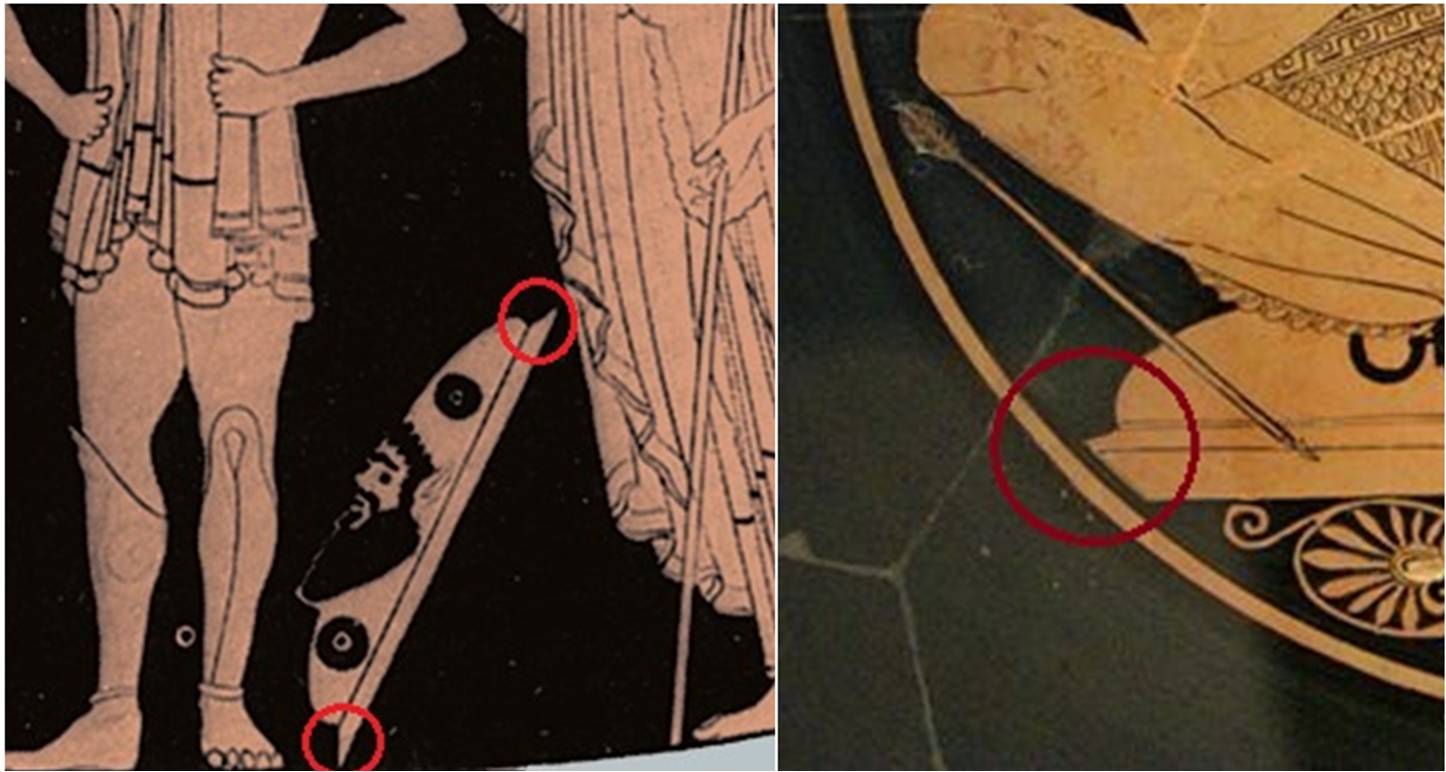
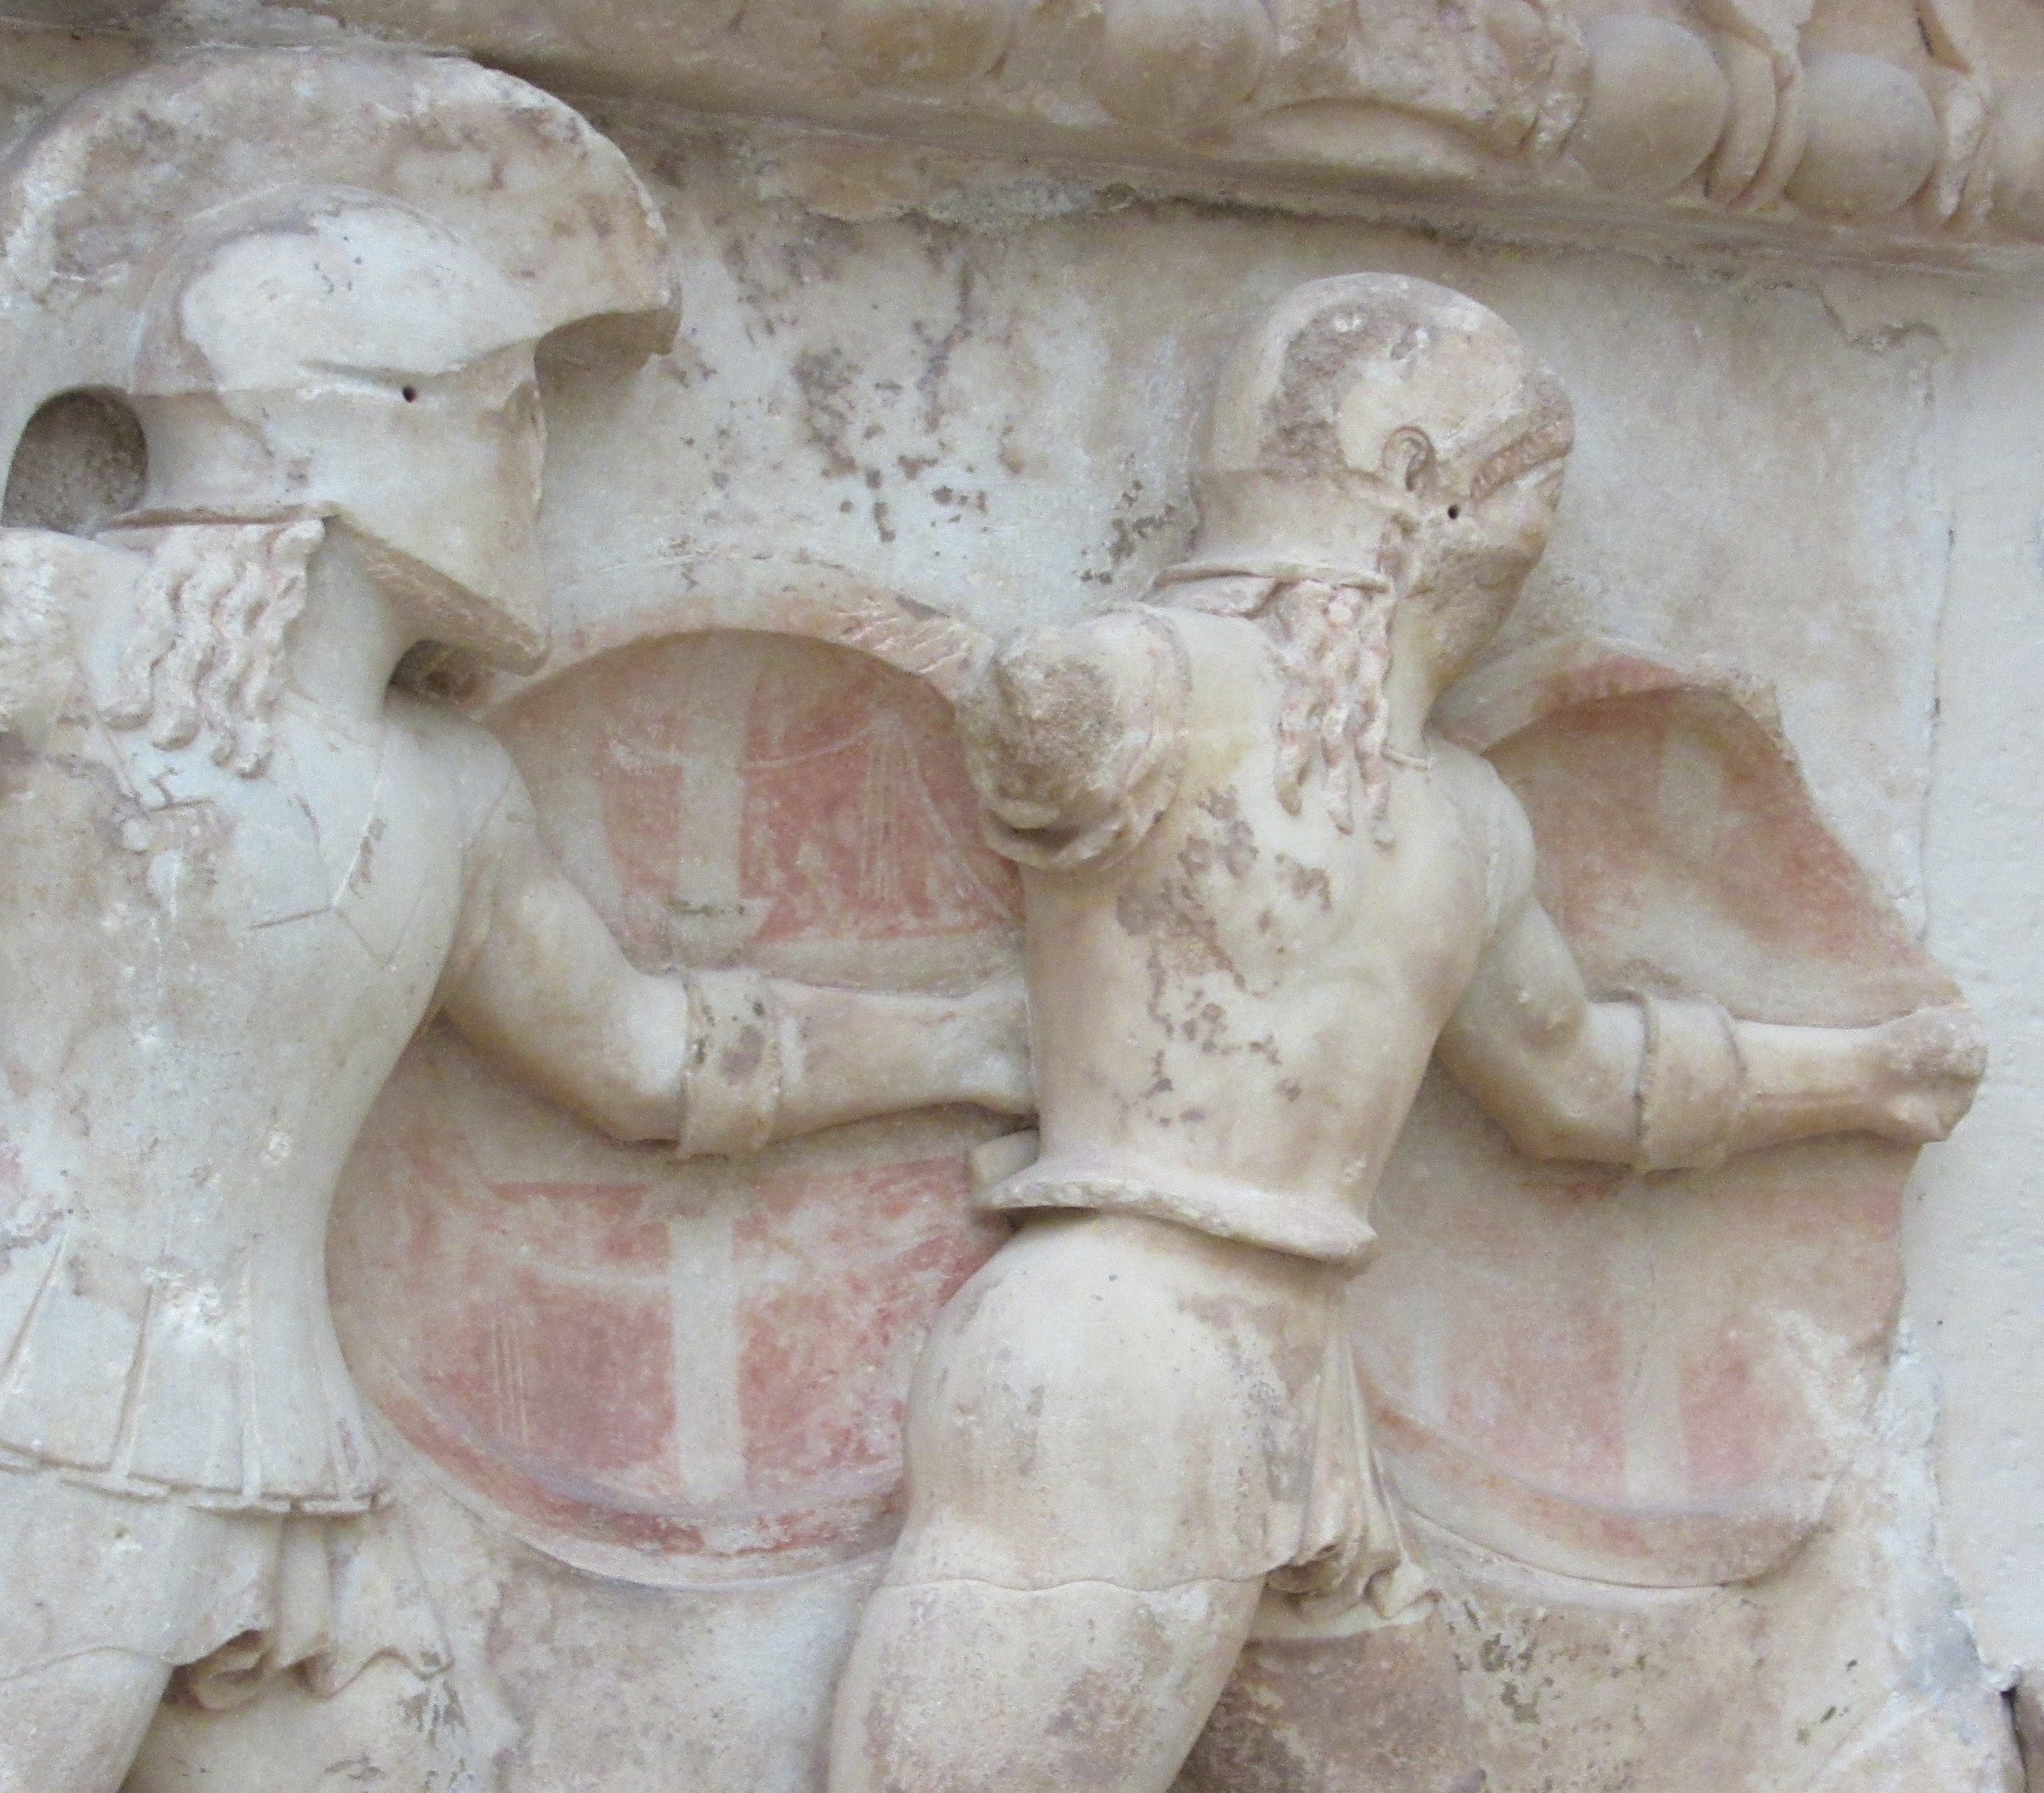
Ring,increases the depth of the shield and allows you to lean,as if "hang" the shield on your shoulder,when there is no need to actively manipulate it. Judging by pictorial sources,there were hoplons without a ring,in which the rim was connected directly to the lens. Sometimes the lack of a ring was compensated for by the depth of the lens itself. The difference is that the main part of the shield goes into the rim smoothly,at an obtuse angle,and not at a right angle,as when there is a ring. The lens itself could be either so deep or very slightly curved. There is an opinion that shields with a very deep deflection are an exaggeration of ancient artists,because so deep bronze plates have not been preserved. Unfortunately,I don't have enough measurements of authentic shields to be able to judge this with certainty,but I think that the depth of deflection and the height of the ring in any case fluctuated within certain limits. At the turn of the classics and Hellenism,apparently,there were shields without a ring or even a rim. Just a curved lens. The same shields are depicted on the monument of Aemilius Paulus in Delphi.
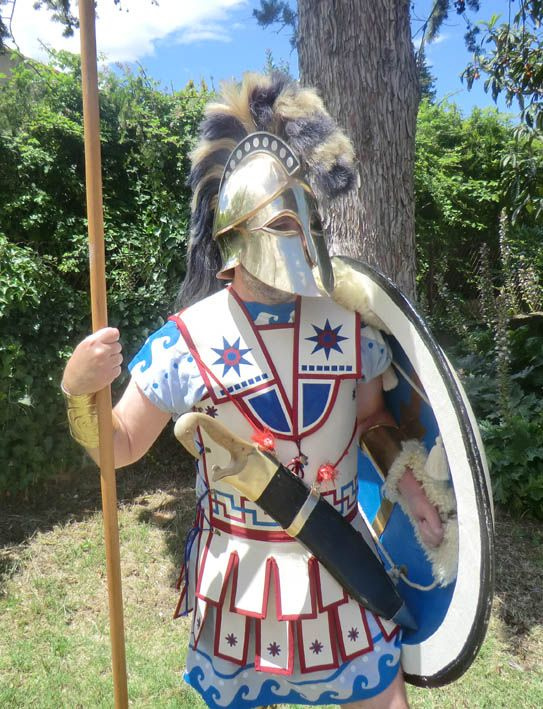
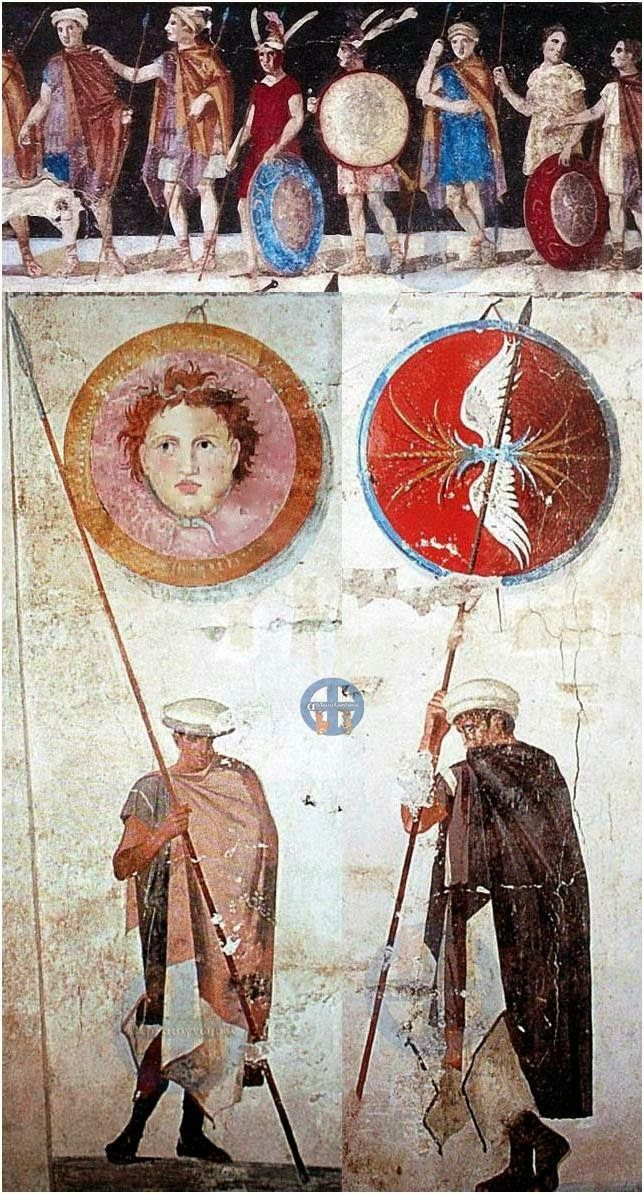
 Variants of hoplons in pictorial sources
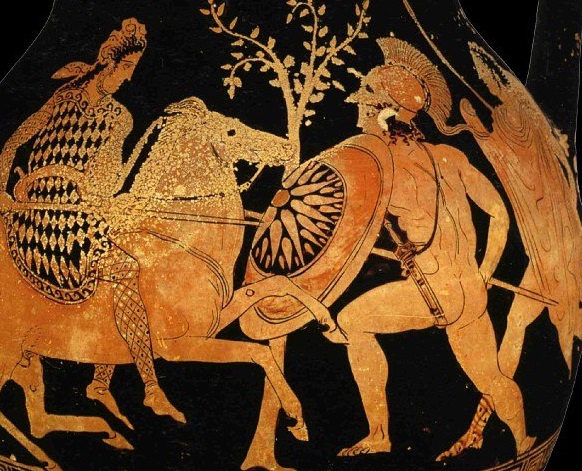
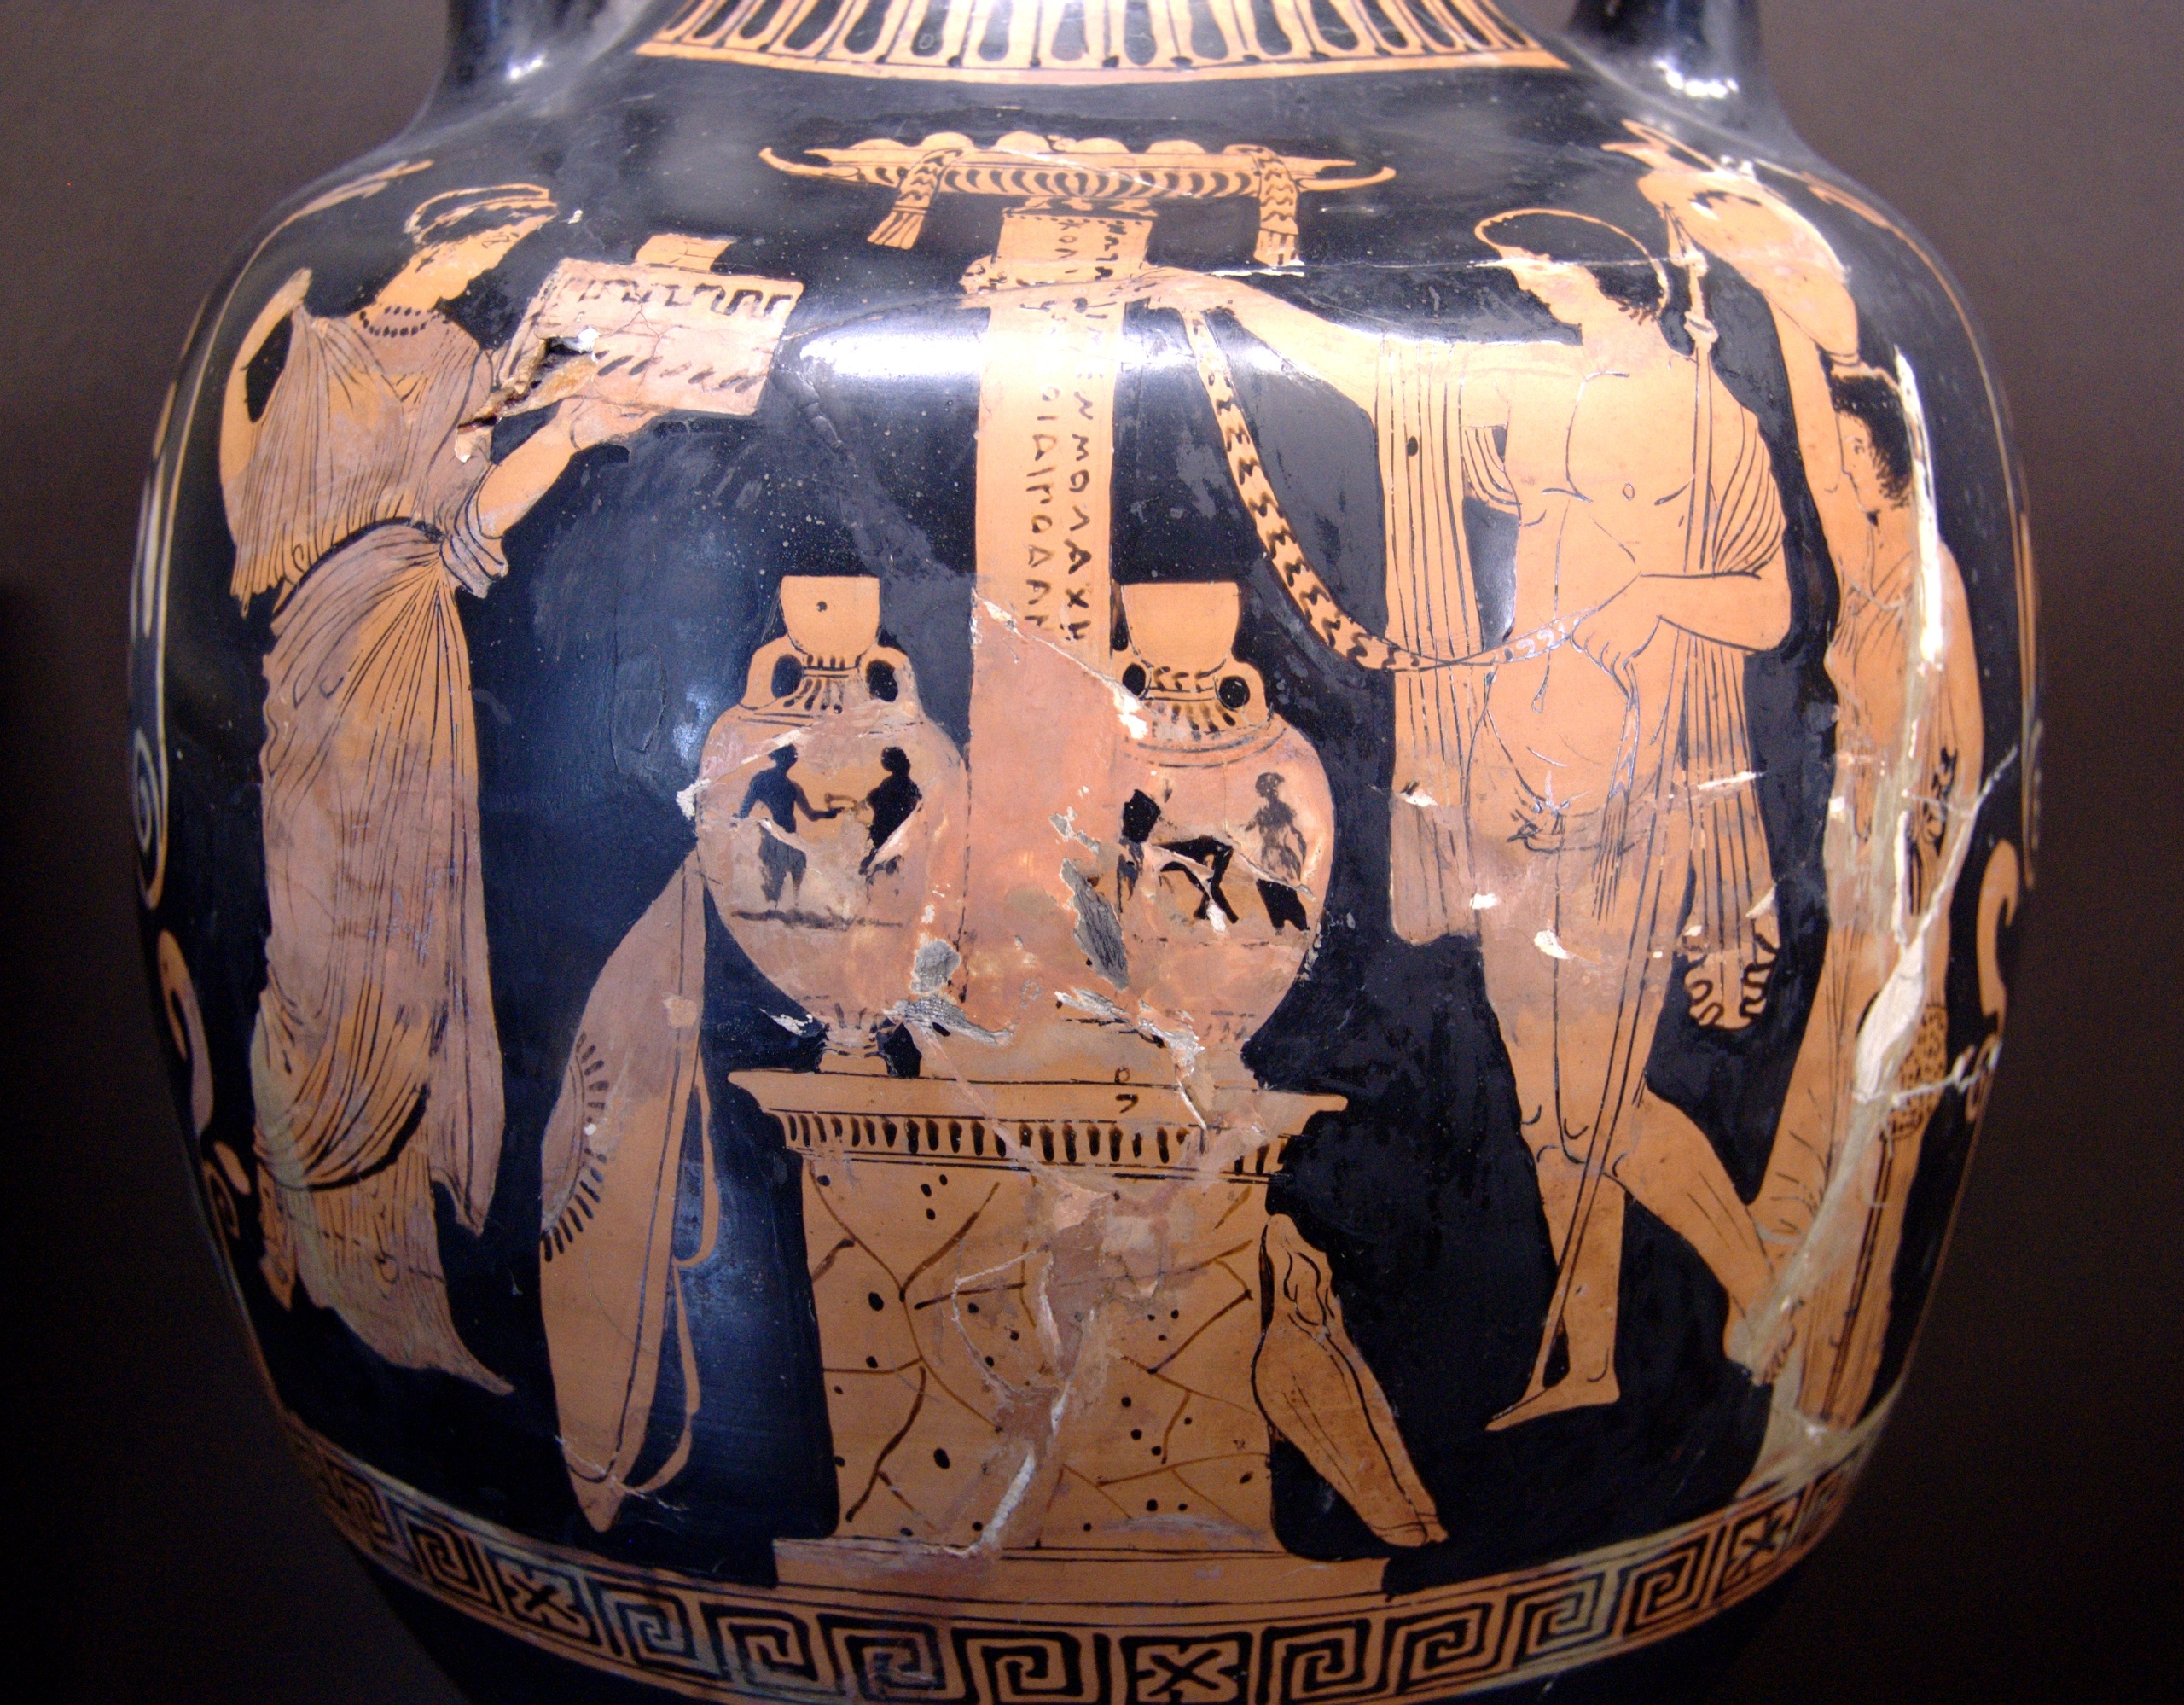

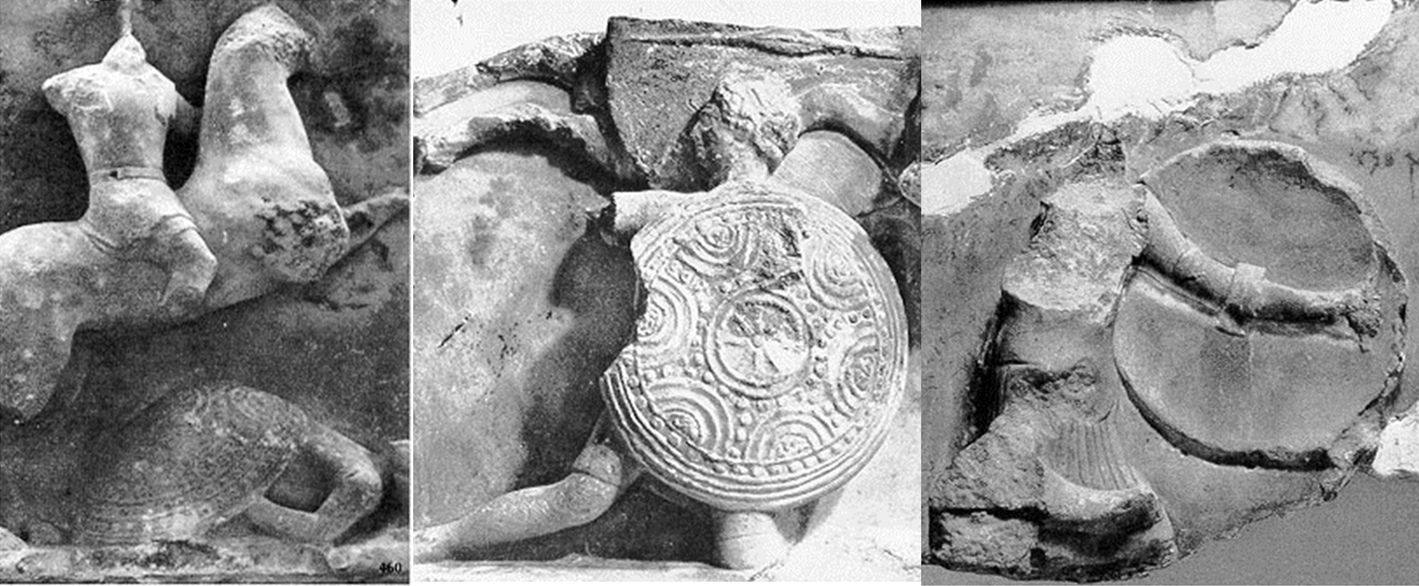
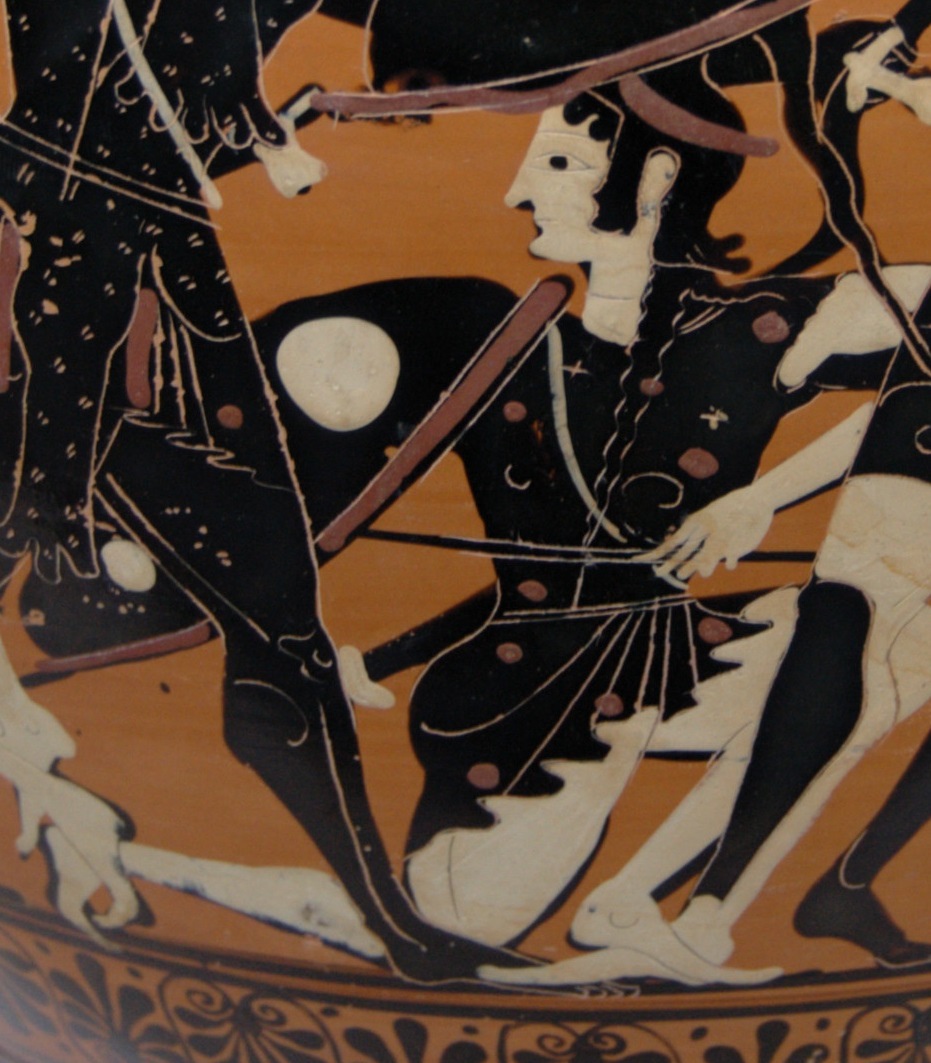
Their size does not allow us to call them pelts. In diameter,they exactly correspond to the hoplons (in proportion to the soldiers depicted,about 88-93 cm). They are held like ordinary hoplons,moreover,the position of porpax in the center will not allow you to stretch your left hand over the edge of the shield to hold sarisa. No special name for such shields from antiquity has come down to us. It can be assumed that they were used as lightweight and simplified versions of hoplons and,perhaps,were called the same,although the design differences are obvious. Archaeological finds of such shields are not known,but it can be assumed that they were simply not bound with bronze. If the ring and rim were abandoned for the purpose of relief,then,obviously,they could not be covered with bronze,even with classical hoplons,this was not always done completely. The abandonment of the ring,rim and bronze coating seriously facilitates the shield at the same size. The rim weighs down the shield less and is more important,so it was rarely abandoned. Even in the era of Alexander the Great,images of hoplons with a rim,including a fairly wide one,are well known. Lightweight and cheaper hoplons-slightly curved,without a ring,sometimes without a rim or shackle-could be convenient in conditions when light infantry and cavalry began to play a more important role than before. Perhaps they would have been suitable for the Macedonian Hypaspists,who,with solid Hoplite weapons,needed to move quickly to support the cavalry attack. In well-known drawings from books on ancient military affairs,three elements of the shield: the lens,ring and rim are depicted as one,and the entire wooden part of the shield is divided into longitudinal segments. The Vatican Museum displays a hoplon with a significant part of its wooden base still intact. The presented illustrations,it seems,should be based on its study,however,from the point of view of the experience of modern reconstruction,this method of production does not seem to be the most rational. It is quite difficult to carve all three elements of the base: the lens,the ring and the rim from solid bars. It's like carving a wooden plate,only very large and complex in shape. It is not easy and reliable to connect these bars together,because the main part of the shield – lens must be thin enough,and the area that the longitudinal elements of the base touch is small. This is not so important for a flat firea shield,because it is much lighter and simpler in shape.
 Illustration of the hoplon assembly
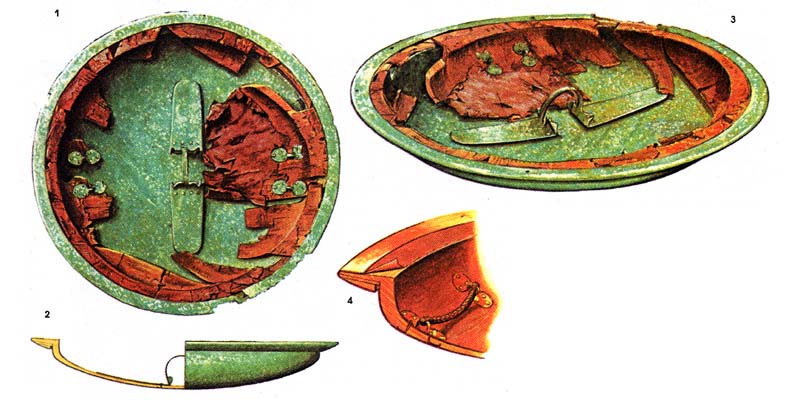
I do not know modern reconstructions of hoplons made according to this scheme,there is something close,but still far from the way they are drawn on graphic reconstructions. With this design,you can achieve the maximum depth of deflection of the shield,but the weight will also be very significant. In addition,it is expensive,and it will not be easy to find a master.
 Variant of modern reconstruction of Hoplon
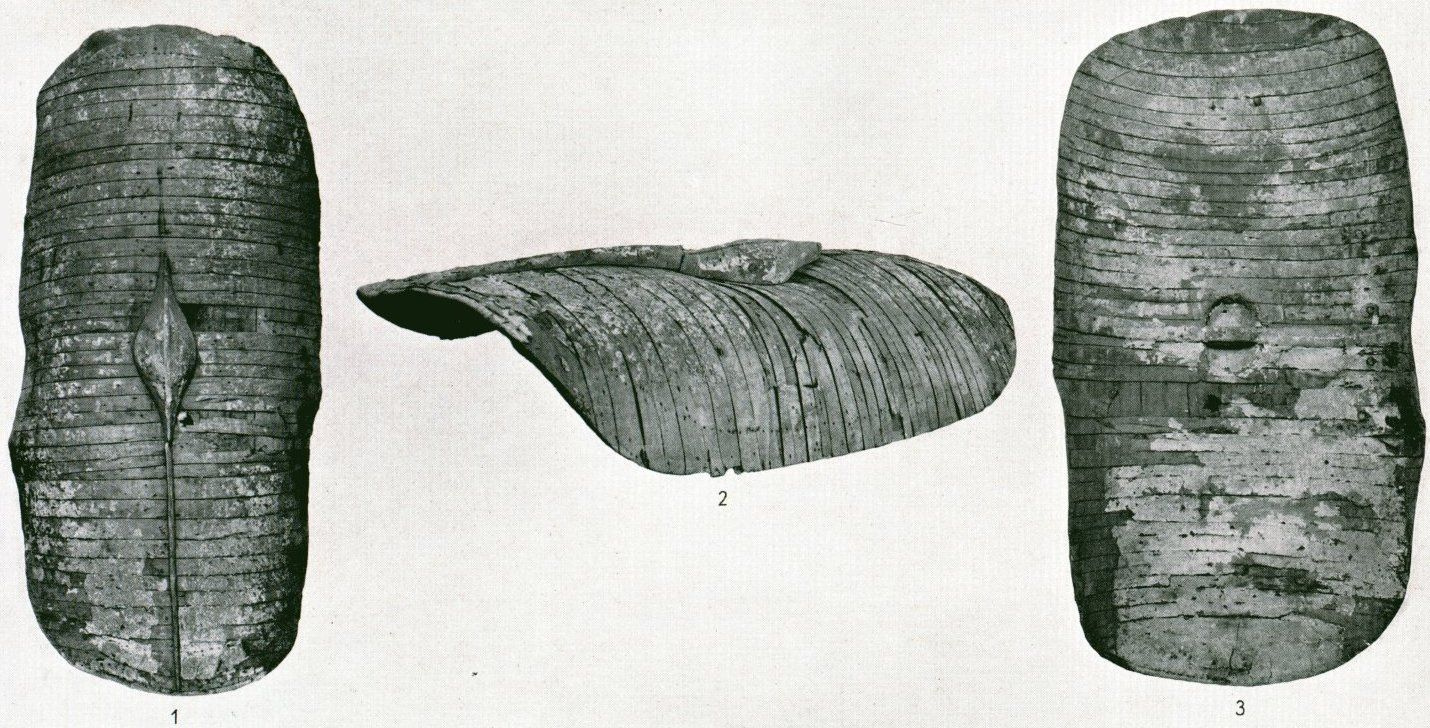
It is rather difficult to draw an unambiguous conclusion about the design of the hoplon base based on one preserved sample. I don't know if it was a battle shield or if it was specially made to be placed in a temple or tomb. How it was investigated,and how much of its safety in general allows us to draw an unambiguous conclusion about the design. We will not even consider the method of manufacturing the hoplon base from plywood rings,which is widespread especially in the West. Once it was the only way,because they didn't know how to do it any other way,but today it's probably the worst way. The point is not even in the harsh non-historical nature of the method,but in the fact that the weight of the product turns out to be unreasonably large - 8 kg or more.
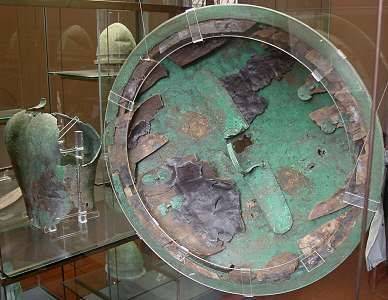 Preserved sample of hoplon
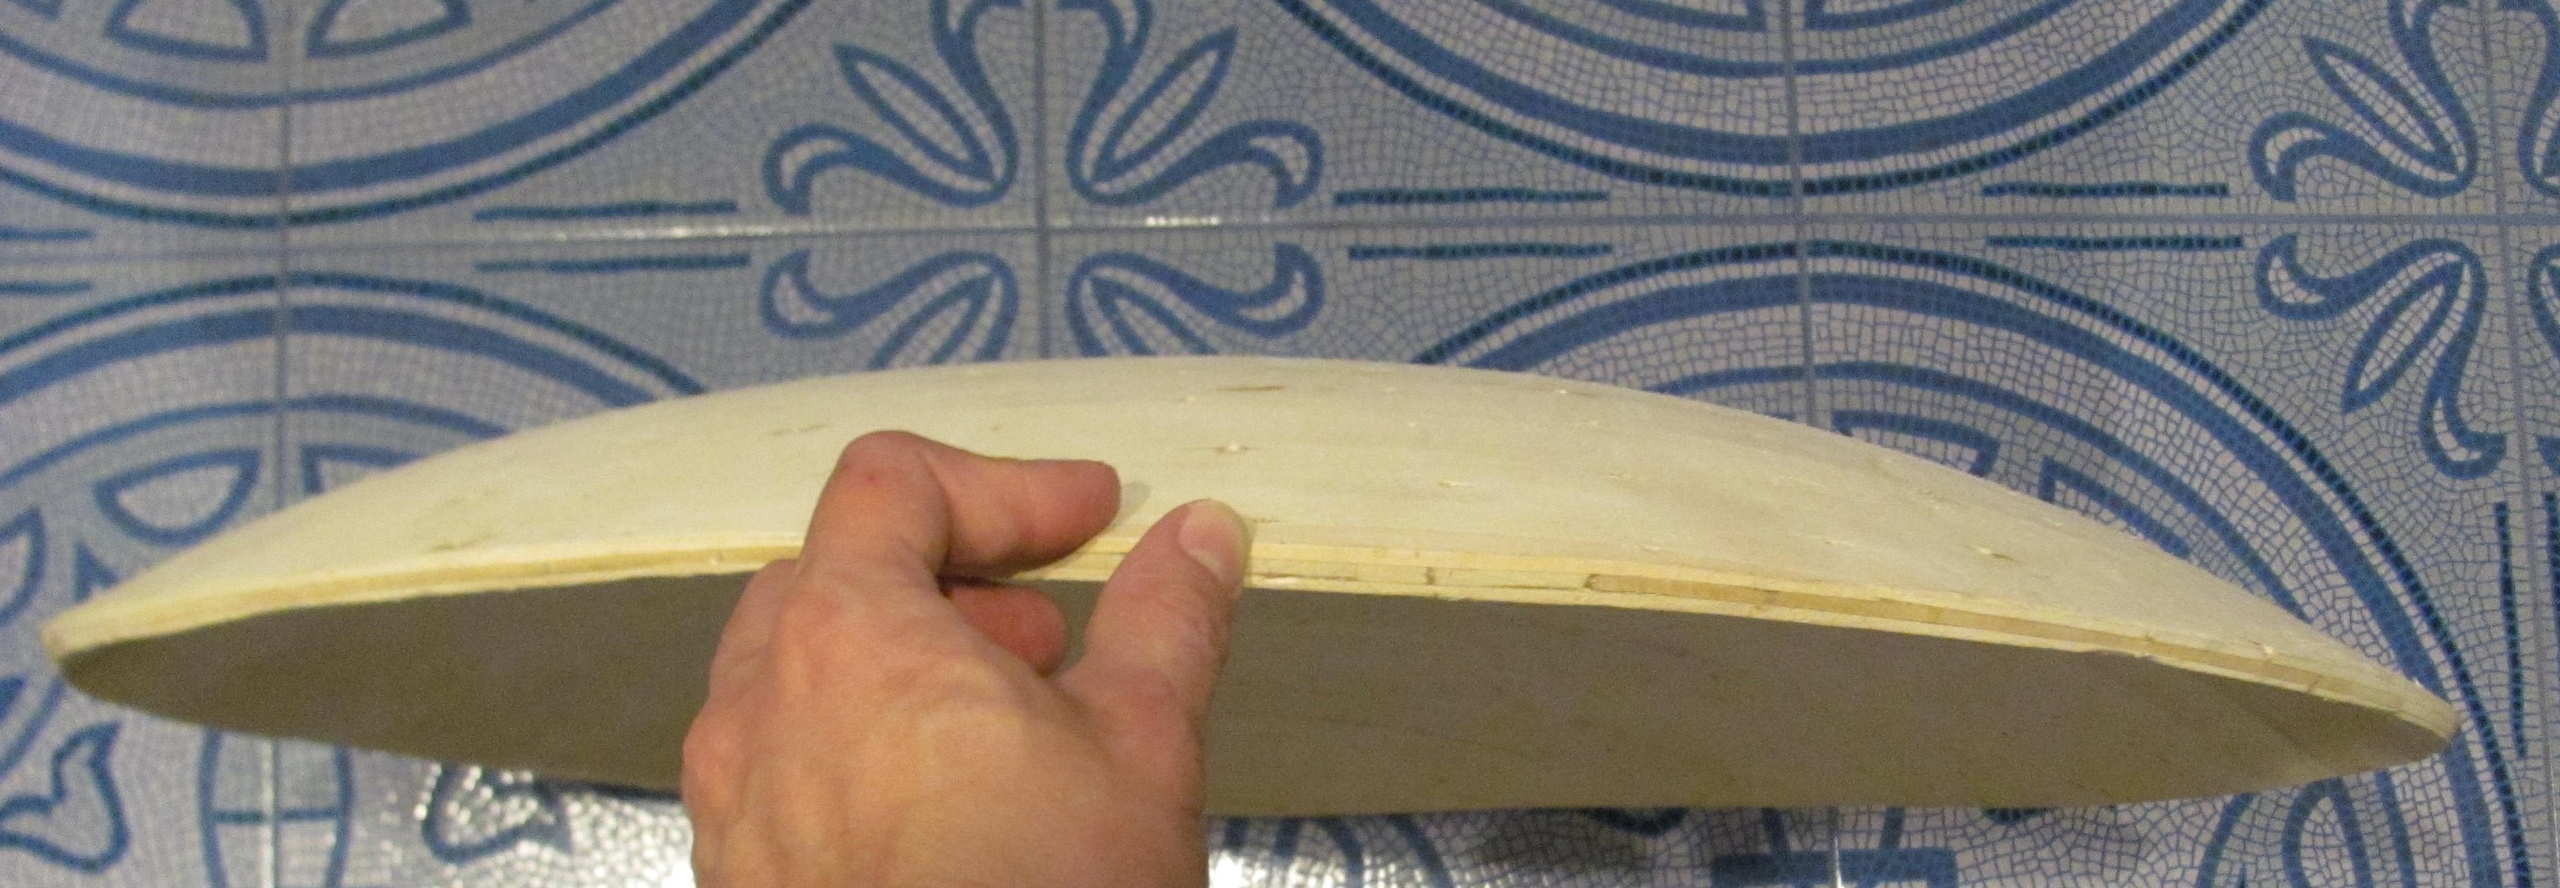
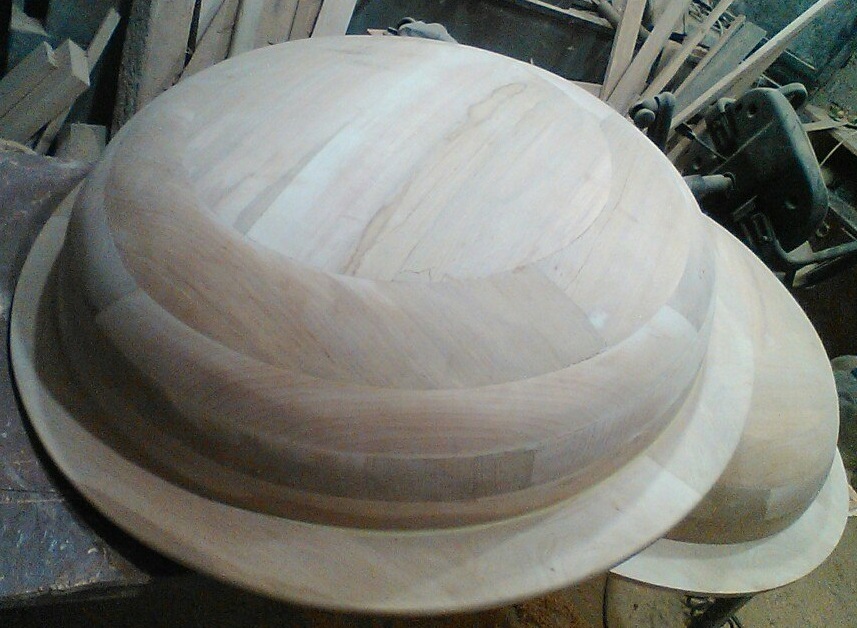
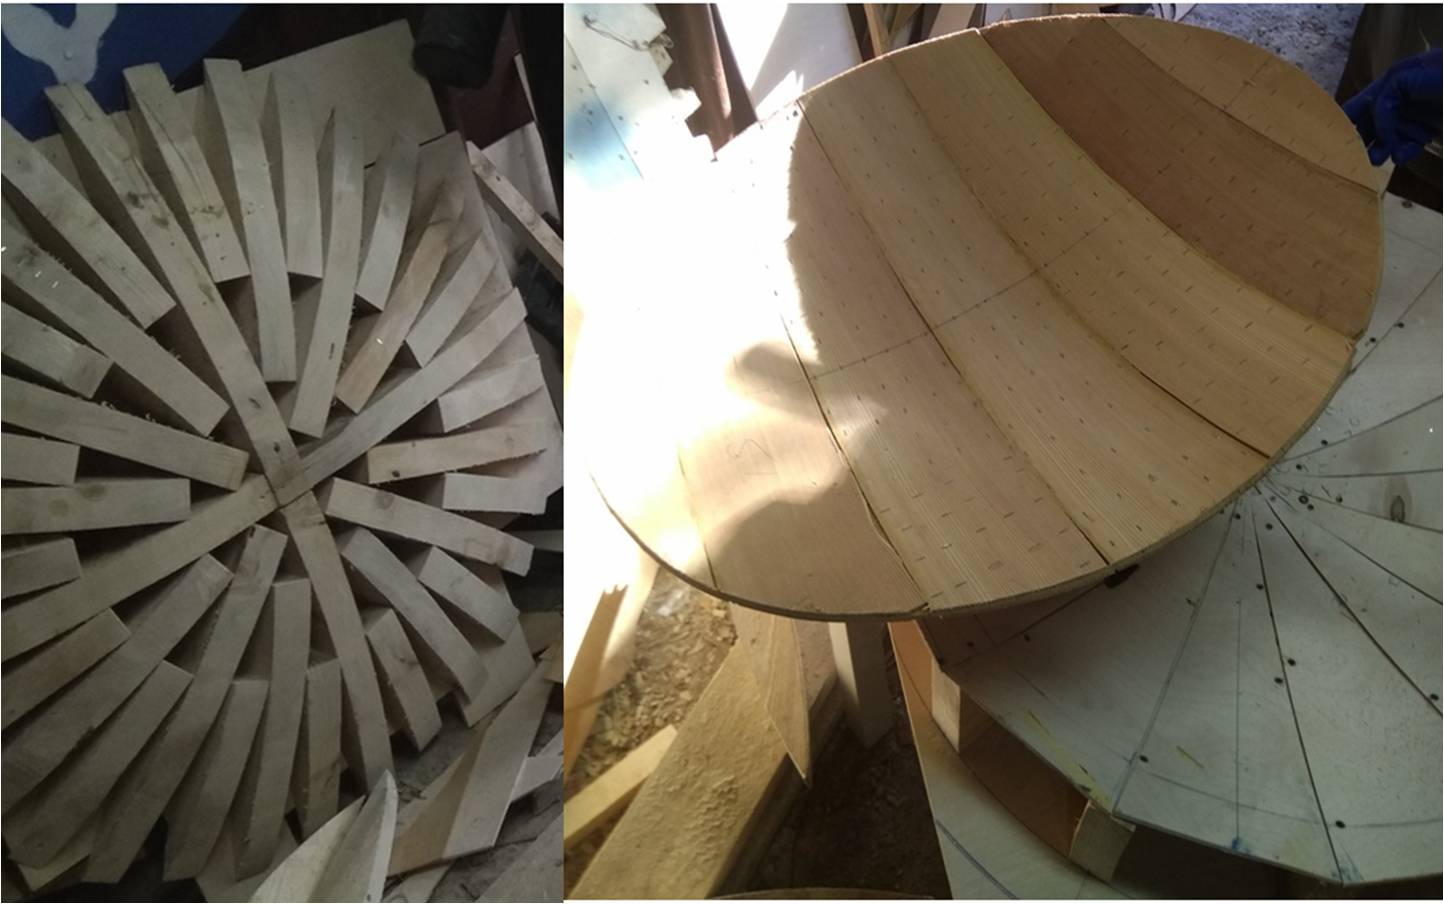
Reconstruction practice has shown that for the manufacture of curved shields,it is best to make them from layers of glued plates laid perpendicular. So,for example,Roman scutums are made,based on a find from the Fayum oasis. In this way,you can also make a lens for a hoplon. To do this,you need a special form of two parts,a wooden veneer with a thickness of 0.3-0.4 cm and a certain skill,so it is convenient to order such a blank from the master. Sergey Sidorov (https://vk.com/v1t4m1n) or Anton Efremov (https://vk.com/id67579777) will perfectly cope with the task. I did just that. For hoplon,you need a lens that is as curved as possible (preferably 8-10 cm) and 1-1. 5 cm thick. My lens was 8 cm deep and about 1.2-1.5 cm thick. It is good when the lens is made of narrow strips of veneer. Then the stripes fit better together,the joints are more dense,and the roundness of the lens is more even. The diameter of the lens should depend on the length of the shoulder. The forearm passes through the porpax exactly in the center of the shield. The arm is bent at the elbow at a right angle,the edge of the lens protrudes 1-1. 5 cm above the upper edge of the shoulder (this is an allowance for the width of the part of the ring that will be covered by the lens,see fig. next) and the upper edge of the shoulder reaches the edge of the lens. Then it will be possible to support the shield with the inner side of the ring on the shoulder from above. It is not necessary to do this,the lens may be slightly larger,as long as it is not smaller. The lens I bought was 68 cm in diameter,but I needed a few centimeters more,and this difference was noticeable. If you keep your arm bent at a right angle,the shoulder will not fit into the shield,only if you bend the arm more.
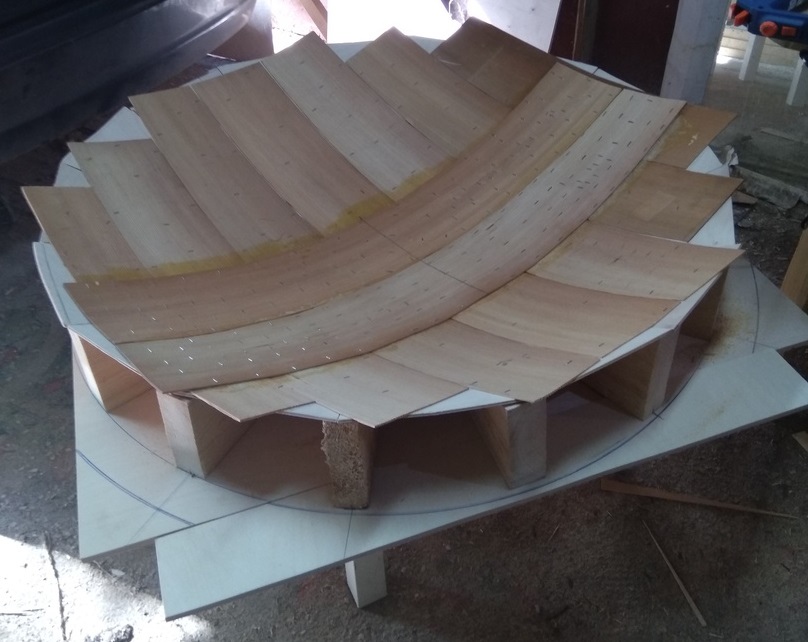 Reconstruction of hoplon from glued plates
 Two-piece hoplon mold
 Skutum from the Fayum Oasis
 Maximum curved lens
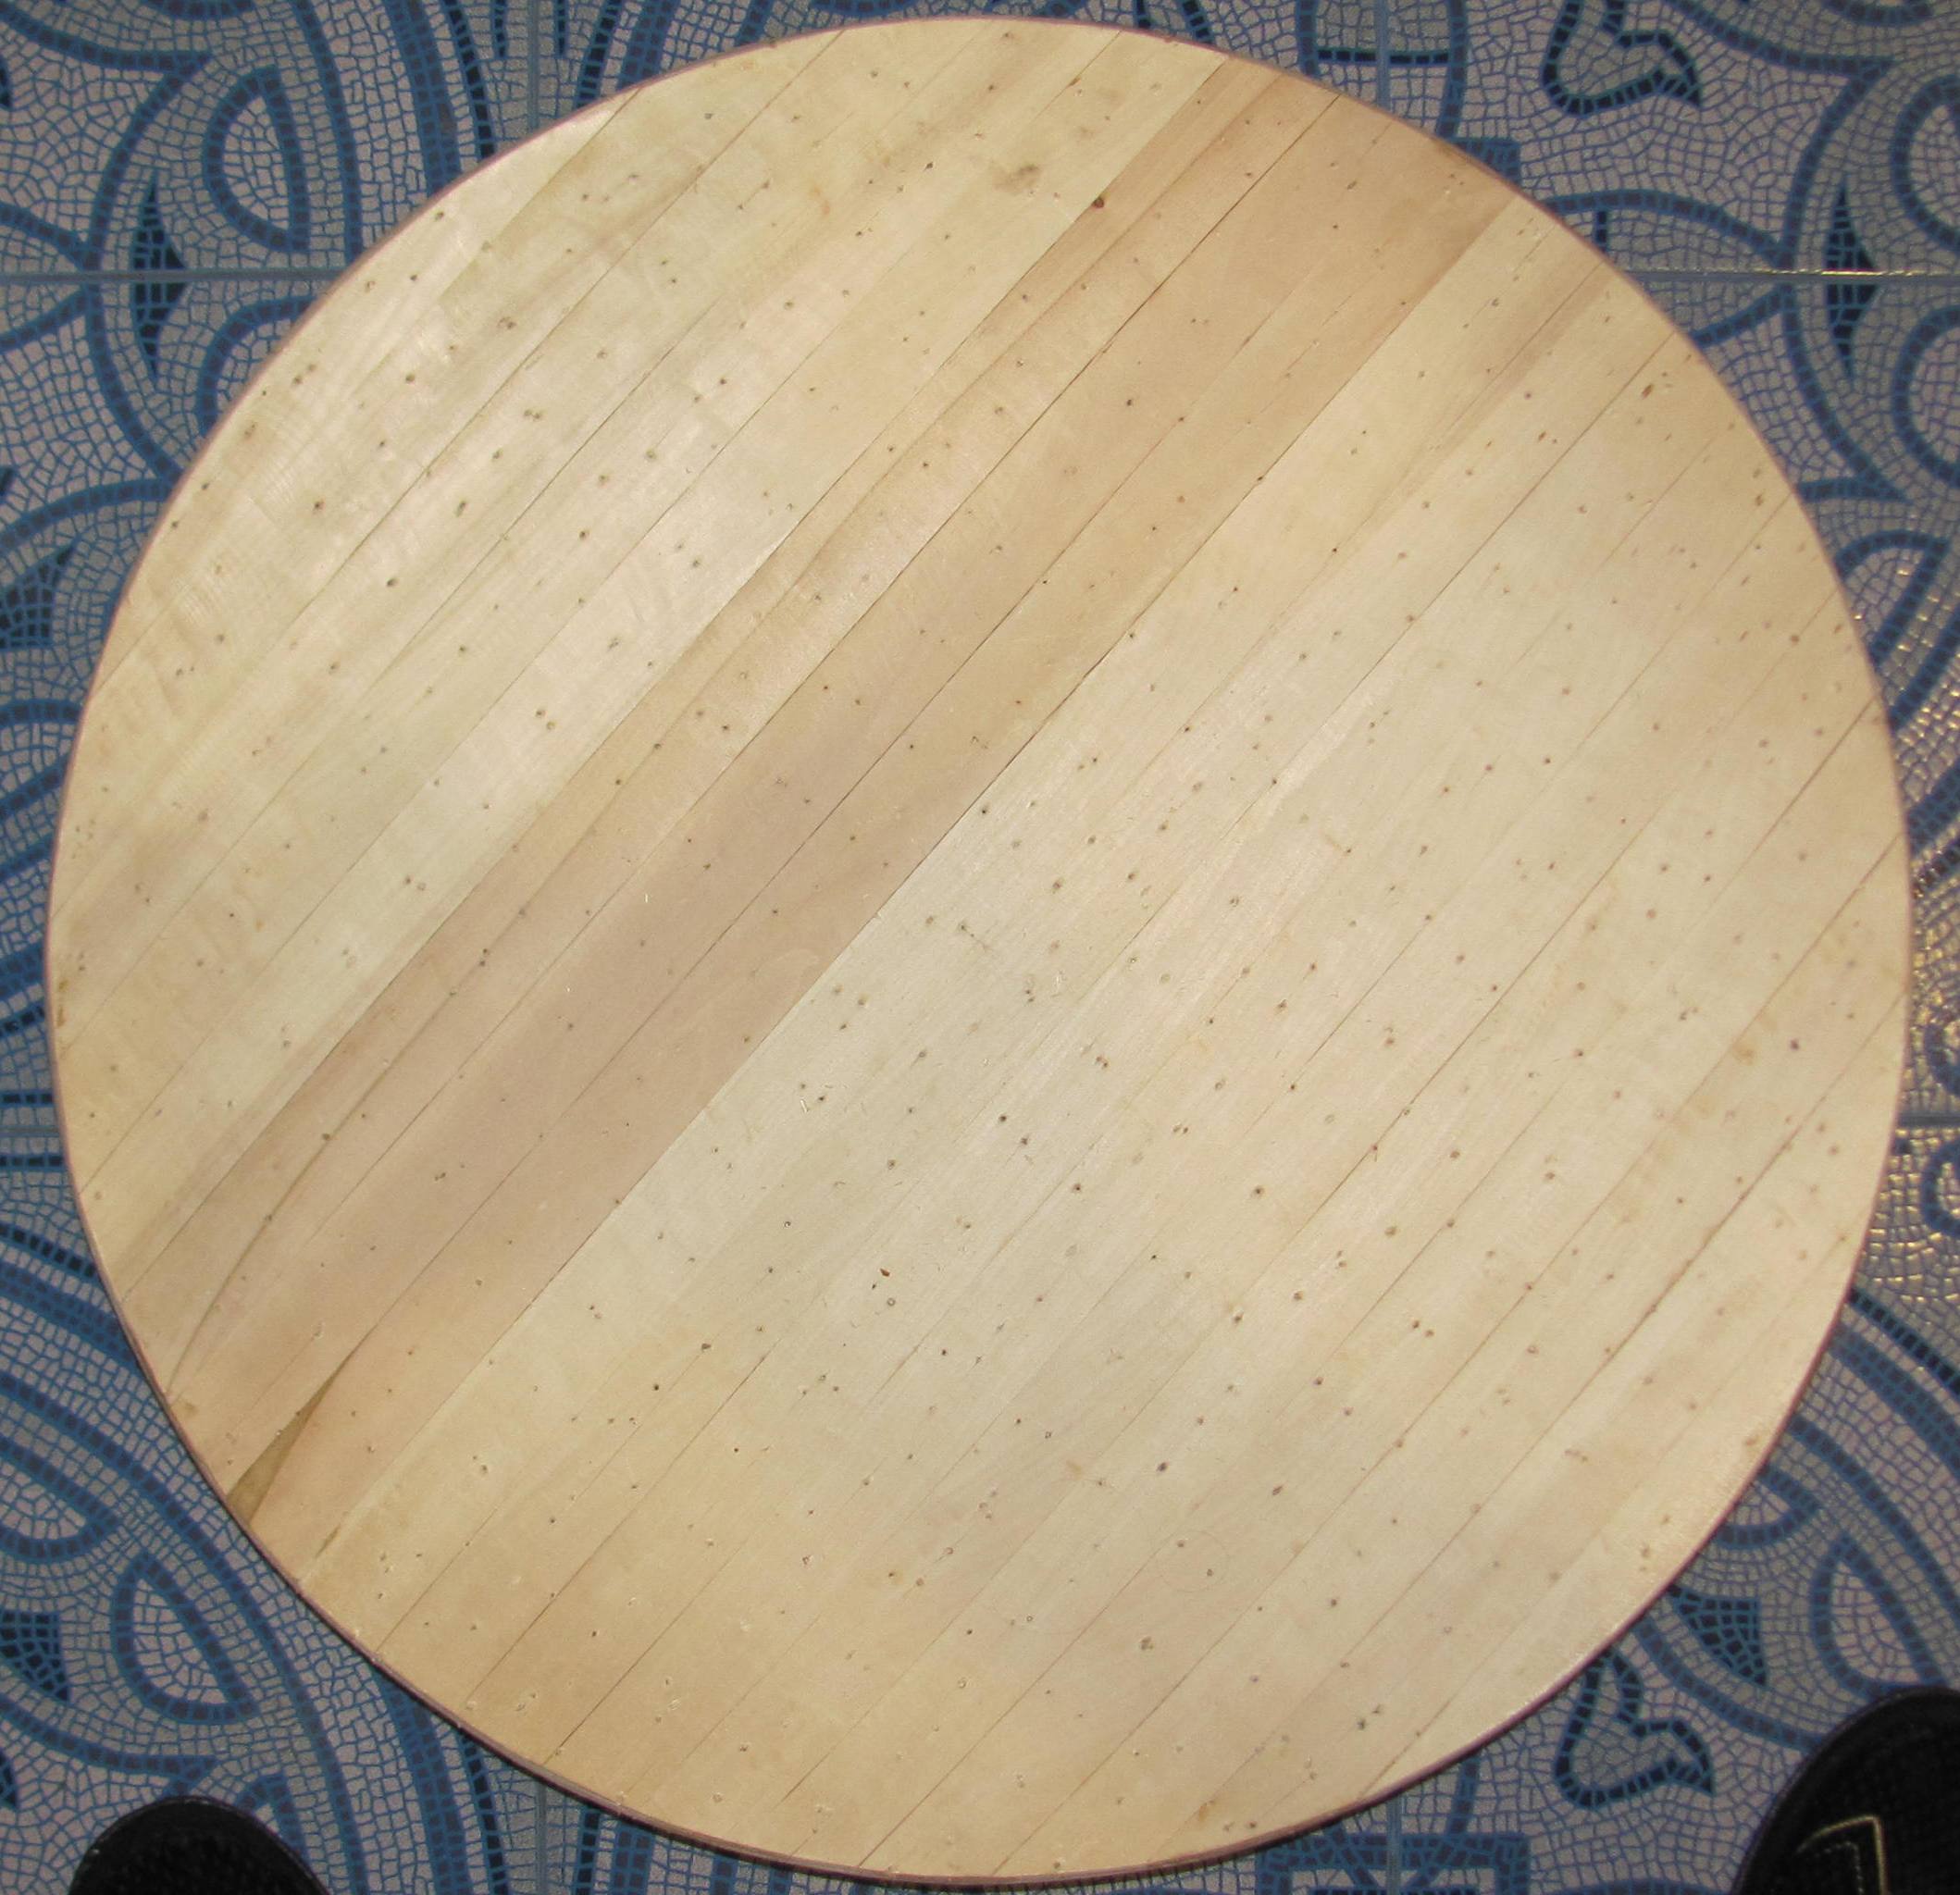 Narrow strips of lens veneer
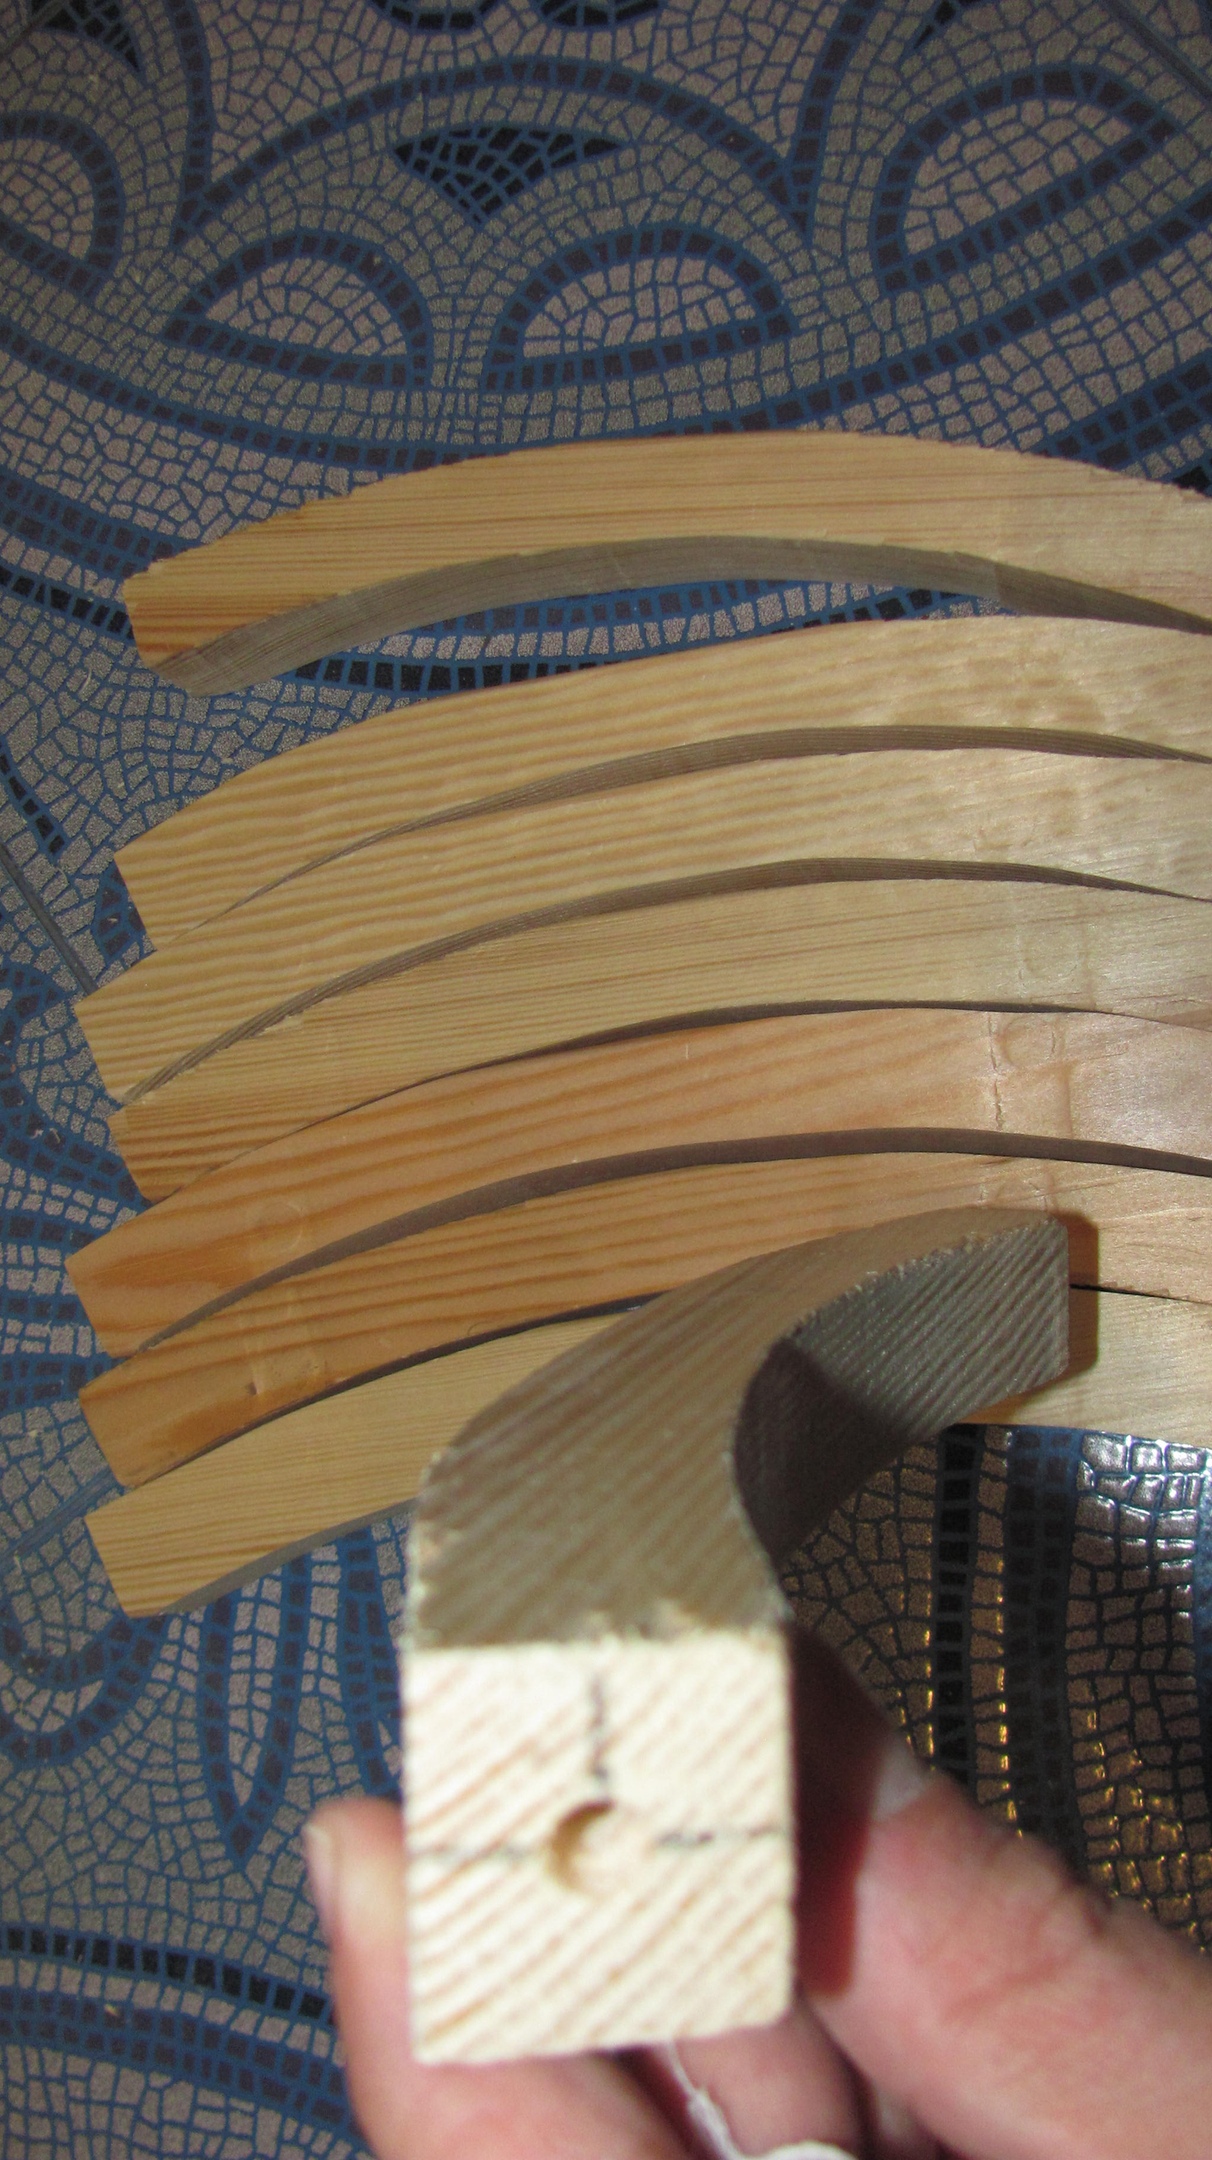
The ring is necessary to increase the depth of the shield. As you know,a curved shield fits and protects the fighter better. In addition,thanks to the ring,the hoplon can be supported on the shoulder. This is why it is so important to calculate the lens diameter. The ring itself should have an outer diameter of 1-1. 5 cm larger than the lens,and a thickness of 2-2. 5 cm. I made a ring 2.5 cm thick,because I was afraid that otherwise I would not be able to connect it tightly to the lens,but I realized that 2 cm would be quite enough. I made the ring height 2.8 cm (I was able to find a suitable bar of this thickness). If you make it higher,the overall deflection of the shield will be greater,but the weight will also increase. You should not make it too big,otherwise it will not look like the shape of the original antique shields. With a ring of 2.8 cm,the deflection is already quite good,because the rim and lens deflection will be added to the ring. You can make 4-5 cm,more,in my opinion,is not worth it.
The ring itself is made of separate segments that do not bend,but are cut out of a single bar with an electric jigsaw. I made it out of 8 segments,which is convenient. The segments were glued together on nagels with a special wood glue. I will not give the brand of glue,it turned out to be good in strength,but too thick and quick-drying. It did not spread evenly and did not harden to a stone state,so that it could be leveled with a file. Buy some good wood glue. One tube under the gun was enough for me,but right next to it,so it's better to try not to spend too much. It is almost impossible to calculate and cut the arcs of the ring absolutely evenly,so that they form a perfect circle. You need to take a slow-drying glue,collect the entire ring on a flat surface,check its roundness with a lens and ruler. While the glue has not hardened,the ring can be bent by hand,achieving the desired roundness. To make it easier to bend,the holes for the pins can be made 0.5-1 mm larger than the diameter of the pins. Despite all my efforts to make a perfectly smooth circle,I did not succeed. The width was 1.5-2 cm more than the height,but this did not have a critical impact on the design and after fitting it turned out to be almost invisible.
 Not quite a "perfect" circle))
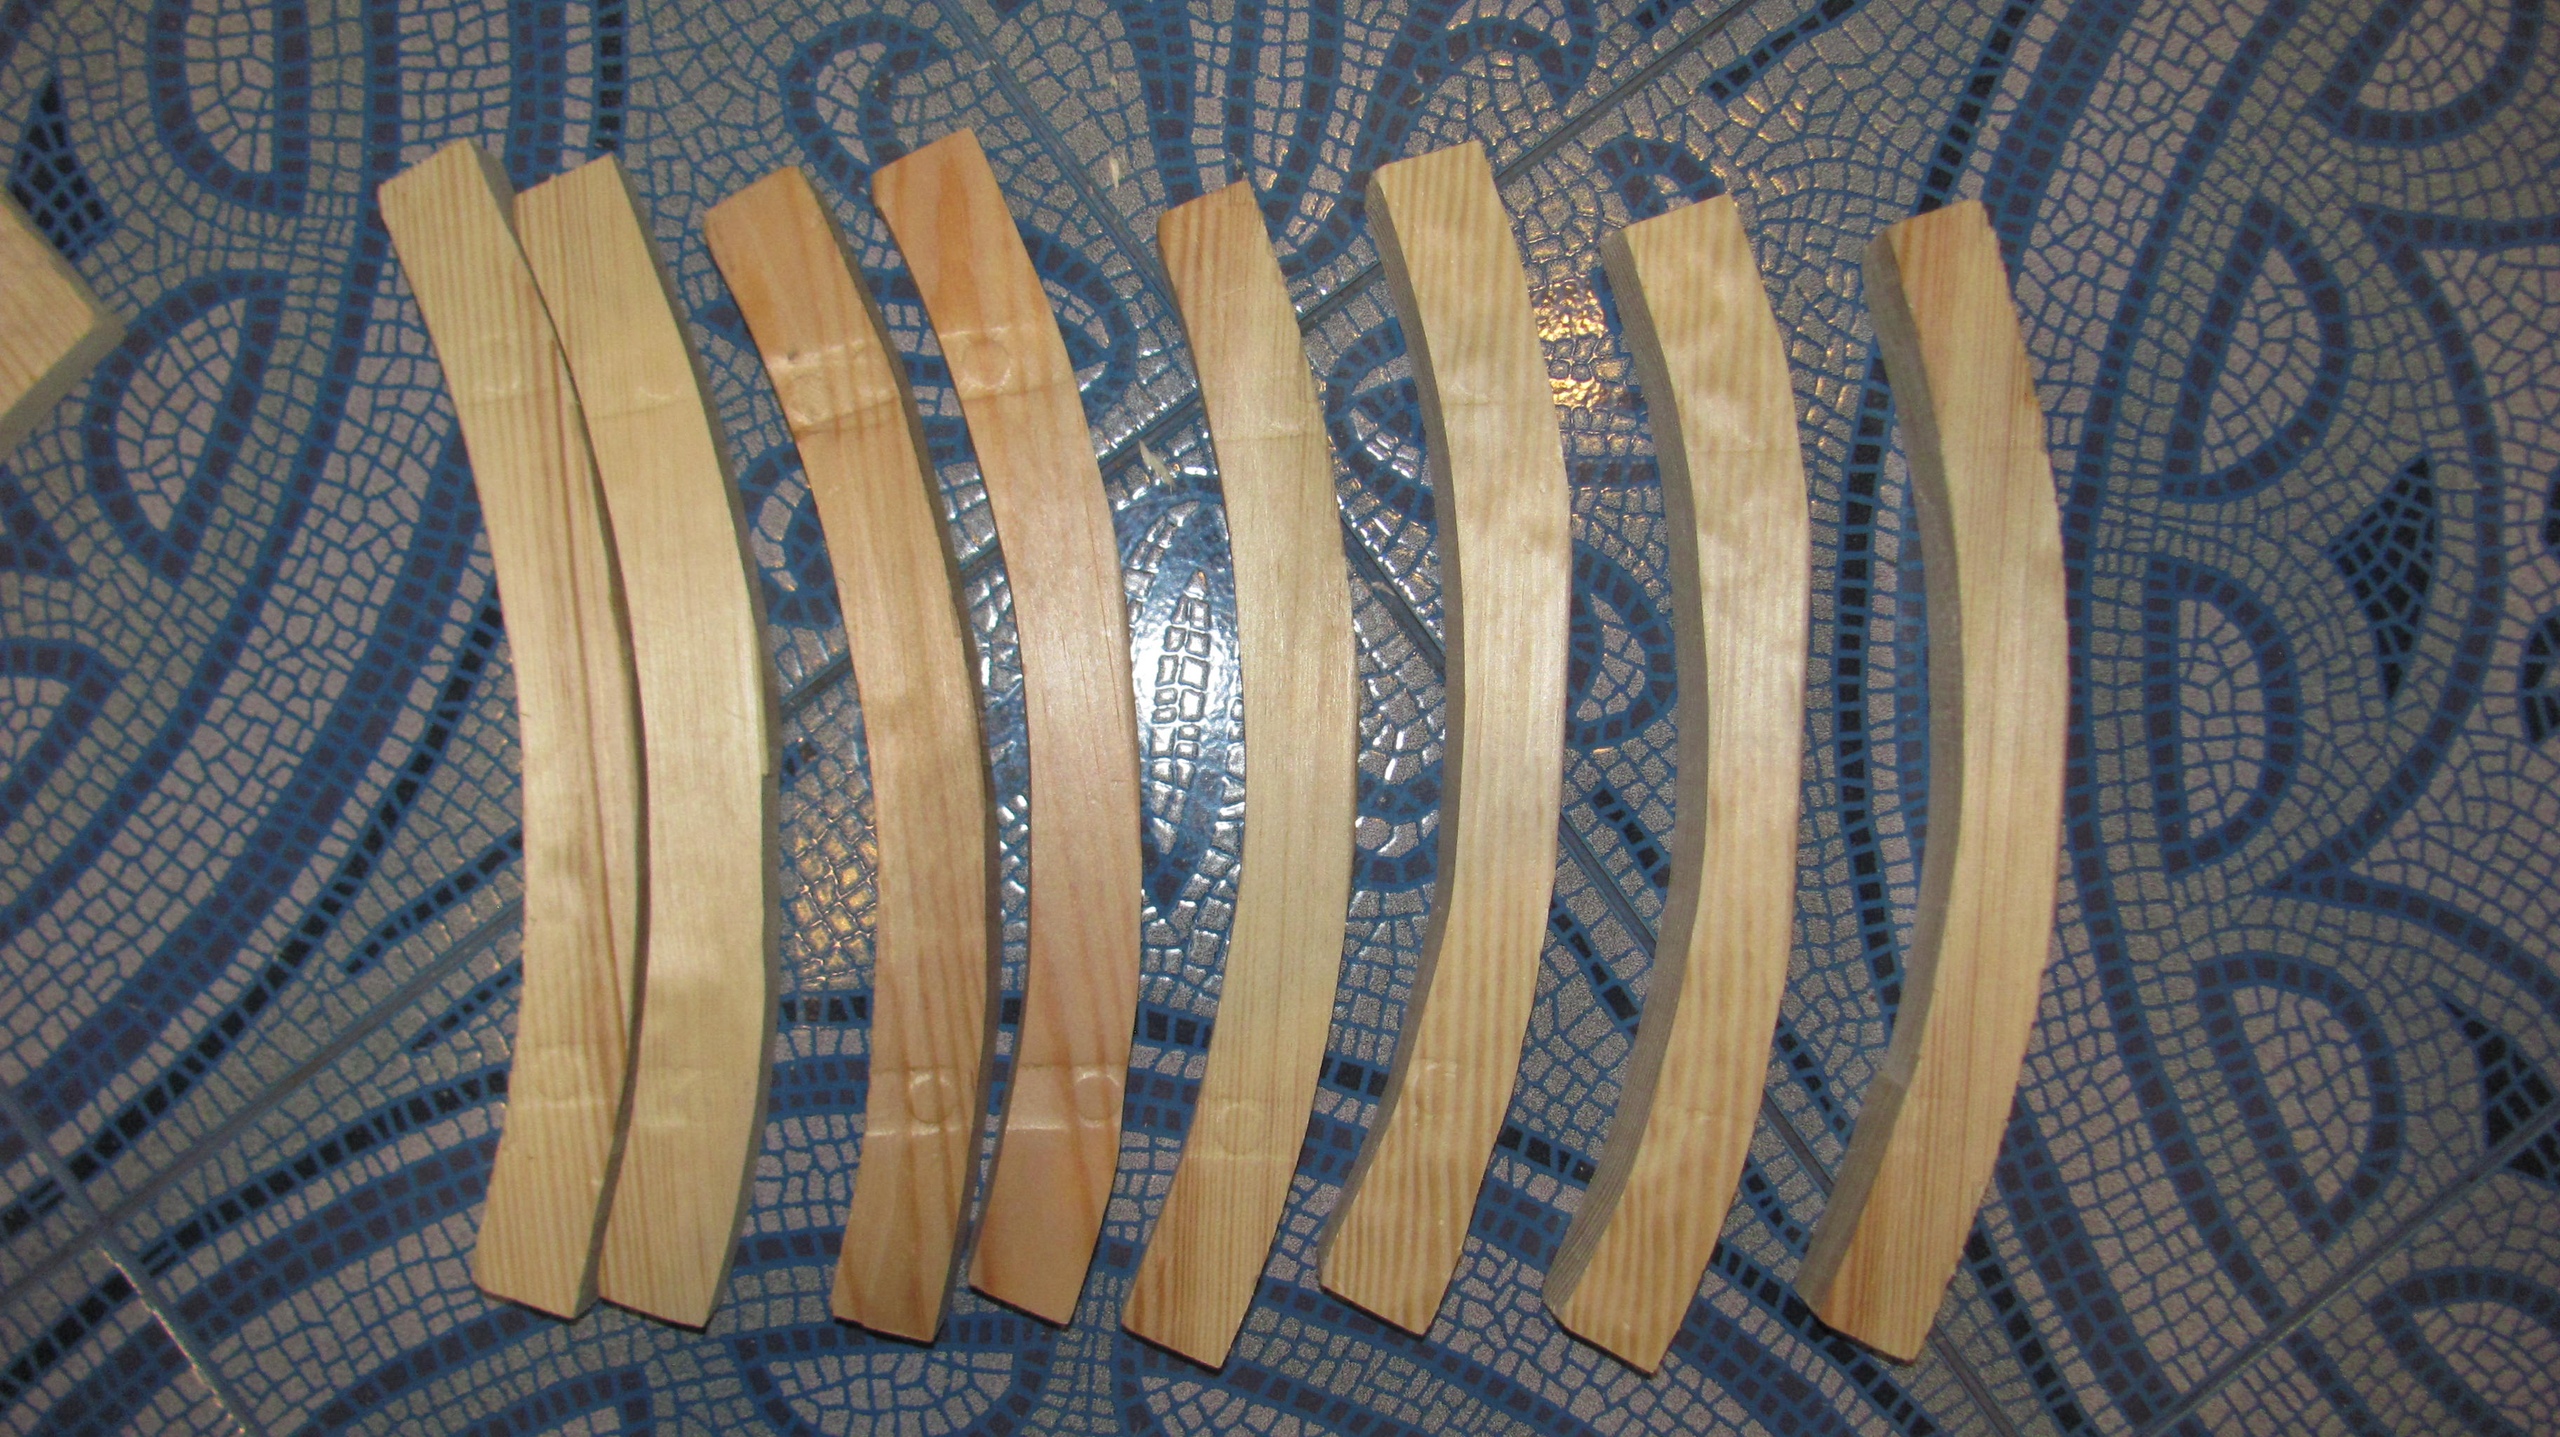 Ring Segments
 A curved shield protects the fighter
 Outer diameter of the ring
 Ring Thickness
 Rim and lens deflection
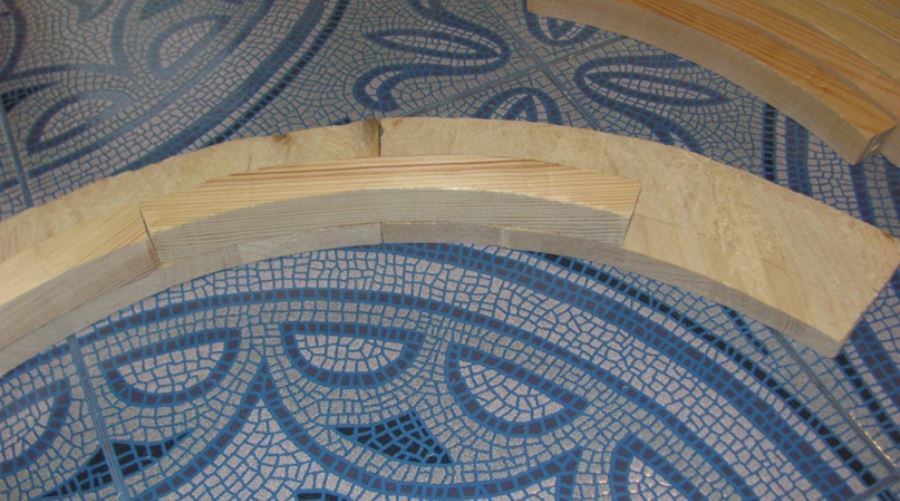
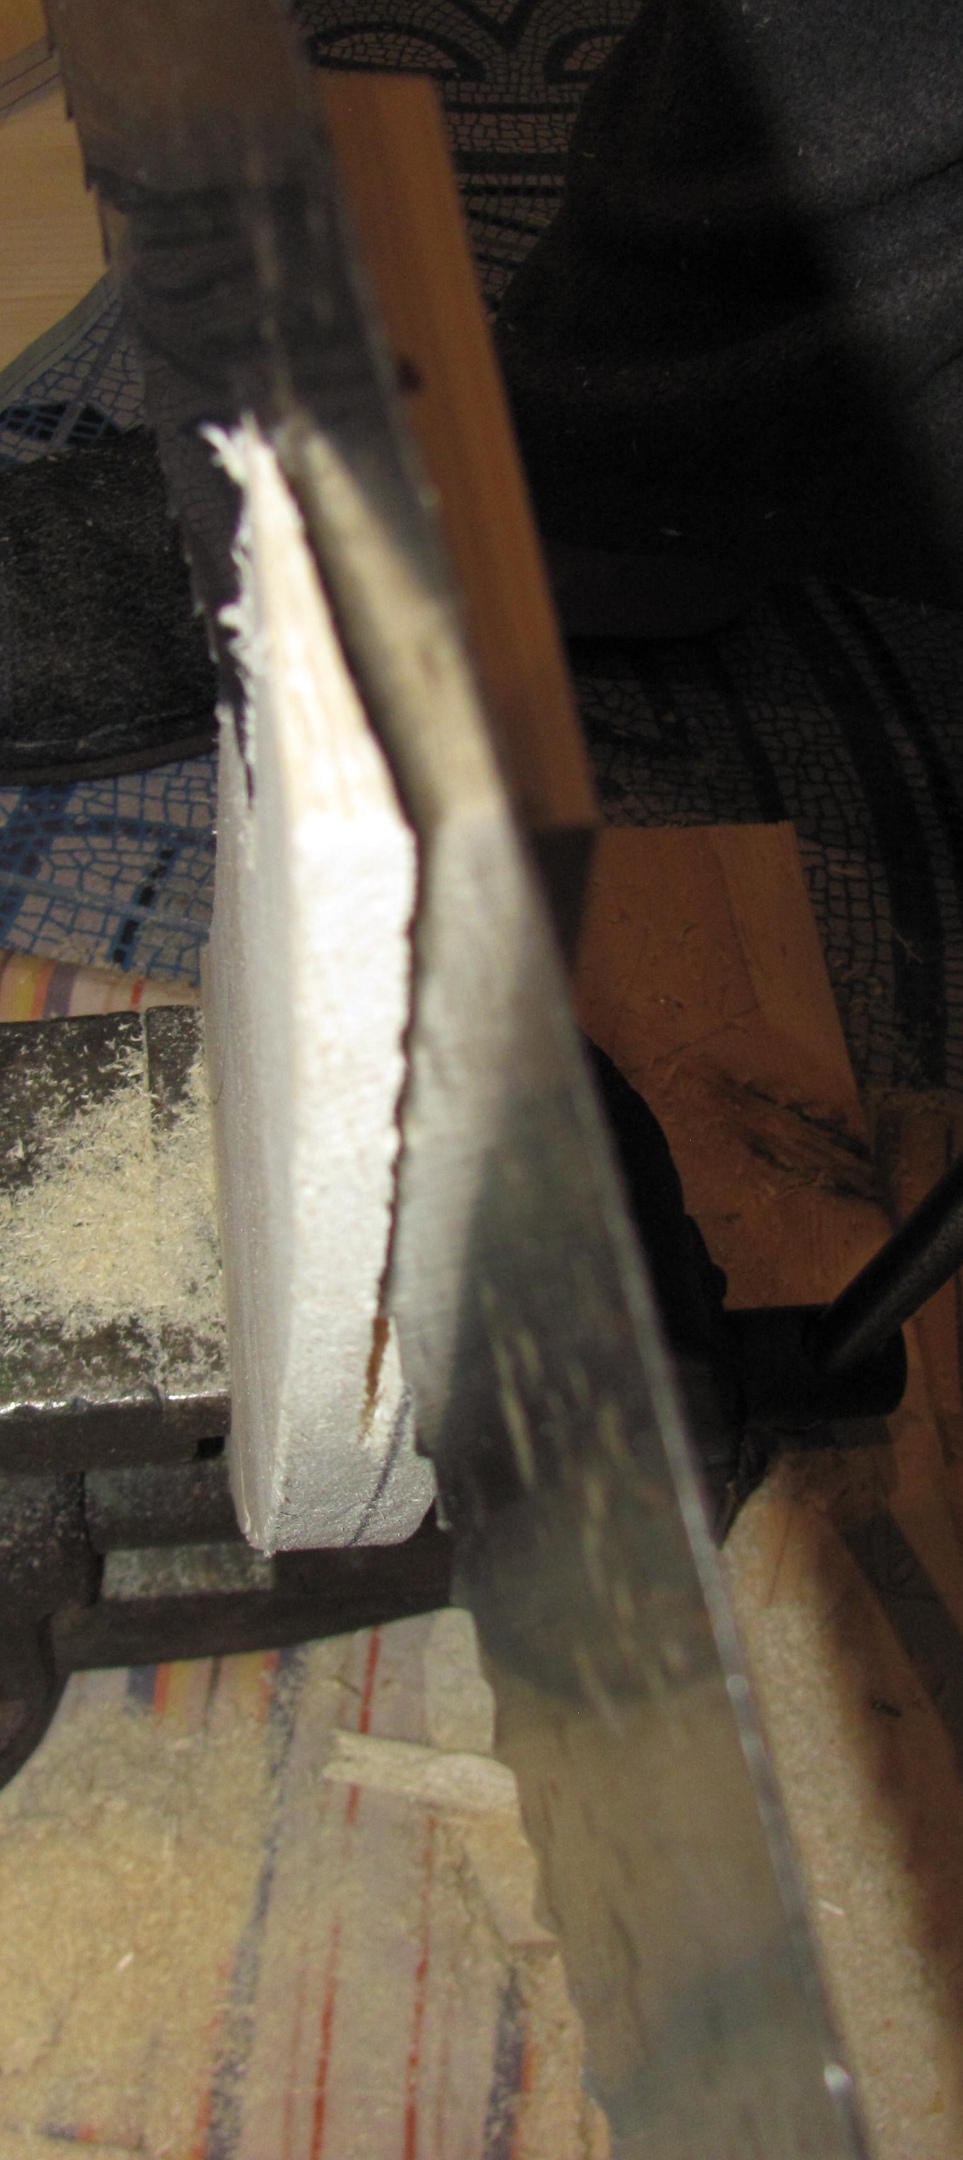
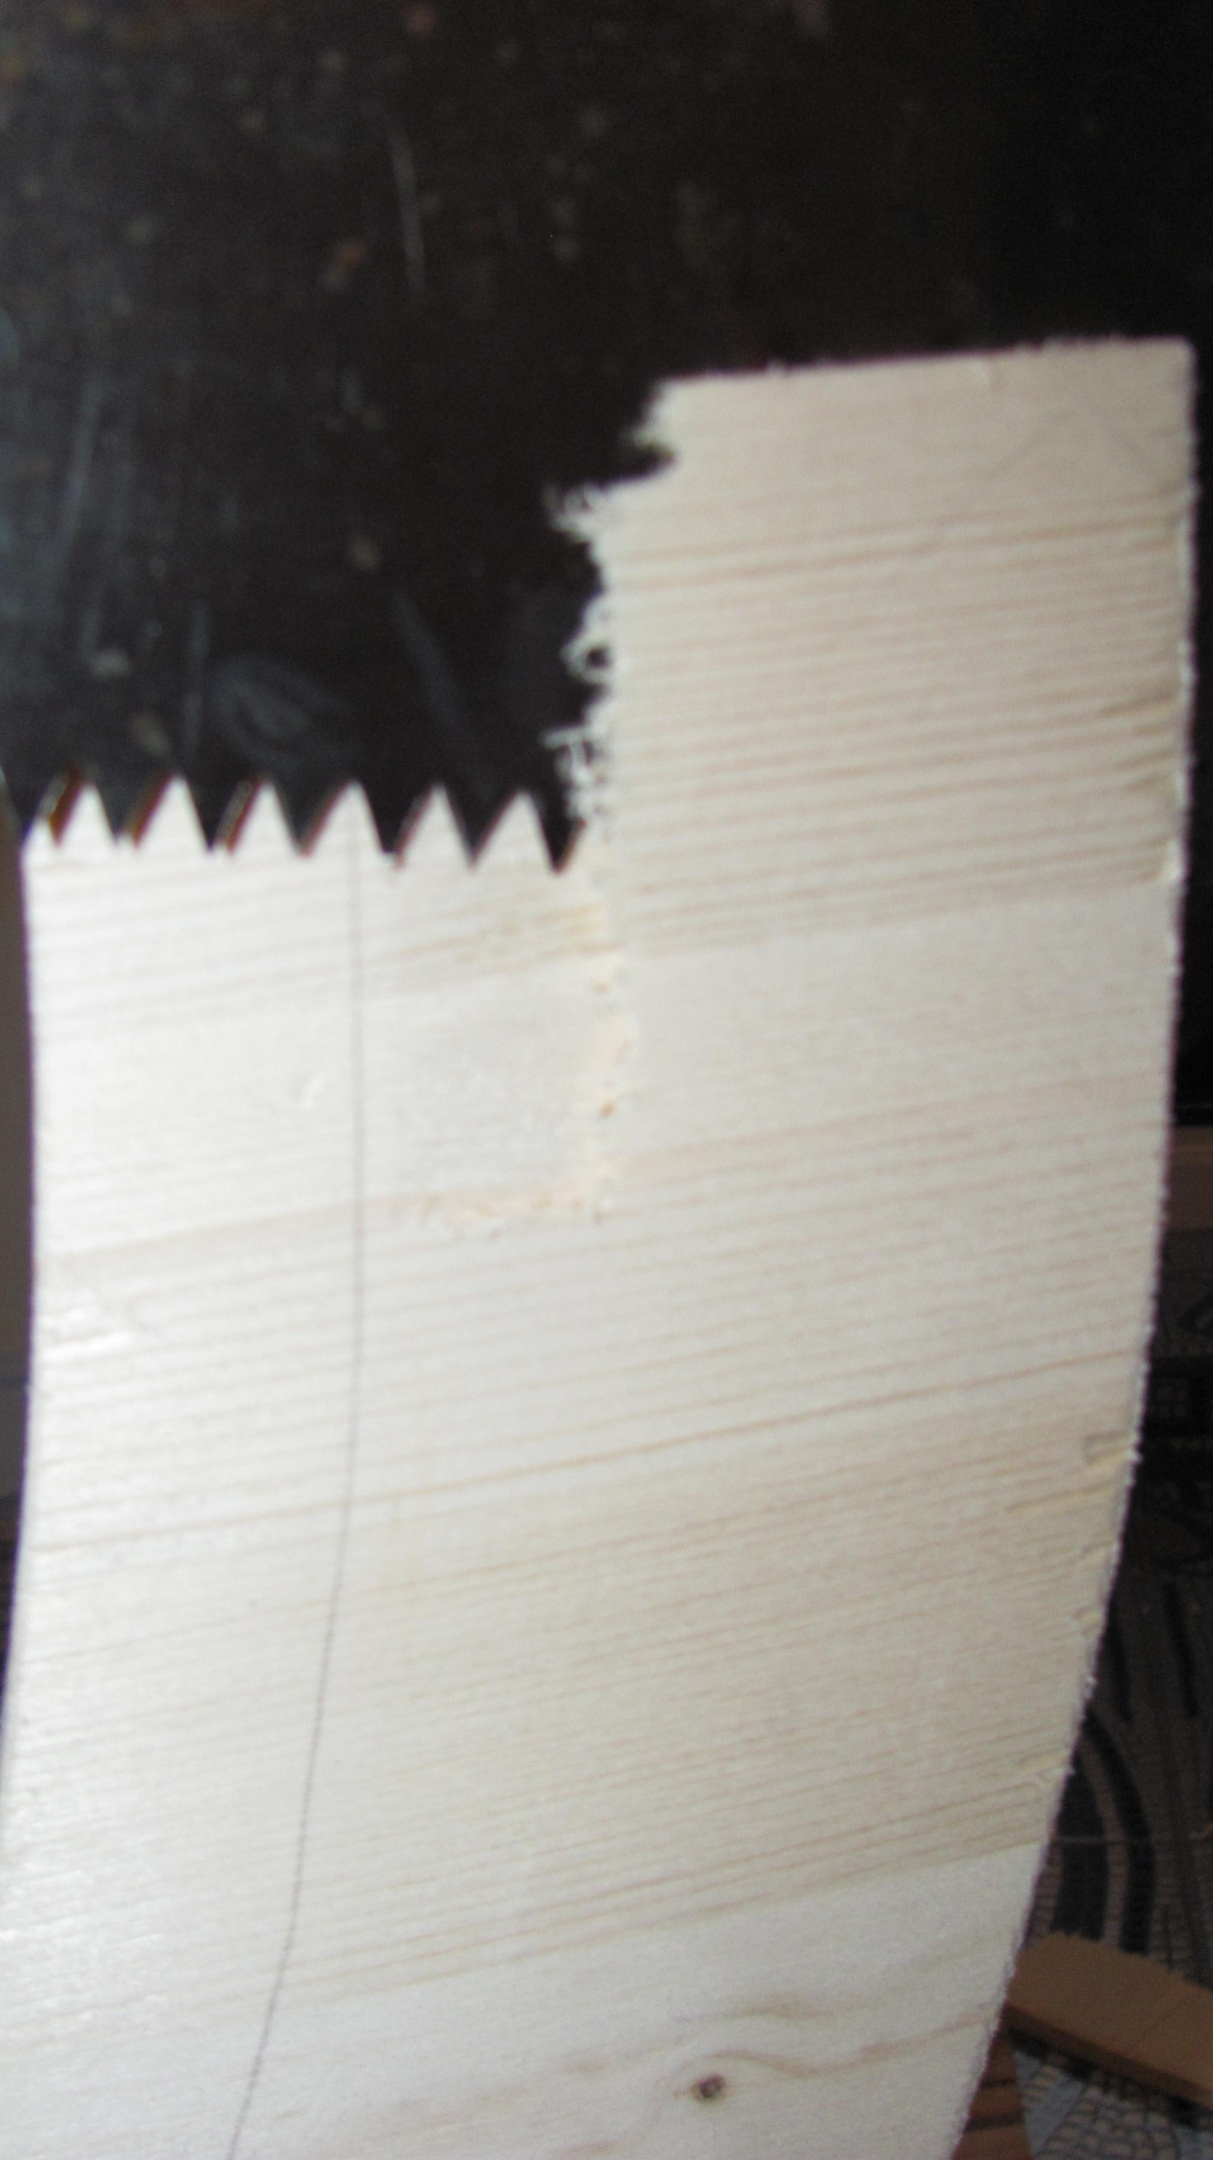
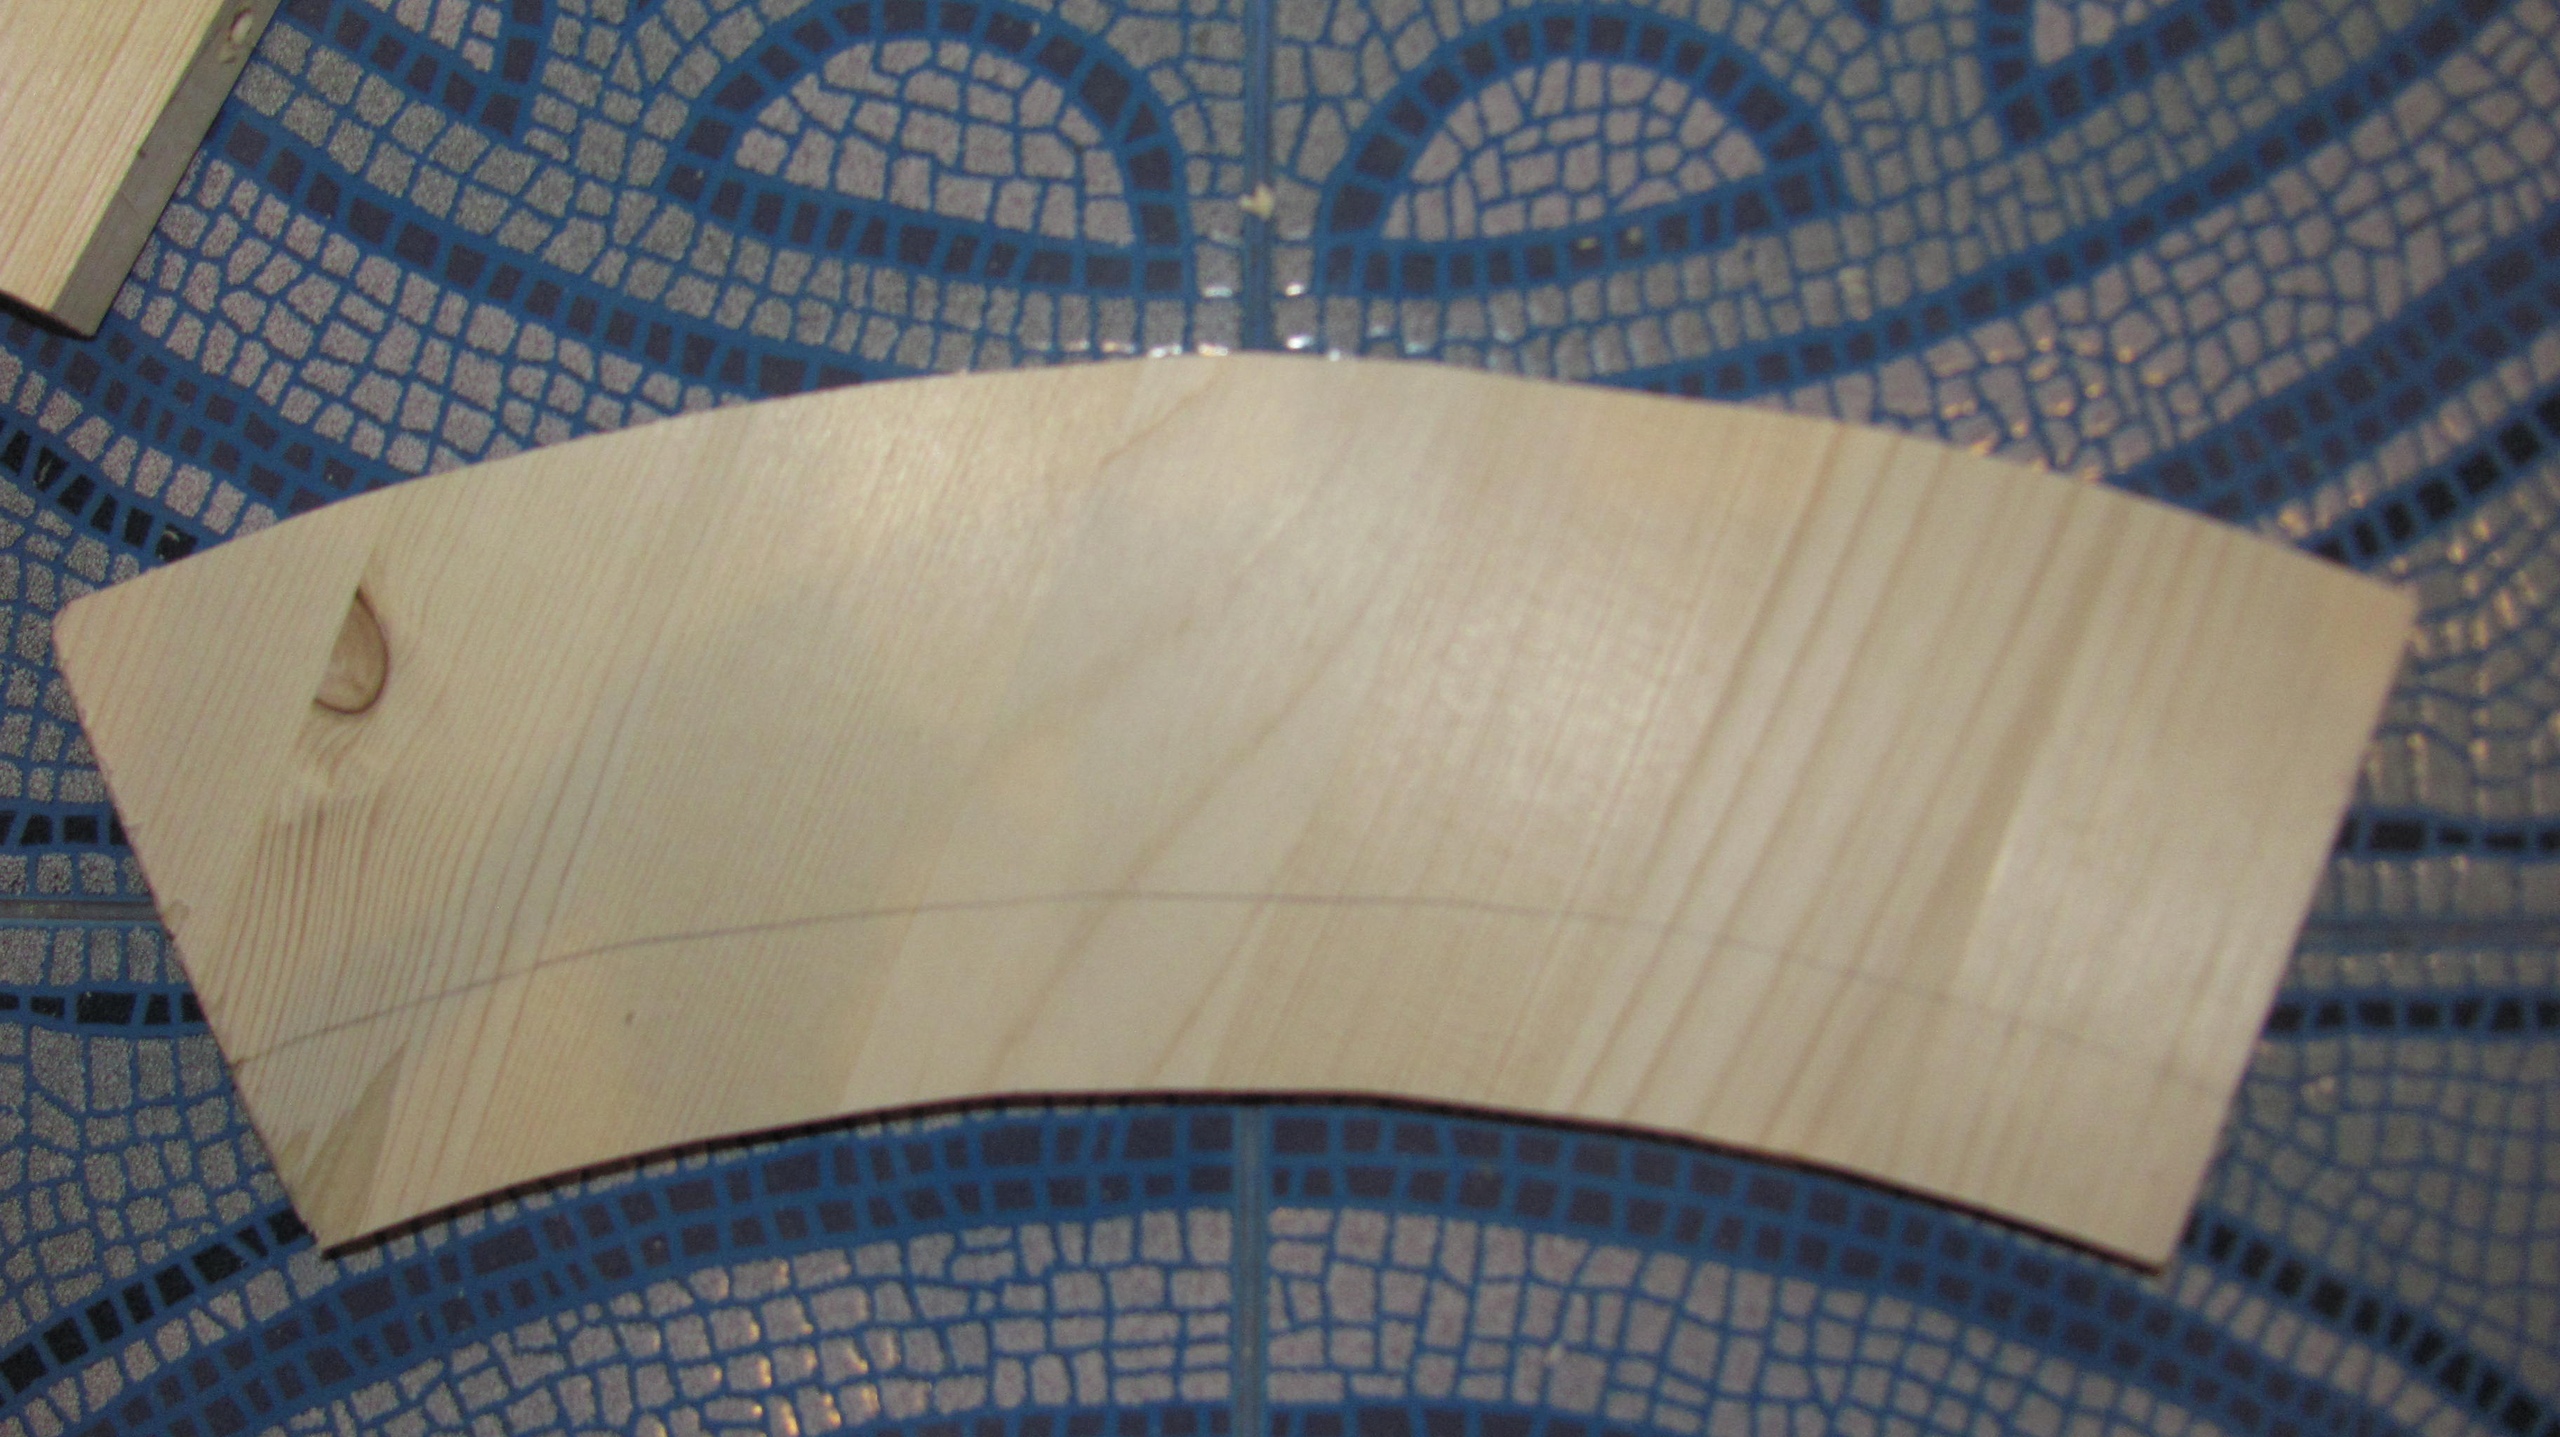
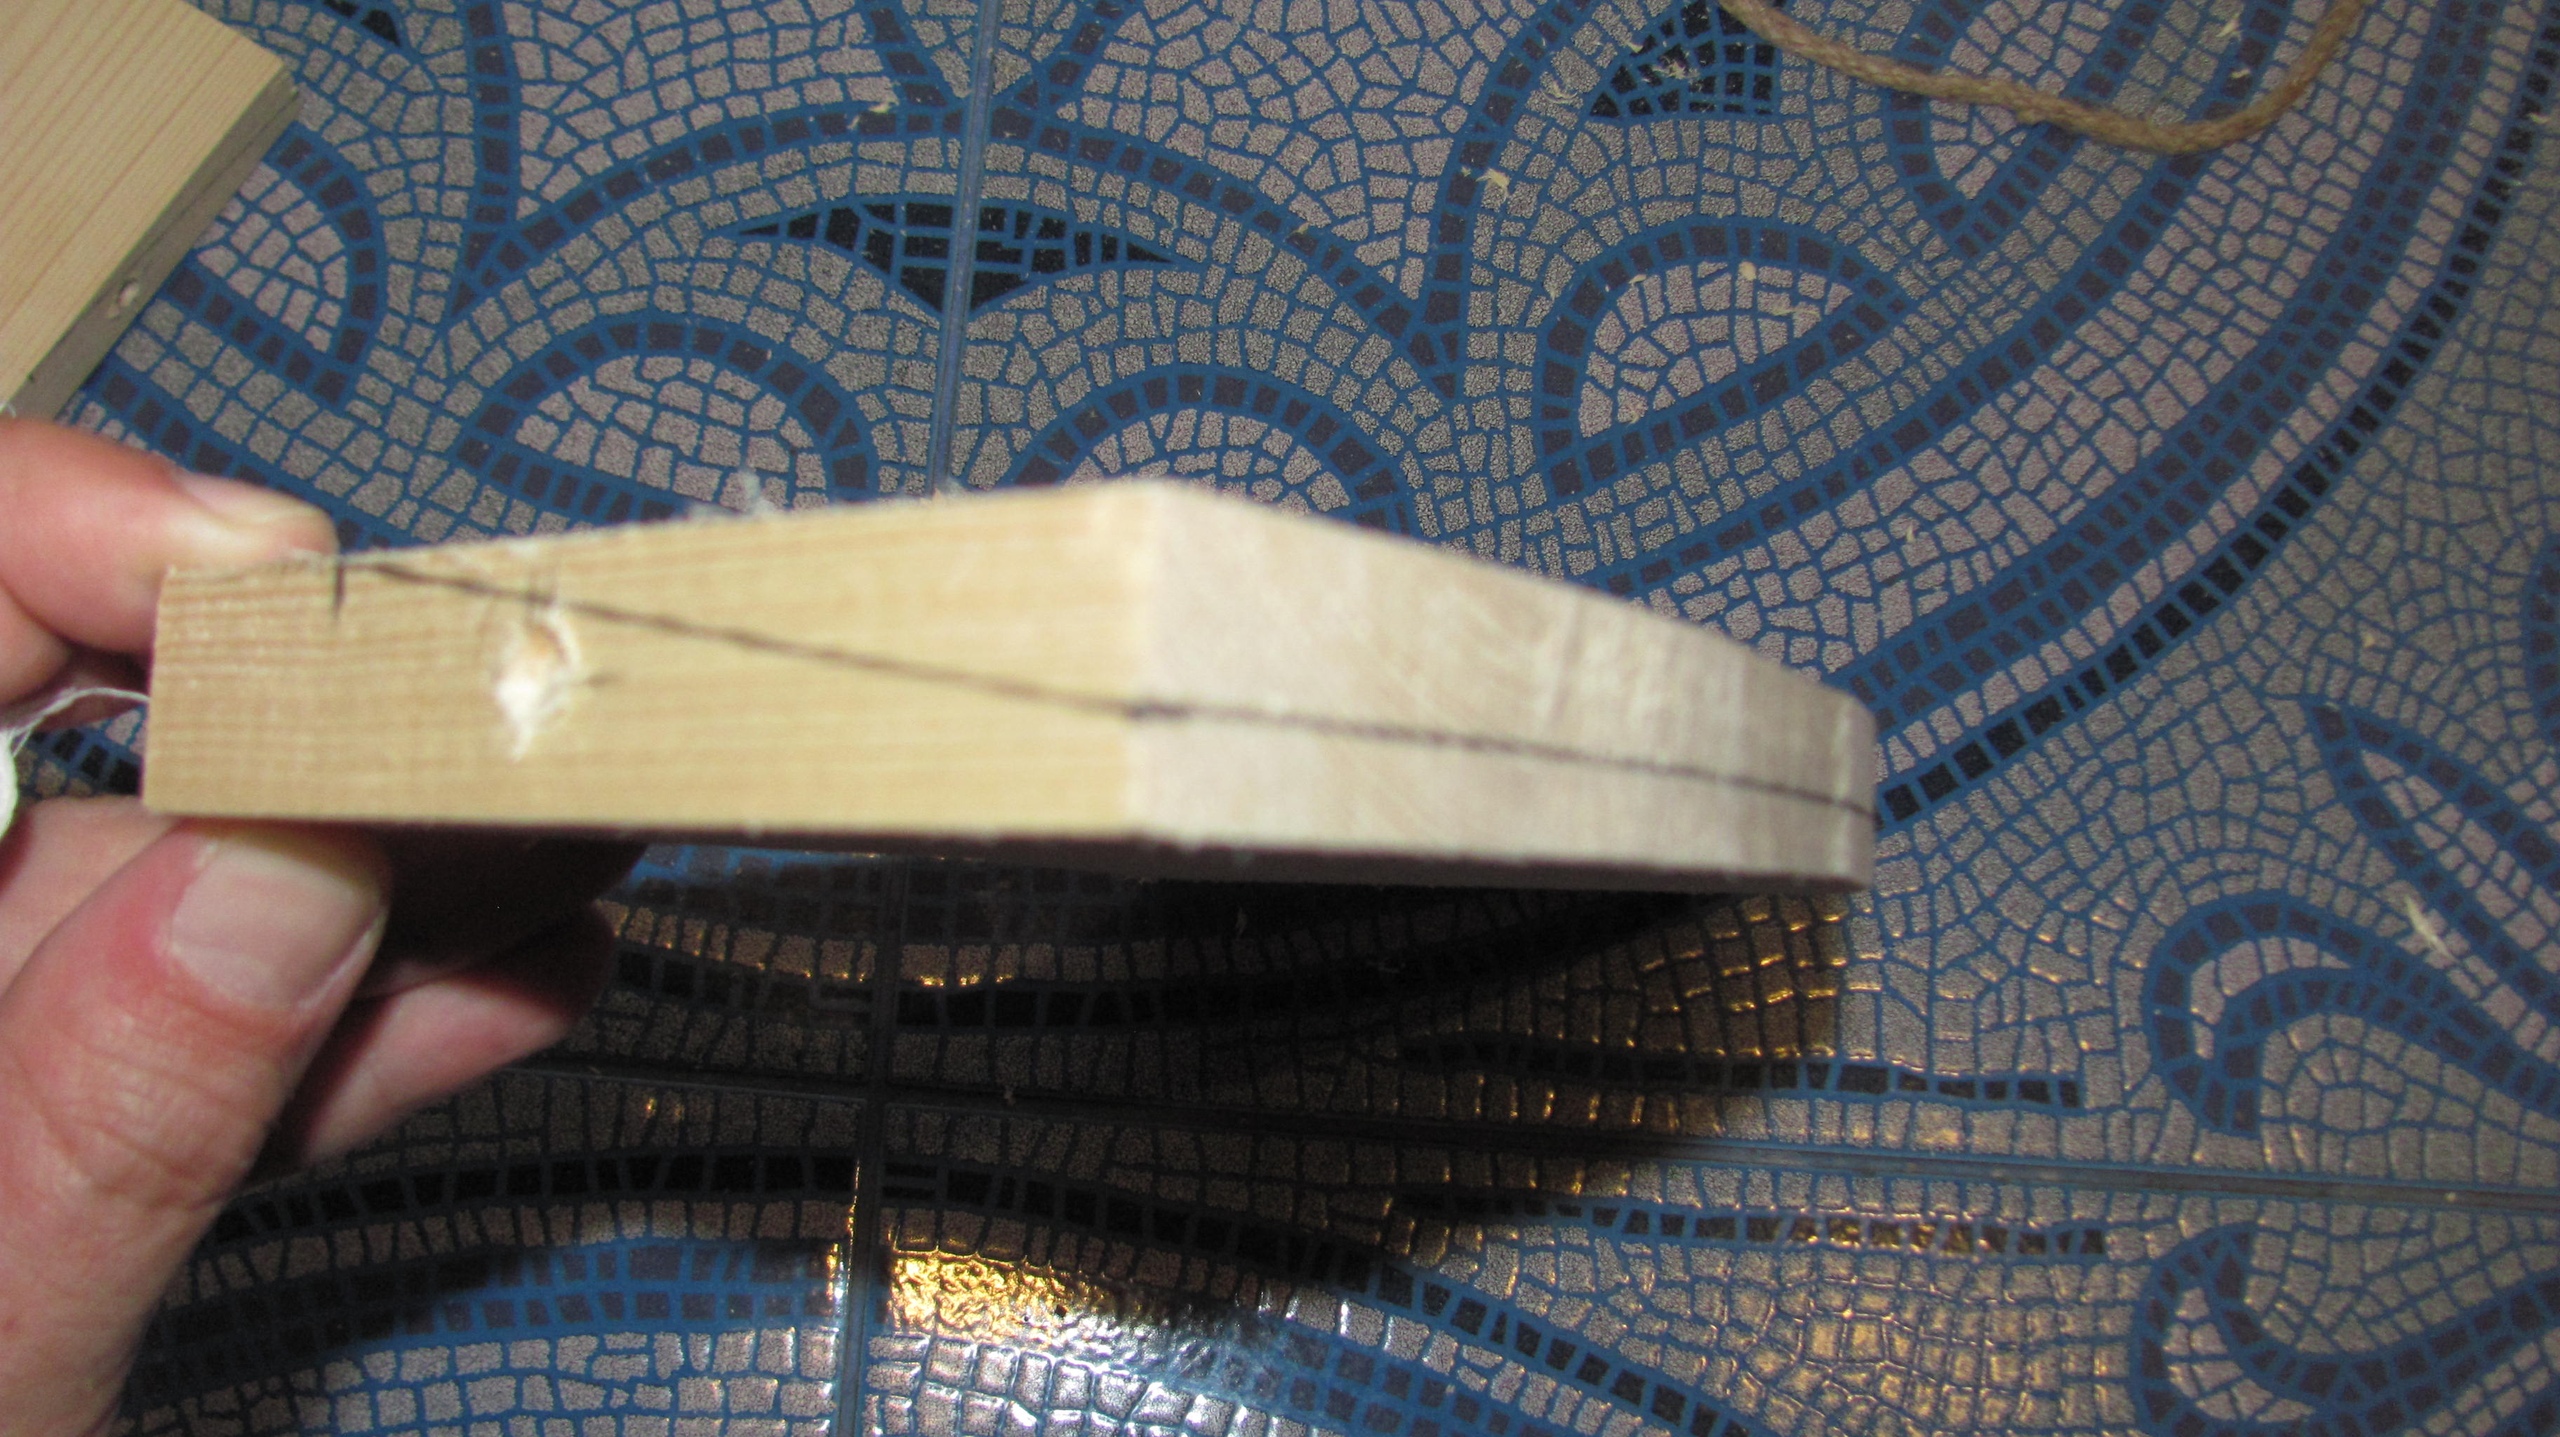
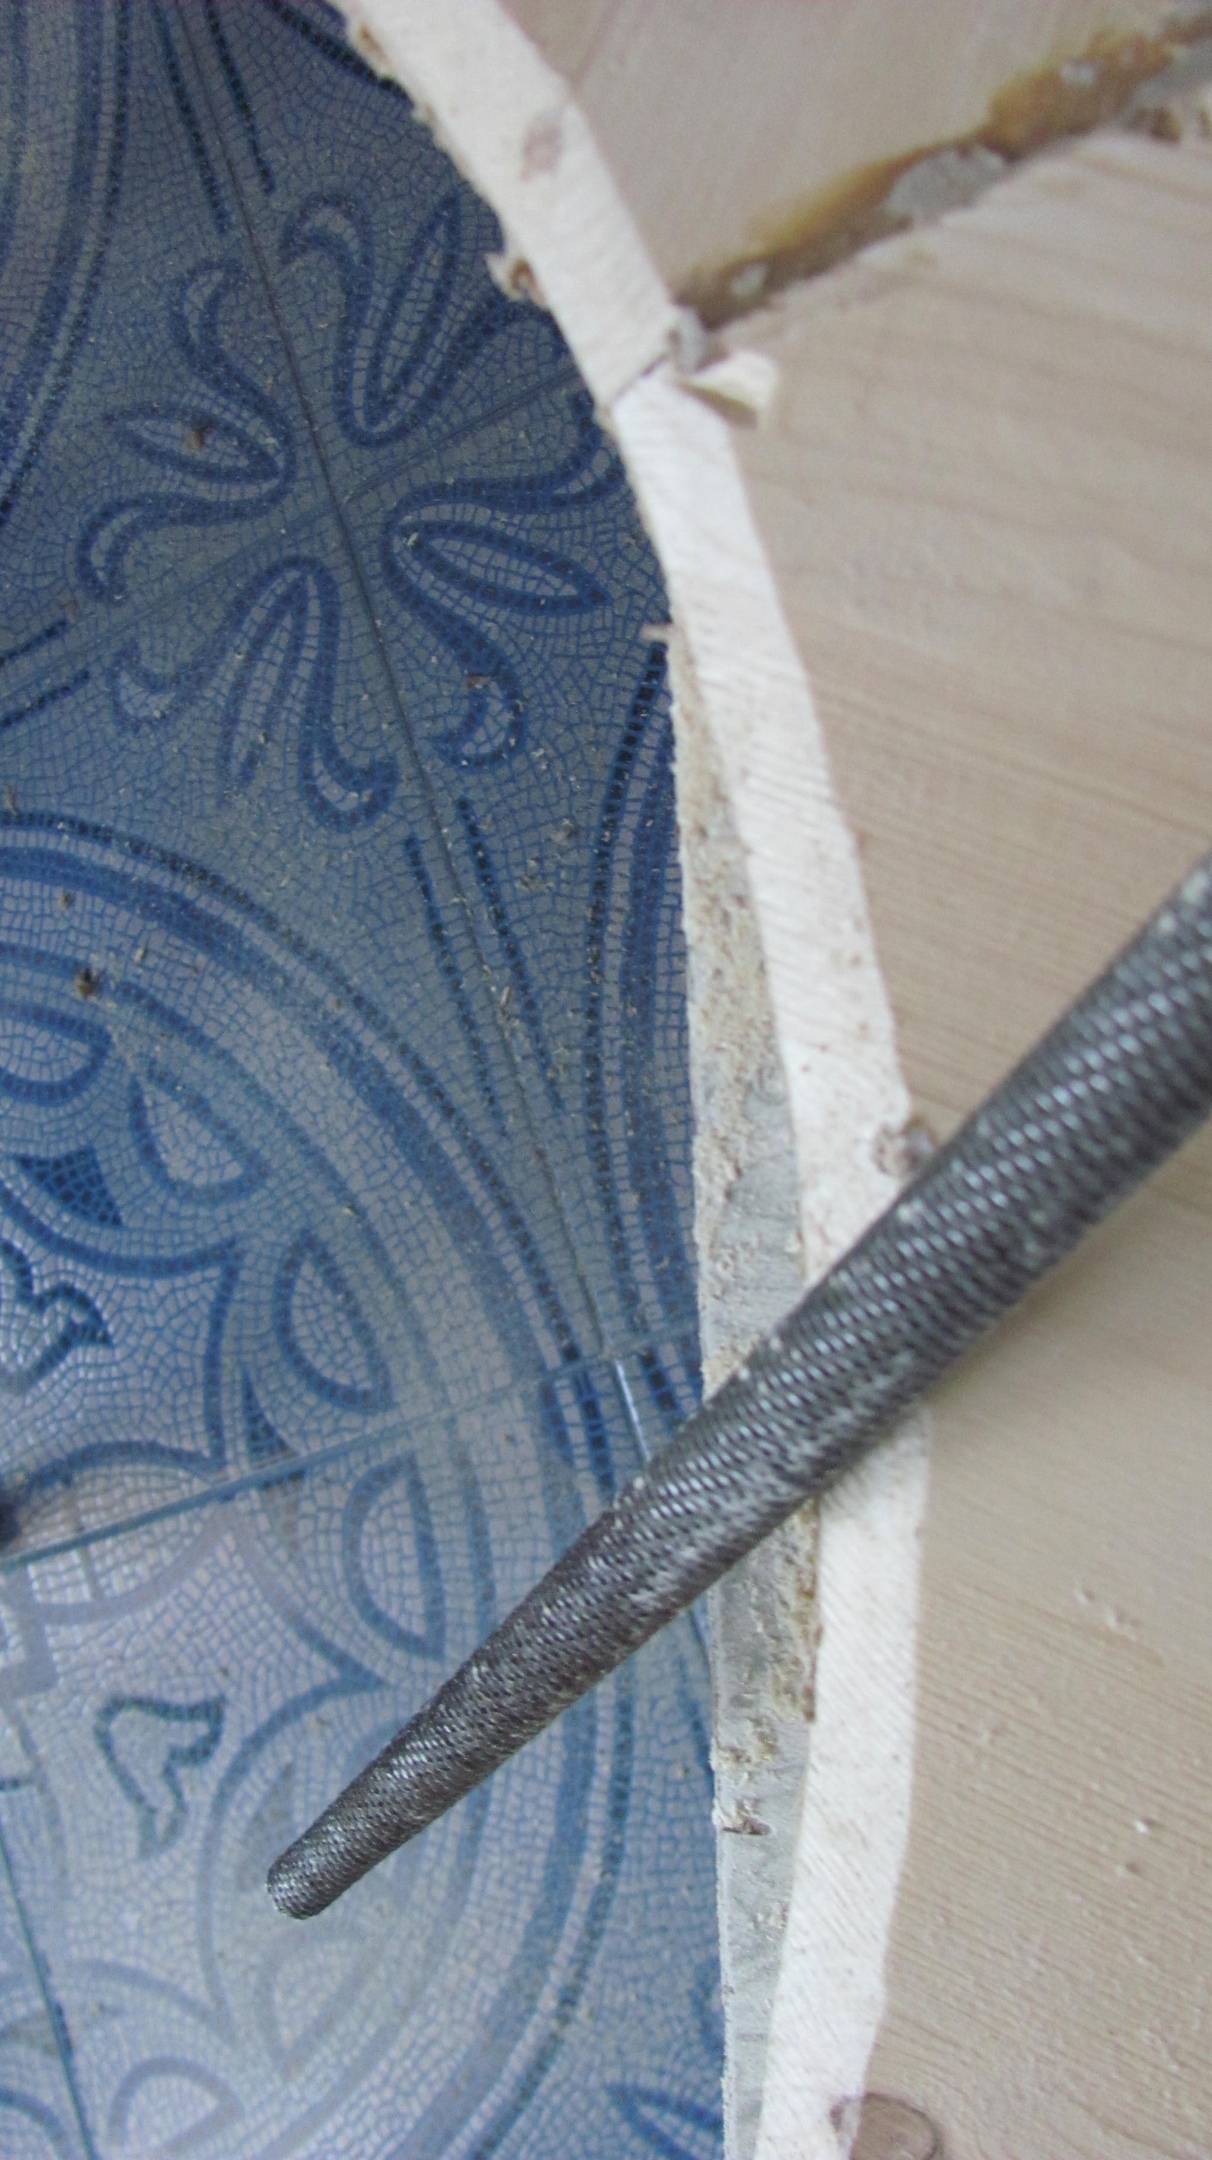
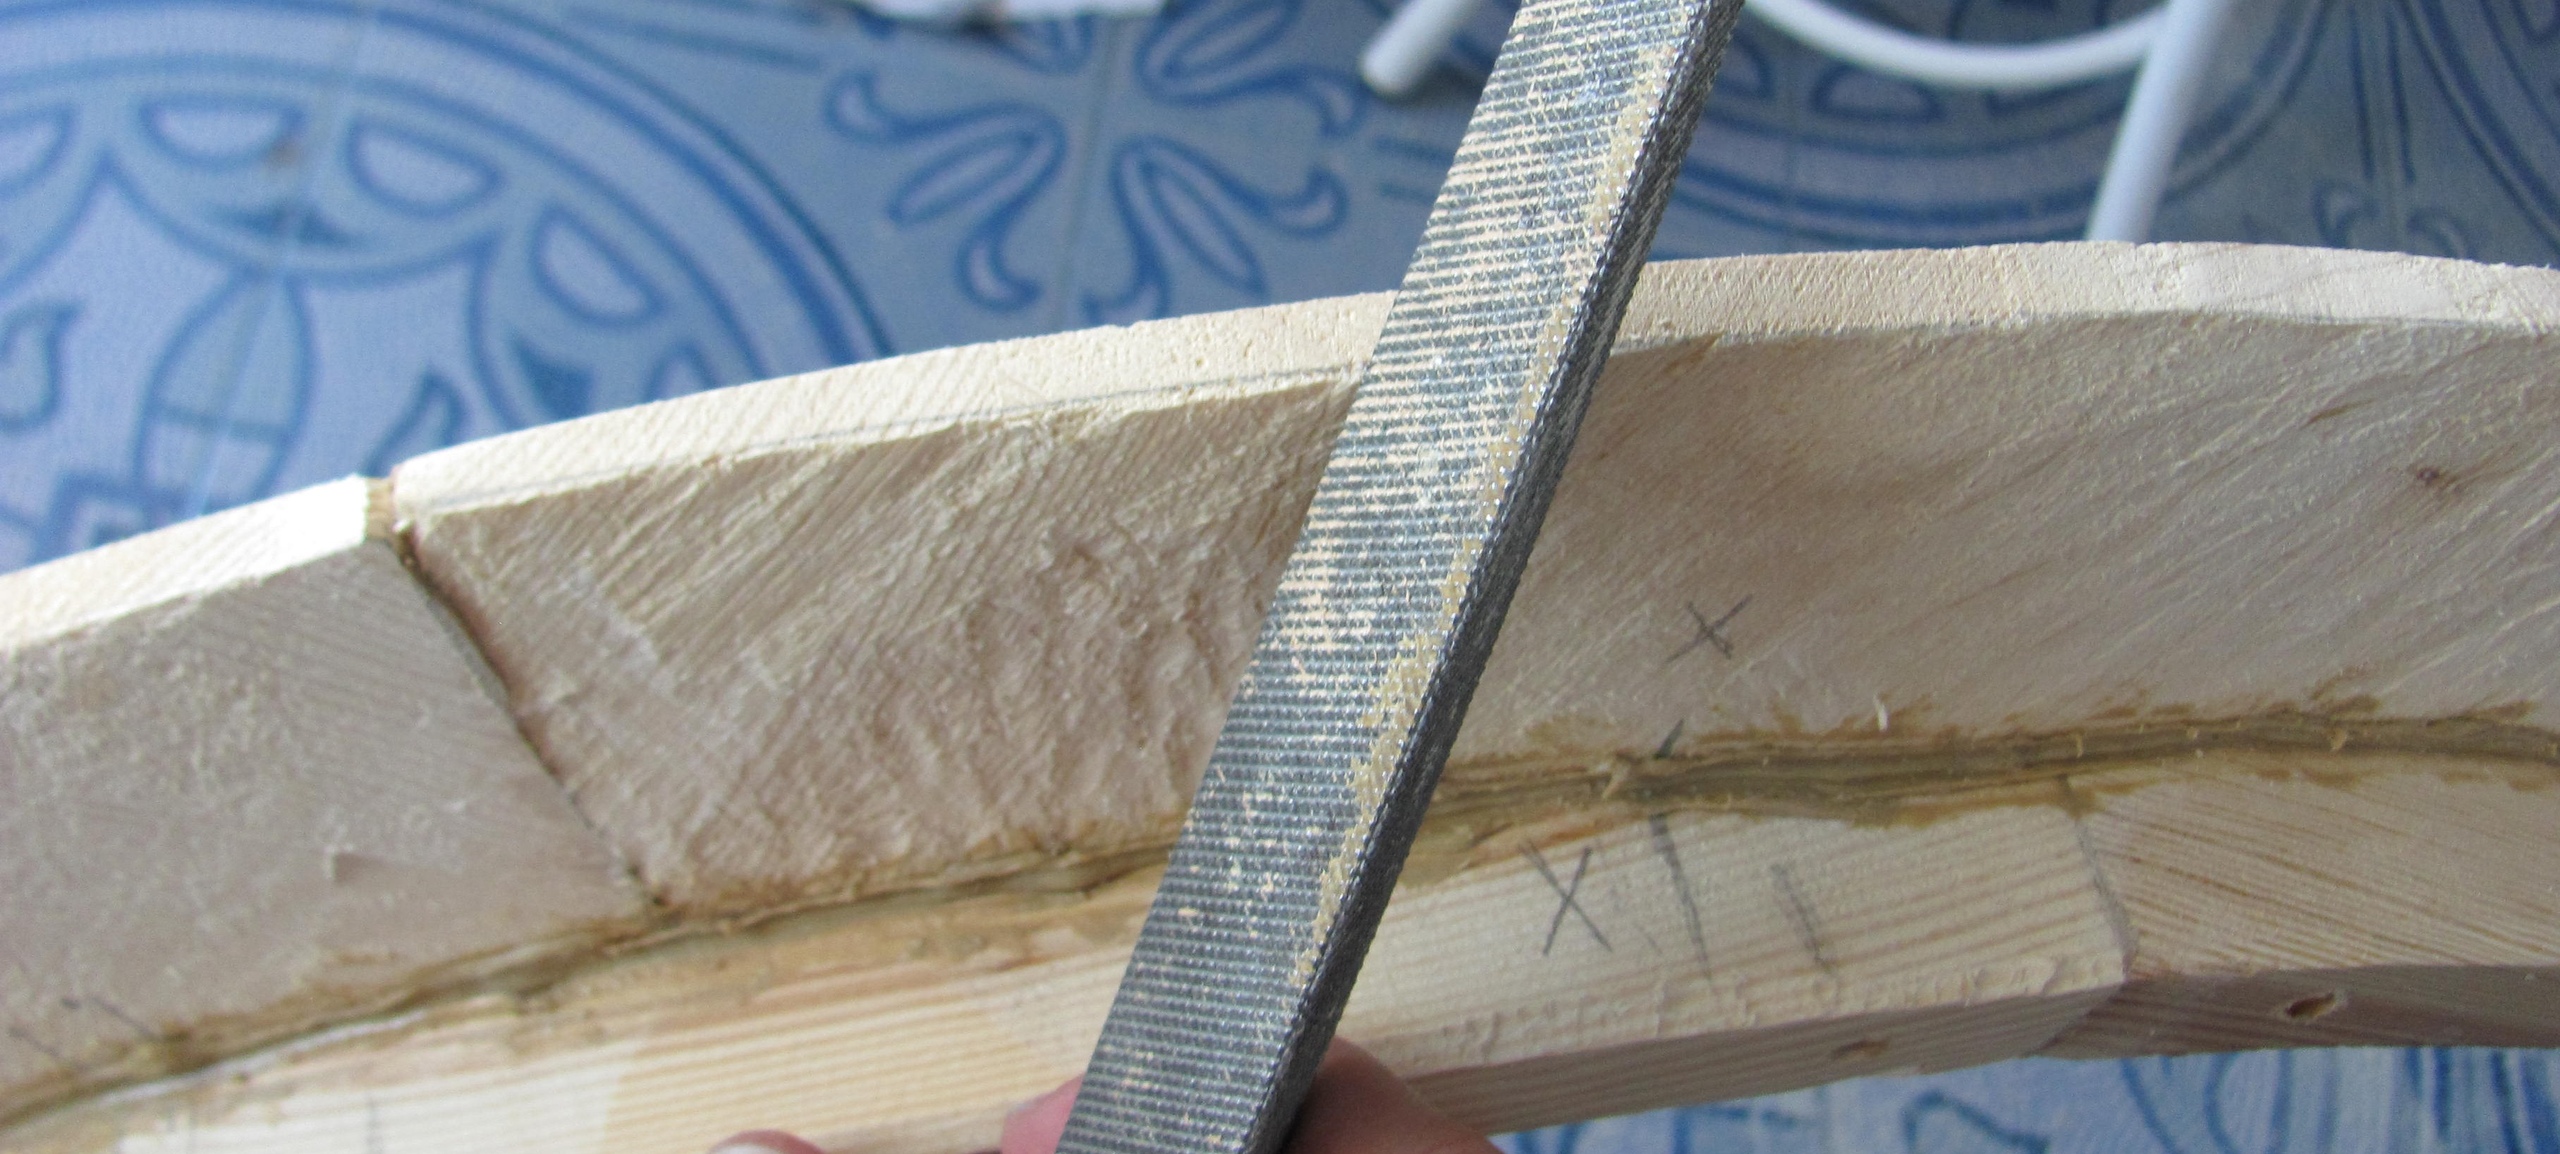
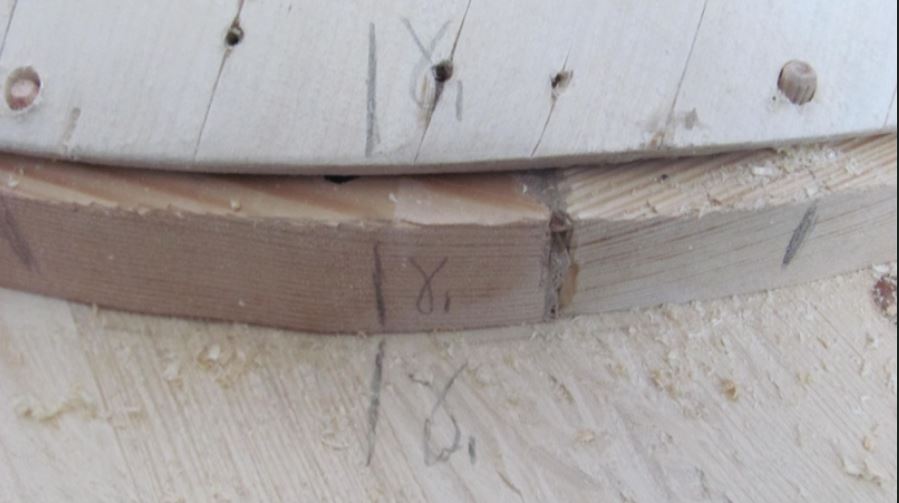
Similarly,you can make a rim of 8 segments assembled using glue and nails. The width of the part of the rim that is visible in the full face from pictorial sources,based on the proportions of the figures,can range from 3-4 cm to 8-10 cm. I made 7 cm on my own. To this,you need to add the width of the zone that goes under the ring,equal to the thickness of the ring-2-2. 5 cm. This area should be flat and parallel to the base,while the main part of the rim is thinned to the outer edge. I made a rim 2 cm thick,thinning to 0.8 cm. This narrowing is clearly visible in the images. Probably,you can find sources where it is not shown,it cannot be excluded that there were such shields too,but most classic hoplons have a noticeably thinner rim to the edge,which is confirmed by the few available material sources. It's not easy to make a thin rim,as my bandaged finger proves. You can shoot quite a lot with a plane,and the wood fibers on these curved segments can go in a very inconvenient direction. There's nothing to lean on with an electric jigsaw. I had to saw by hand,carefully watching to maintain the desired angle. You need a good saw and a lot of physical strength. Personally,I didn't manage to cut all eight of them in one sitting. First,we cut deep at an angle,then hold the saw perpendicular to the bar and draw the edge along the line marked out in advance. This is the border of the zone that the ring will overlap. The resulting plane,of course,will not be smooth. You can level it with a file,and fill in the places where they have screwed up and washed down too much with the same wood glue. I didn't do much to align this plane. When fitting,this was hidden by the fabric,primer and those folds of fabric that,unfortunately,are obtained in this place.
 Rim forming process
 Narrowing of the rim on pictorial sources
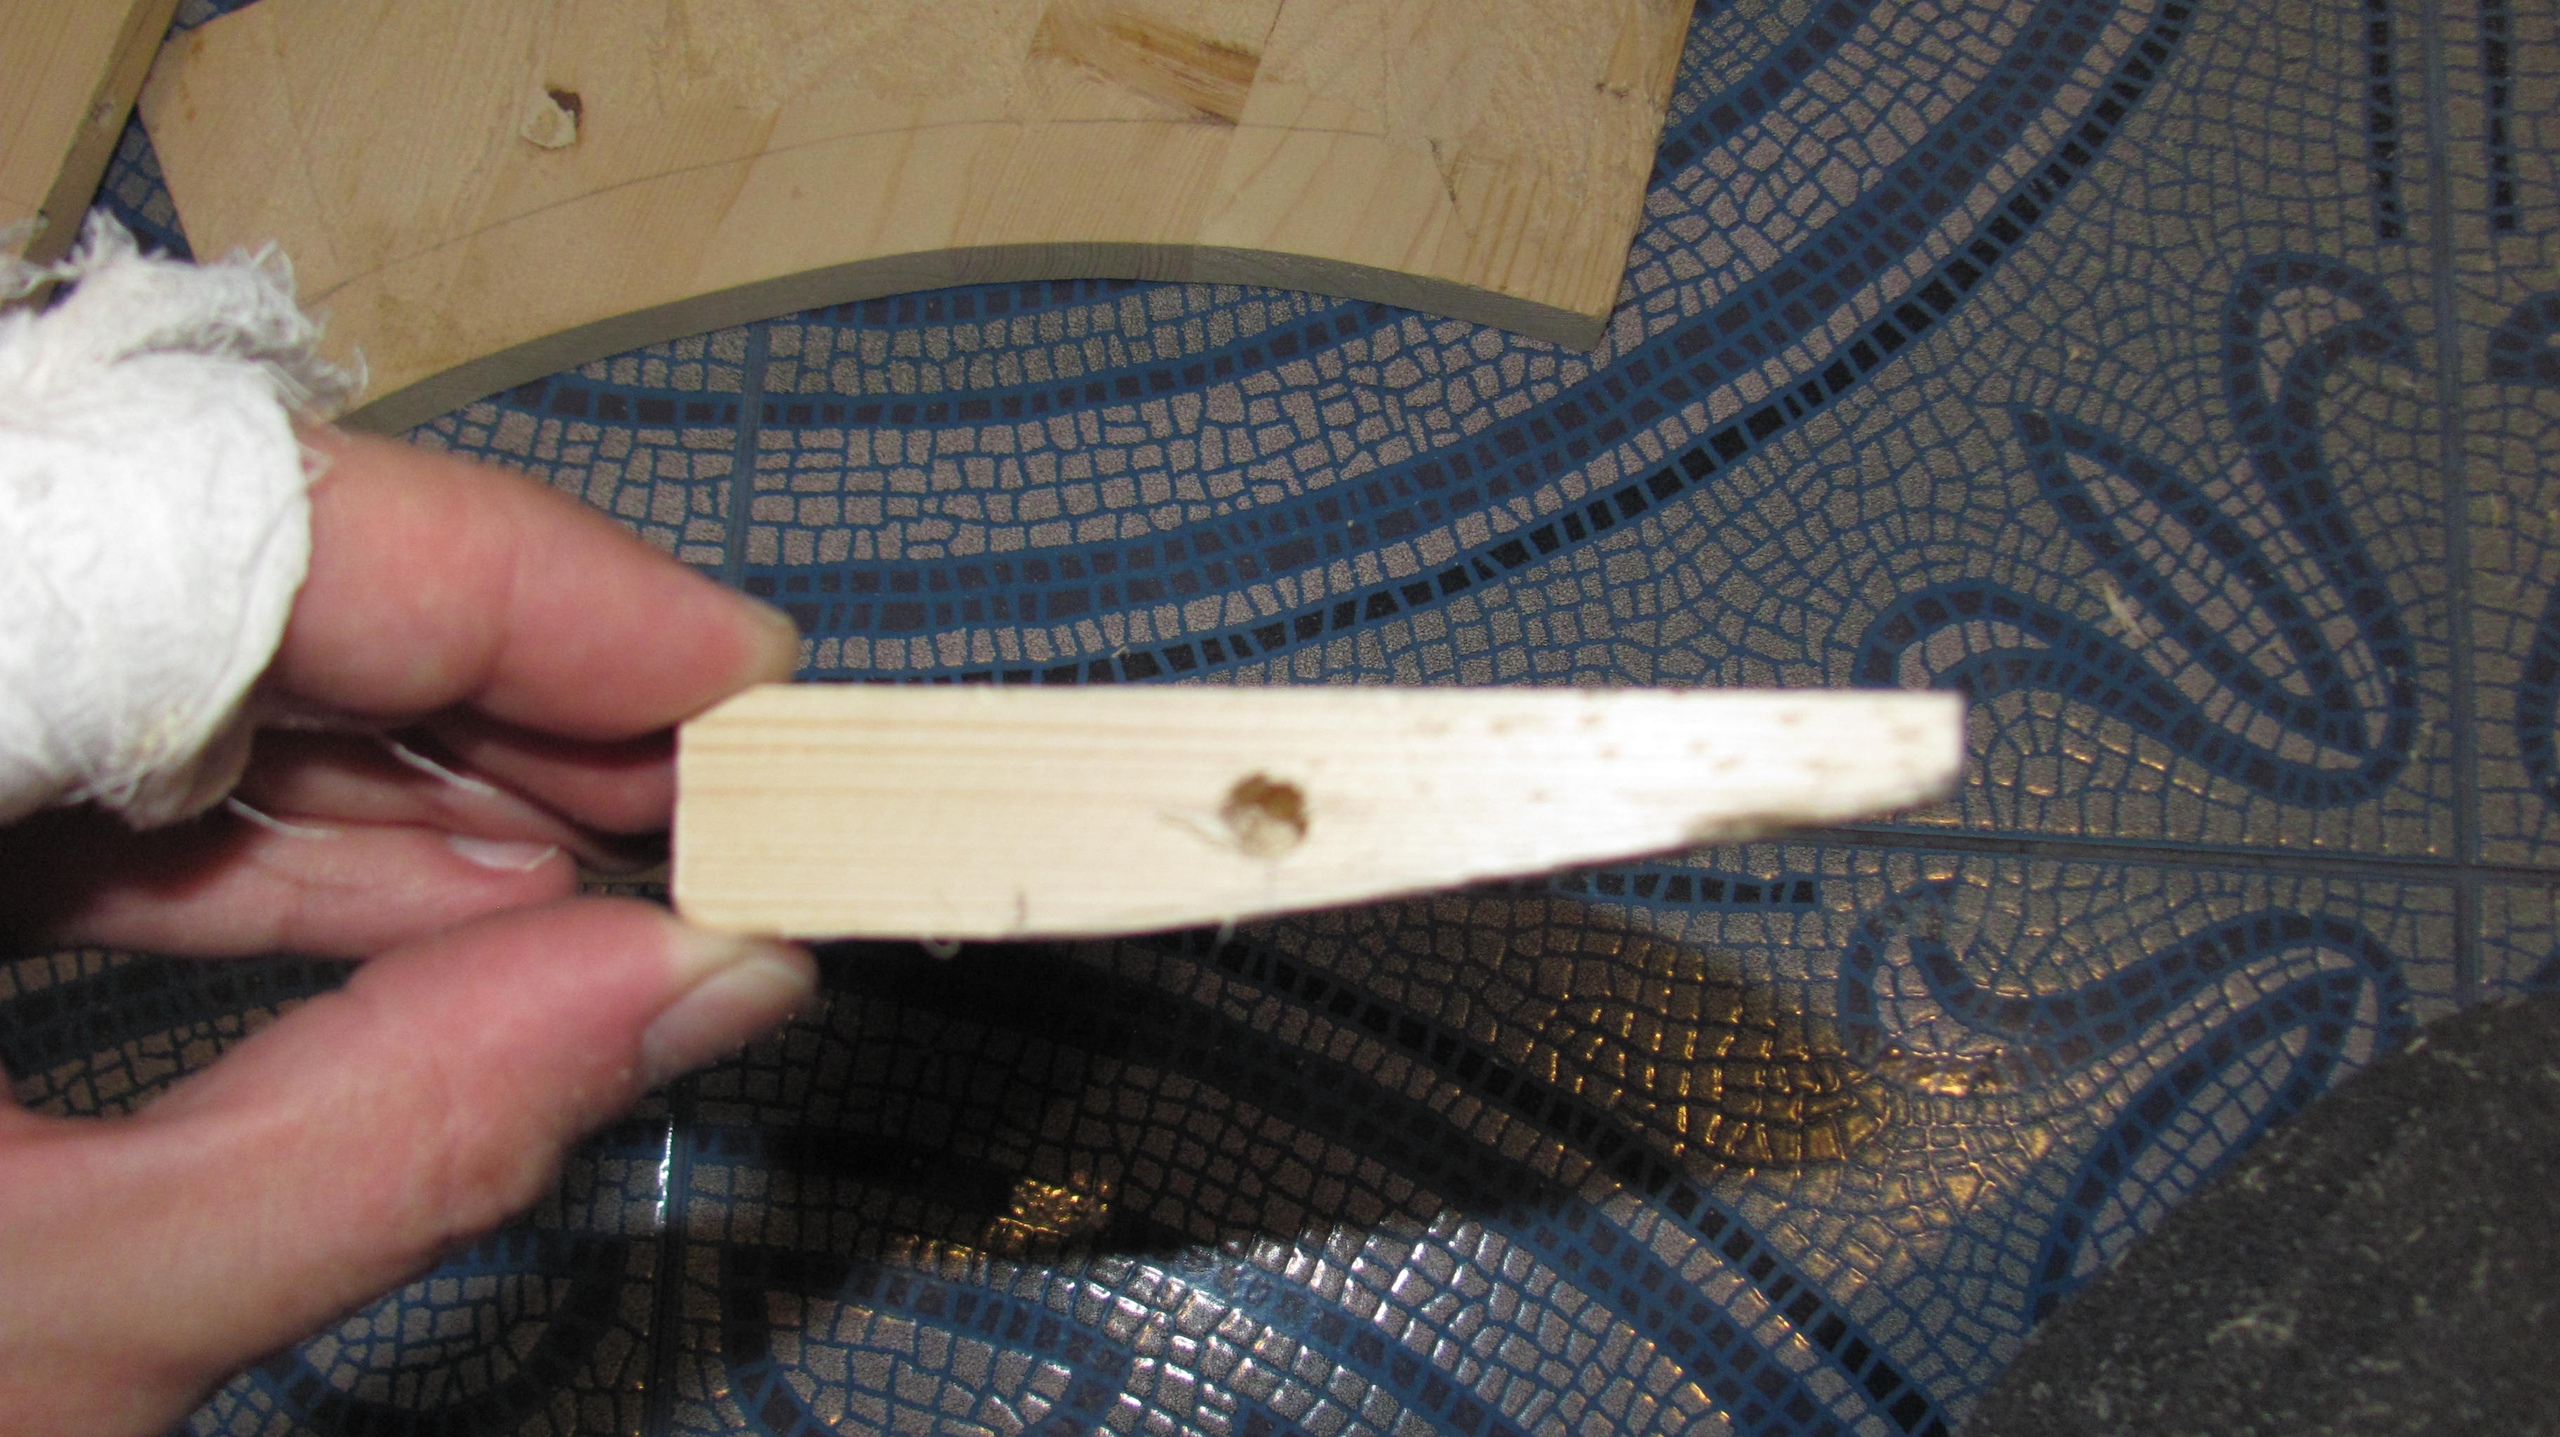
 Split rim
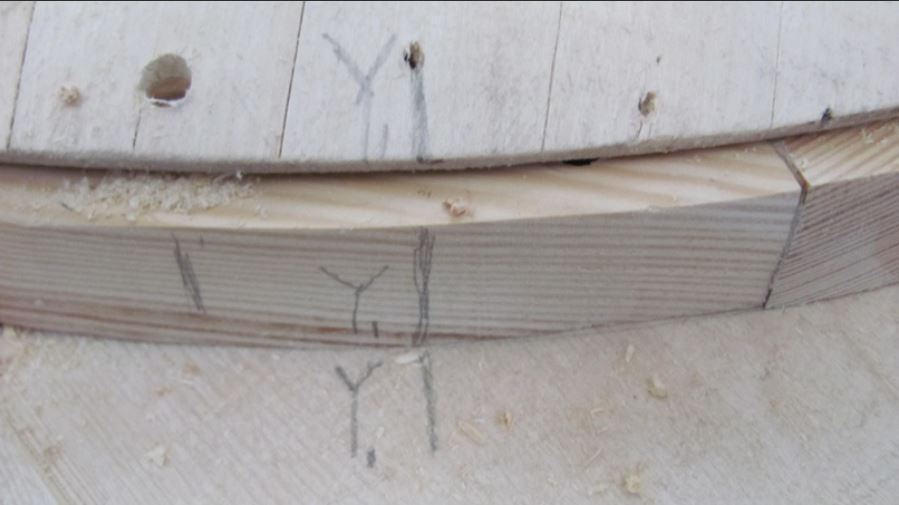
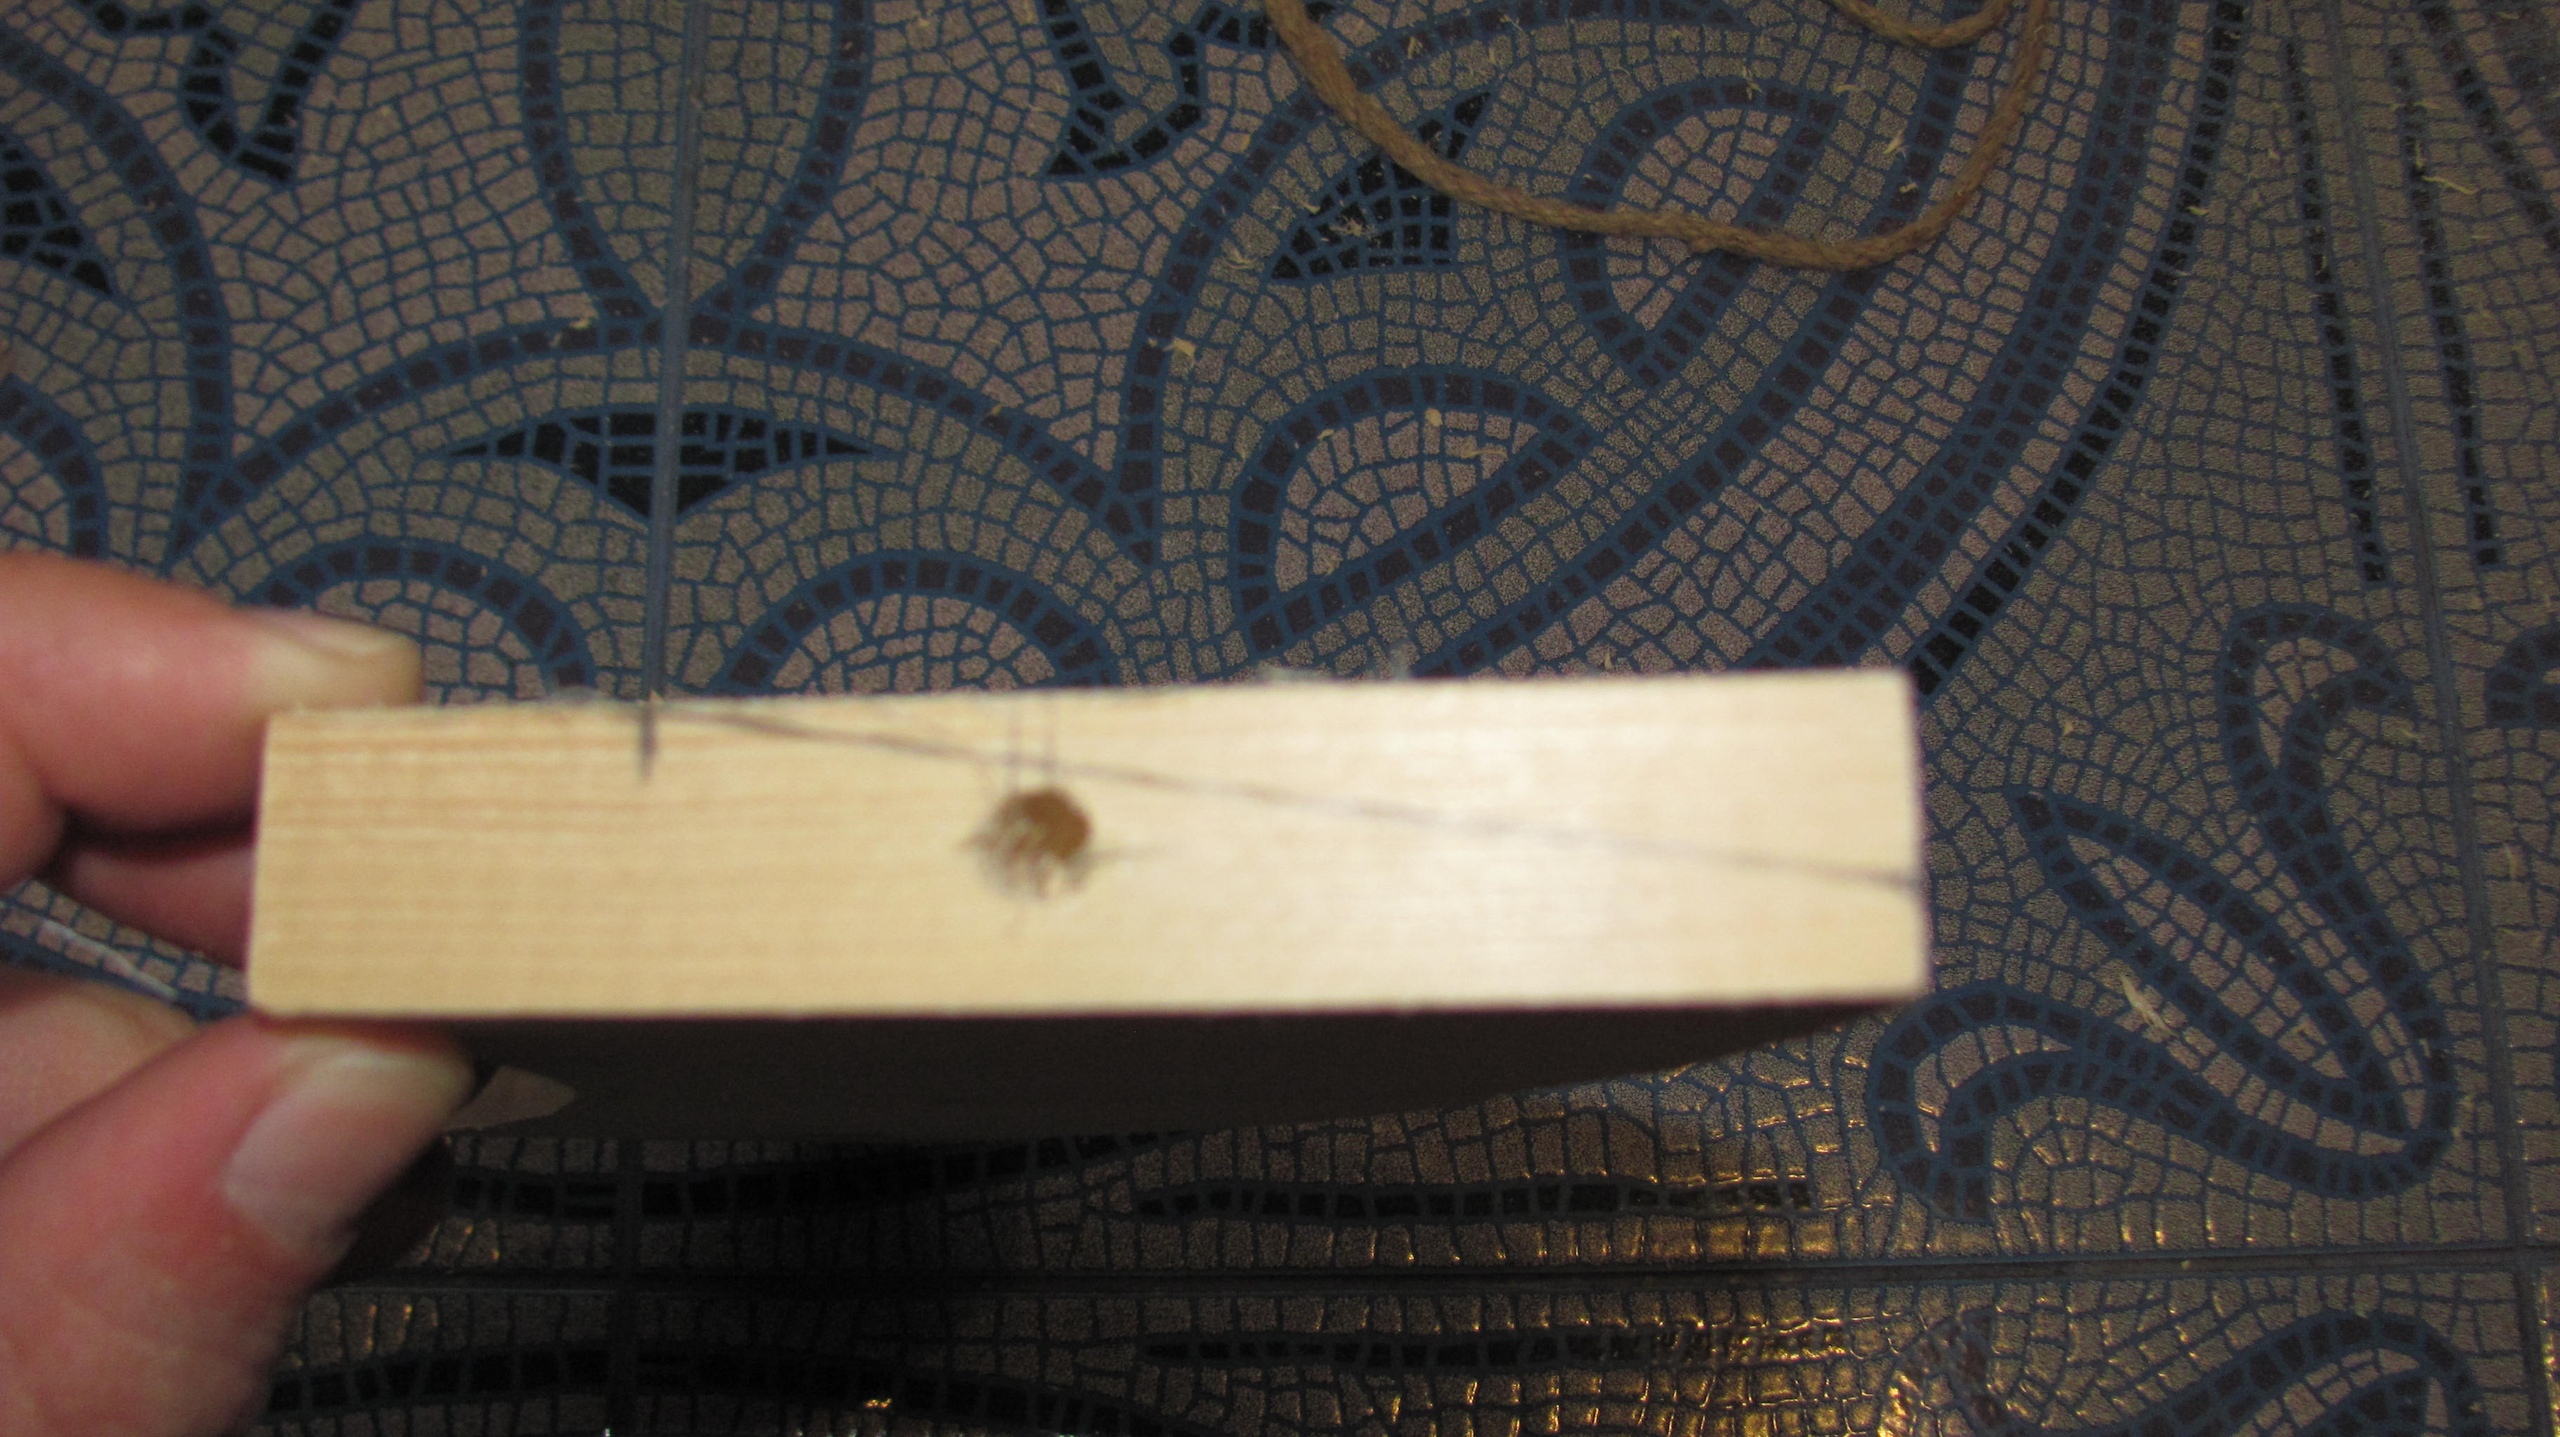
 Border of the ring overlay
 Rim width with marked ring thickness
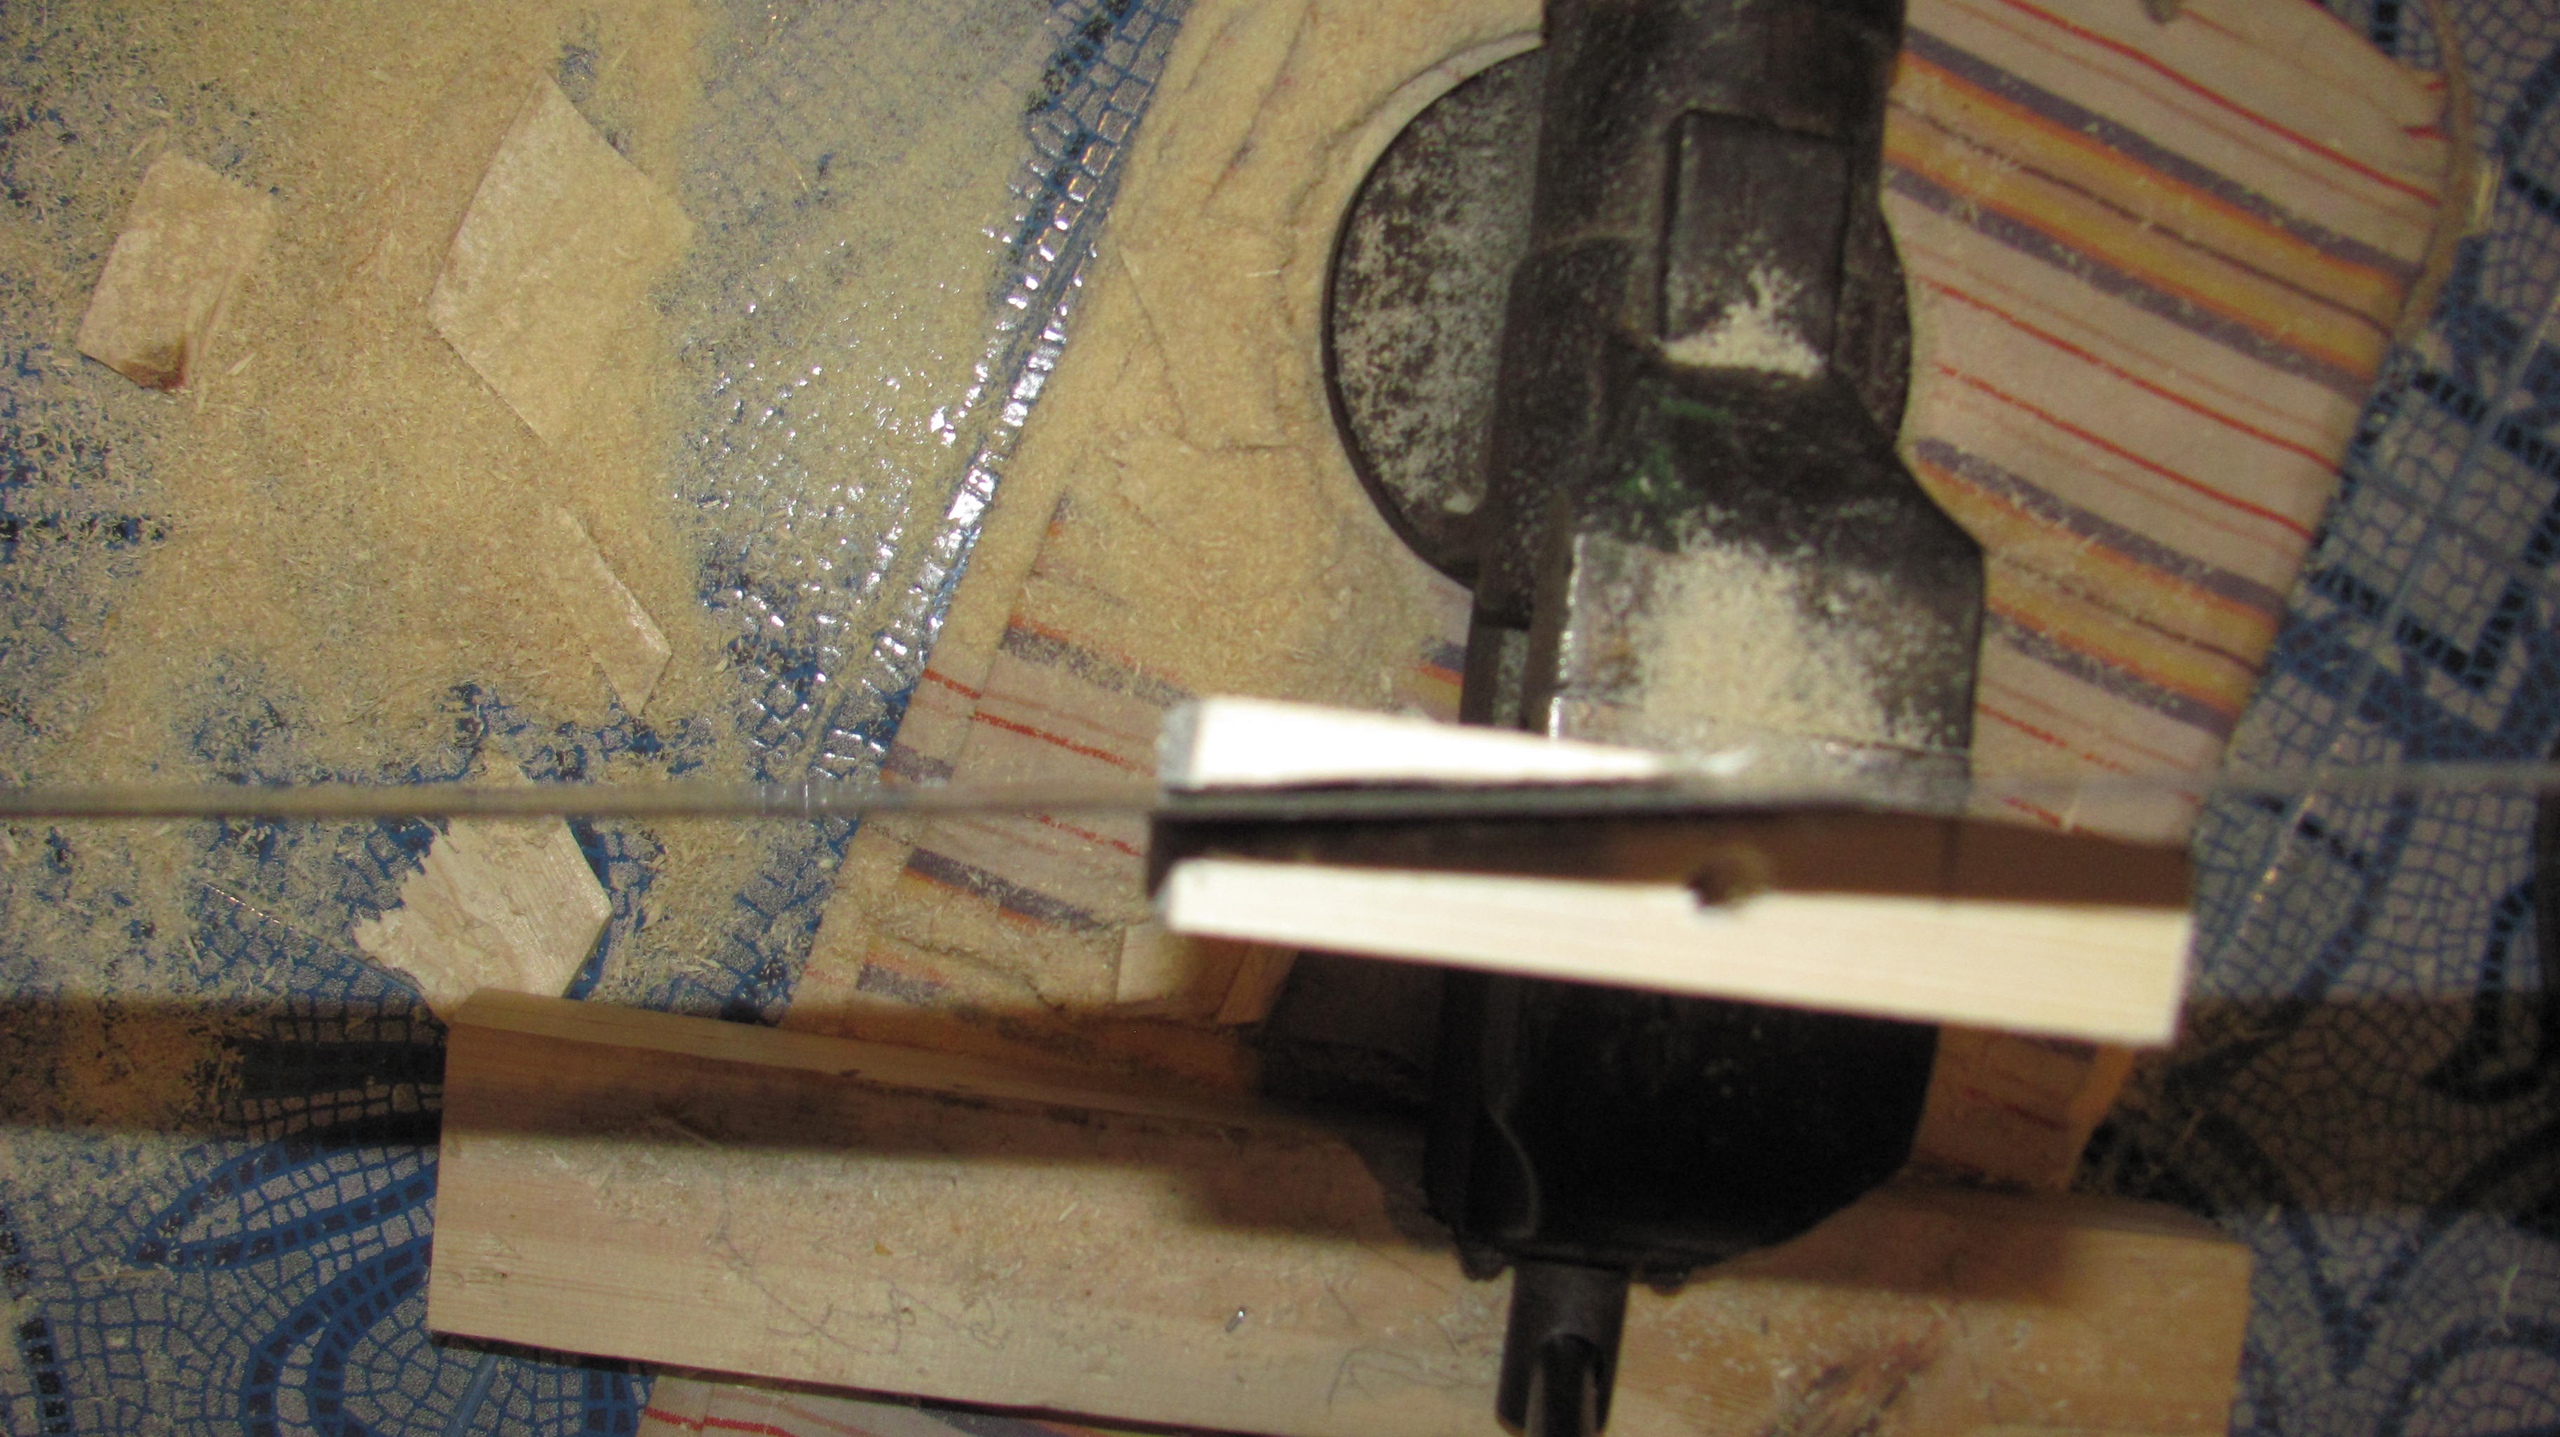 Manual work when forming the rim
 Split rim
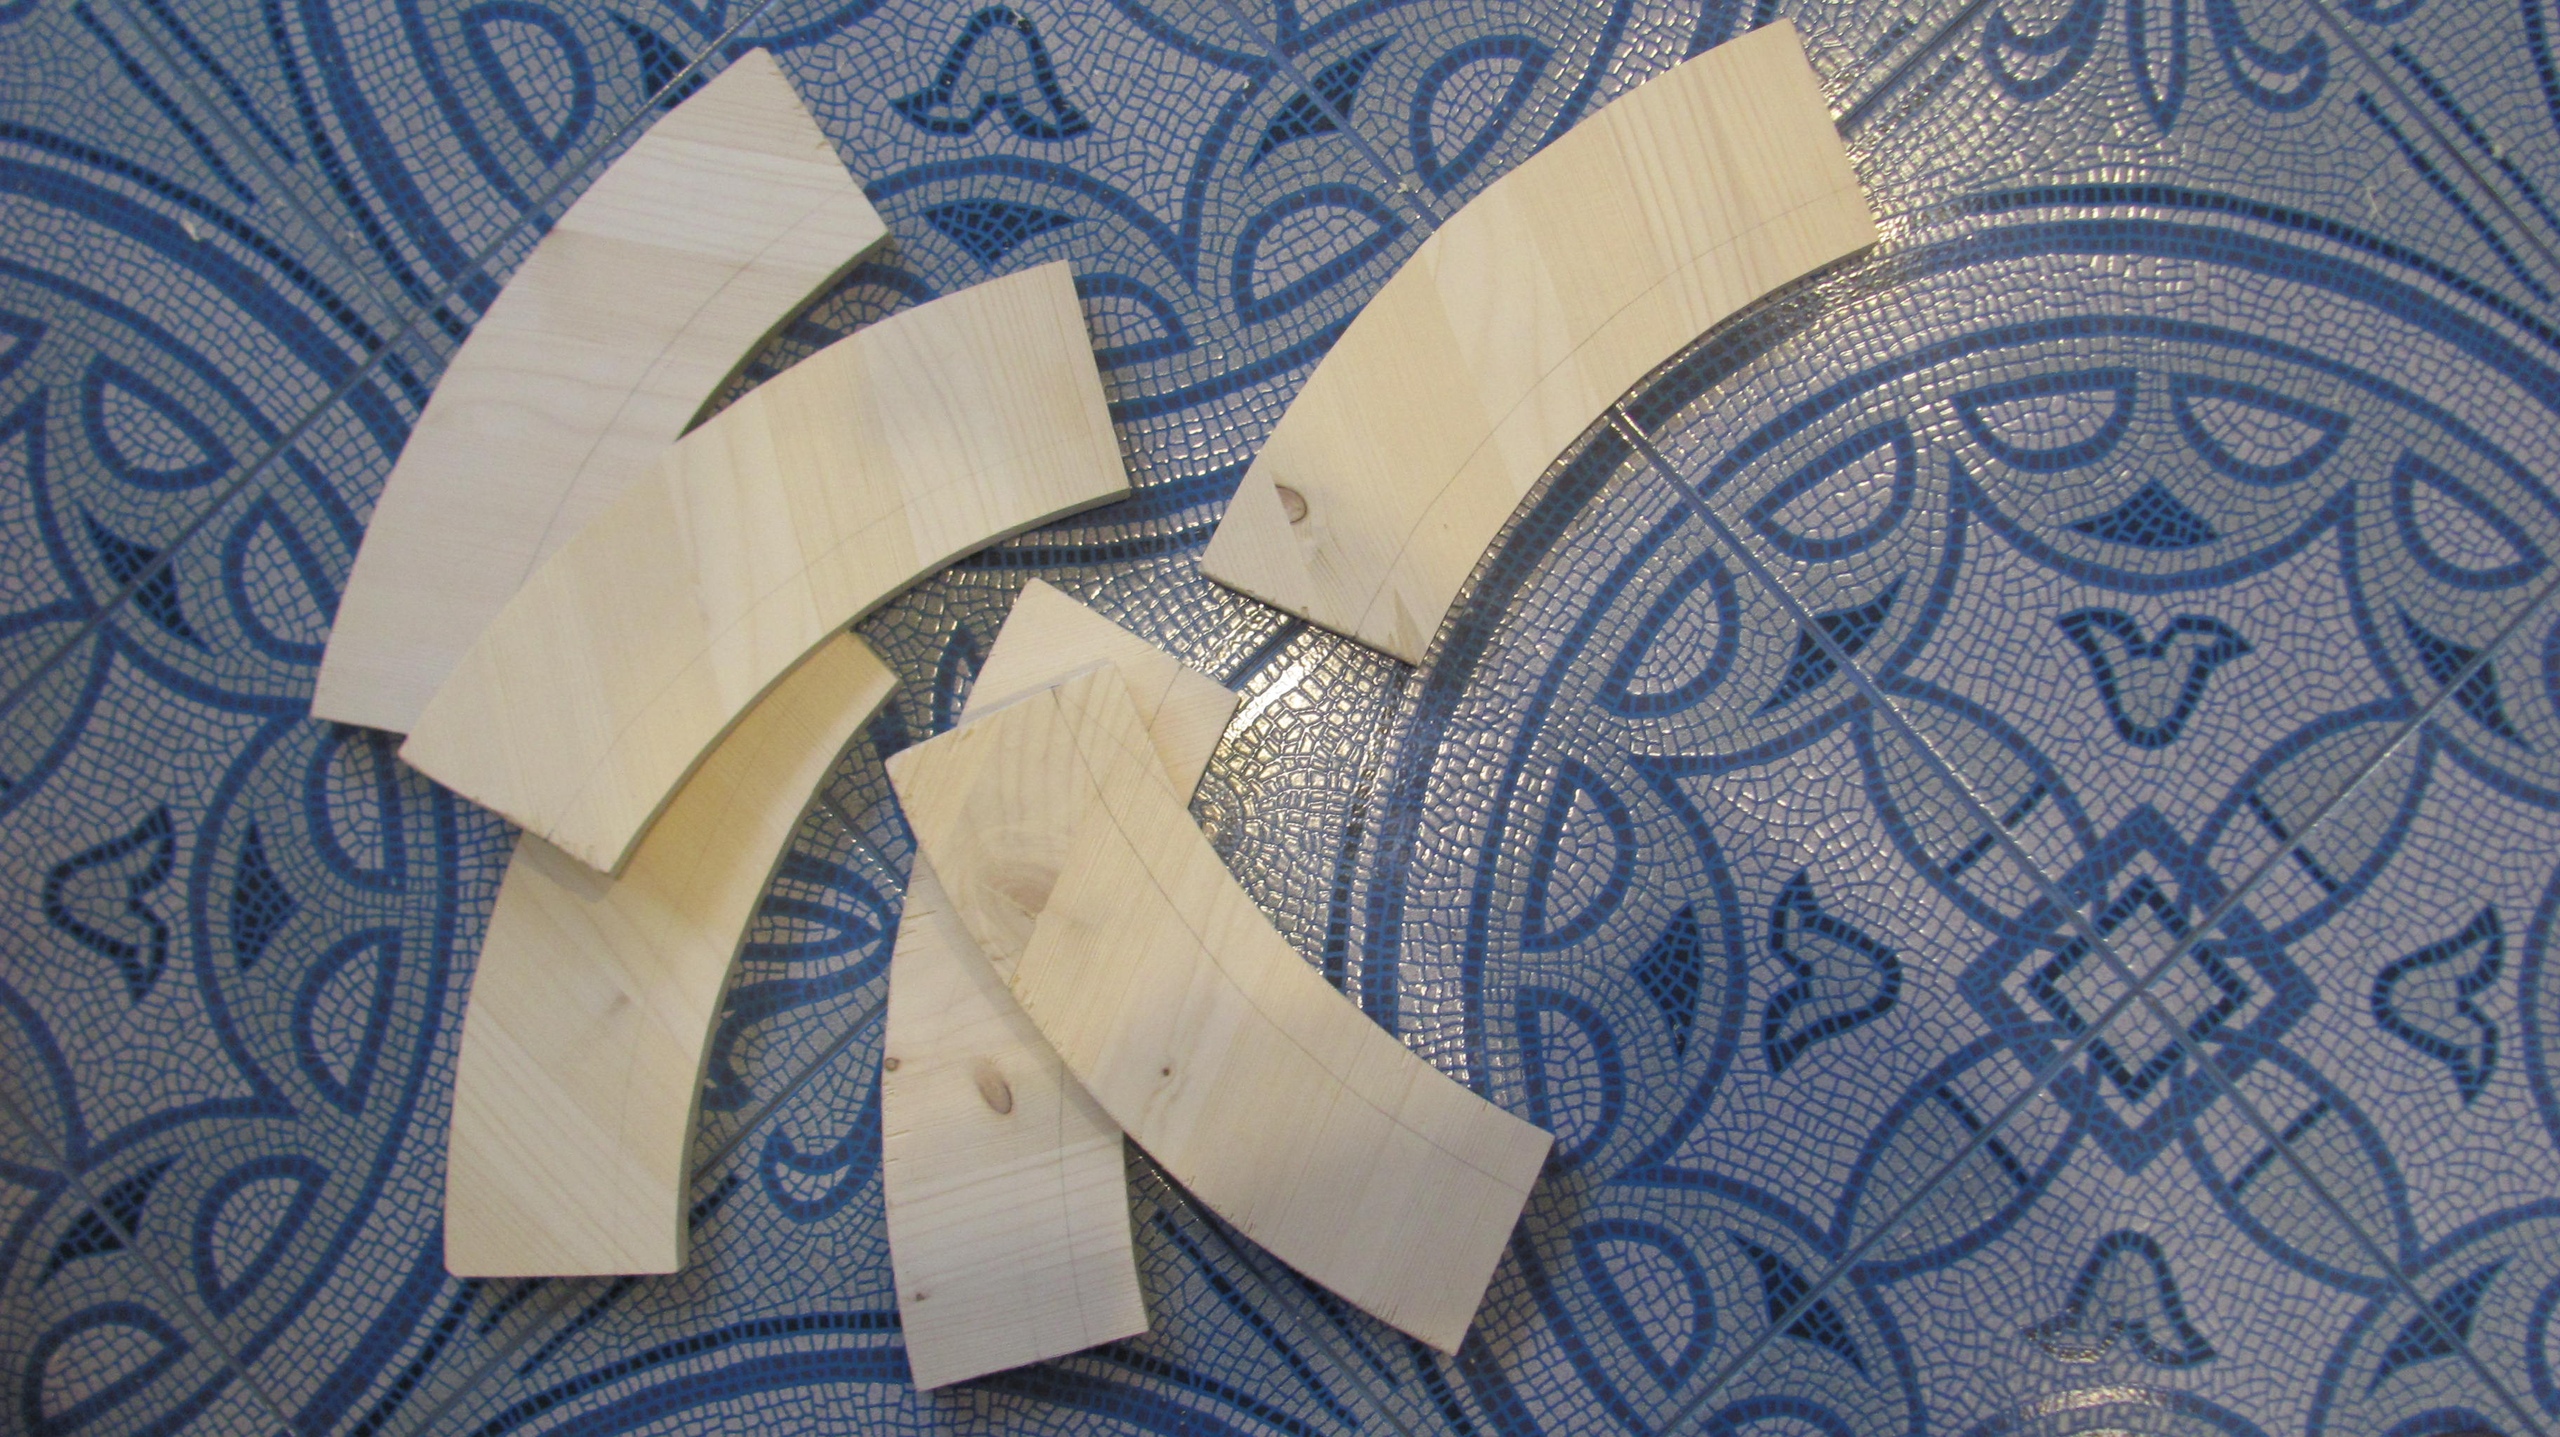 Rim Segments
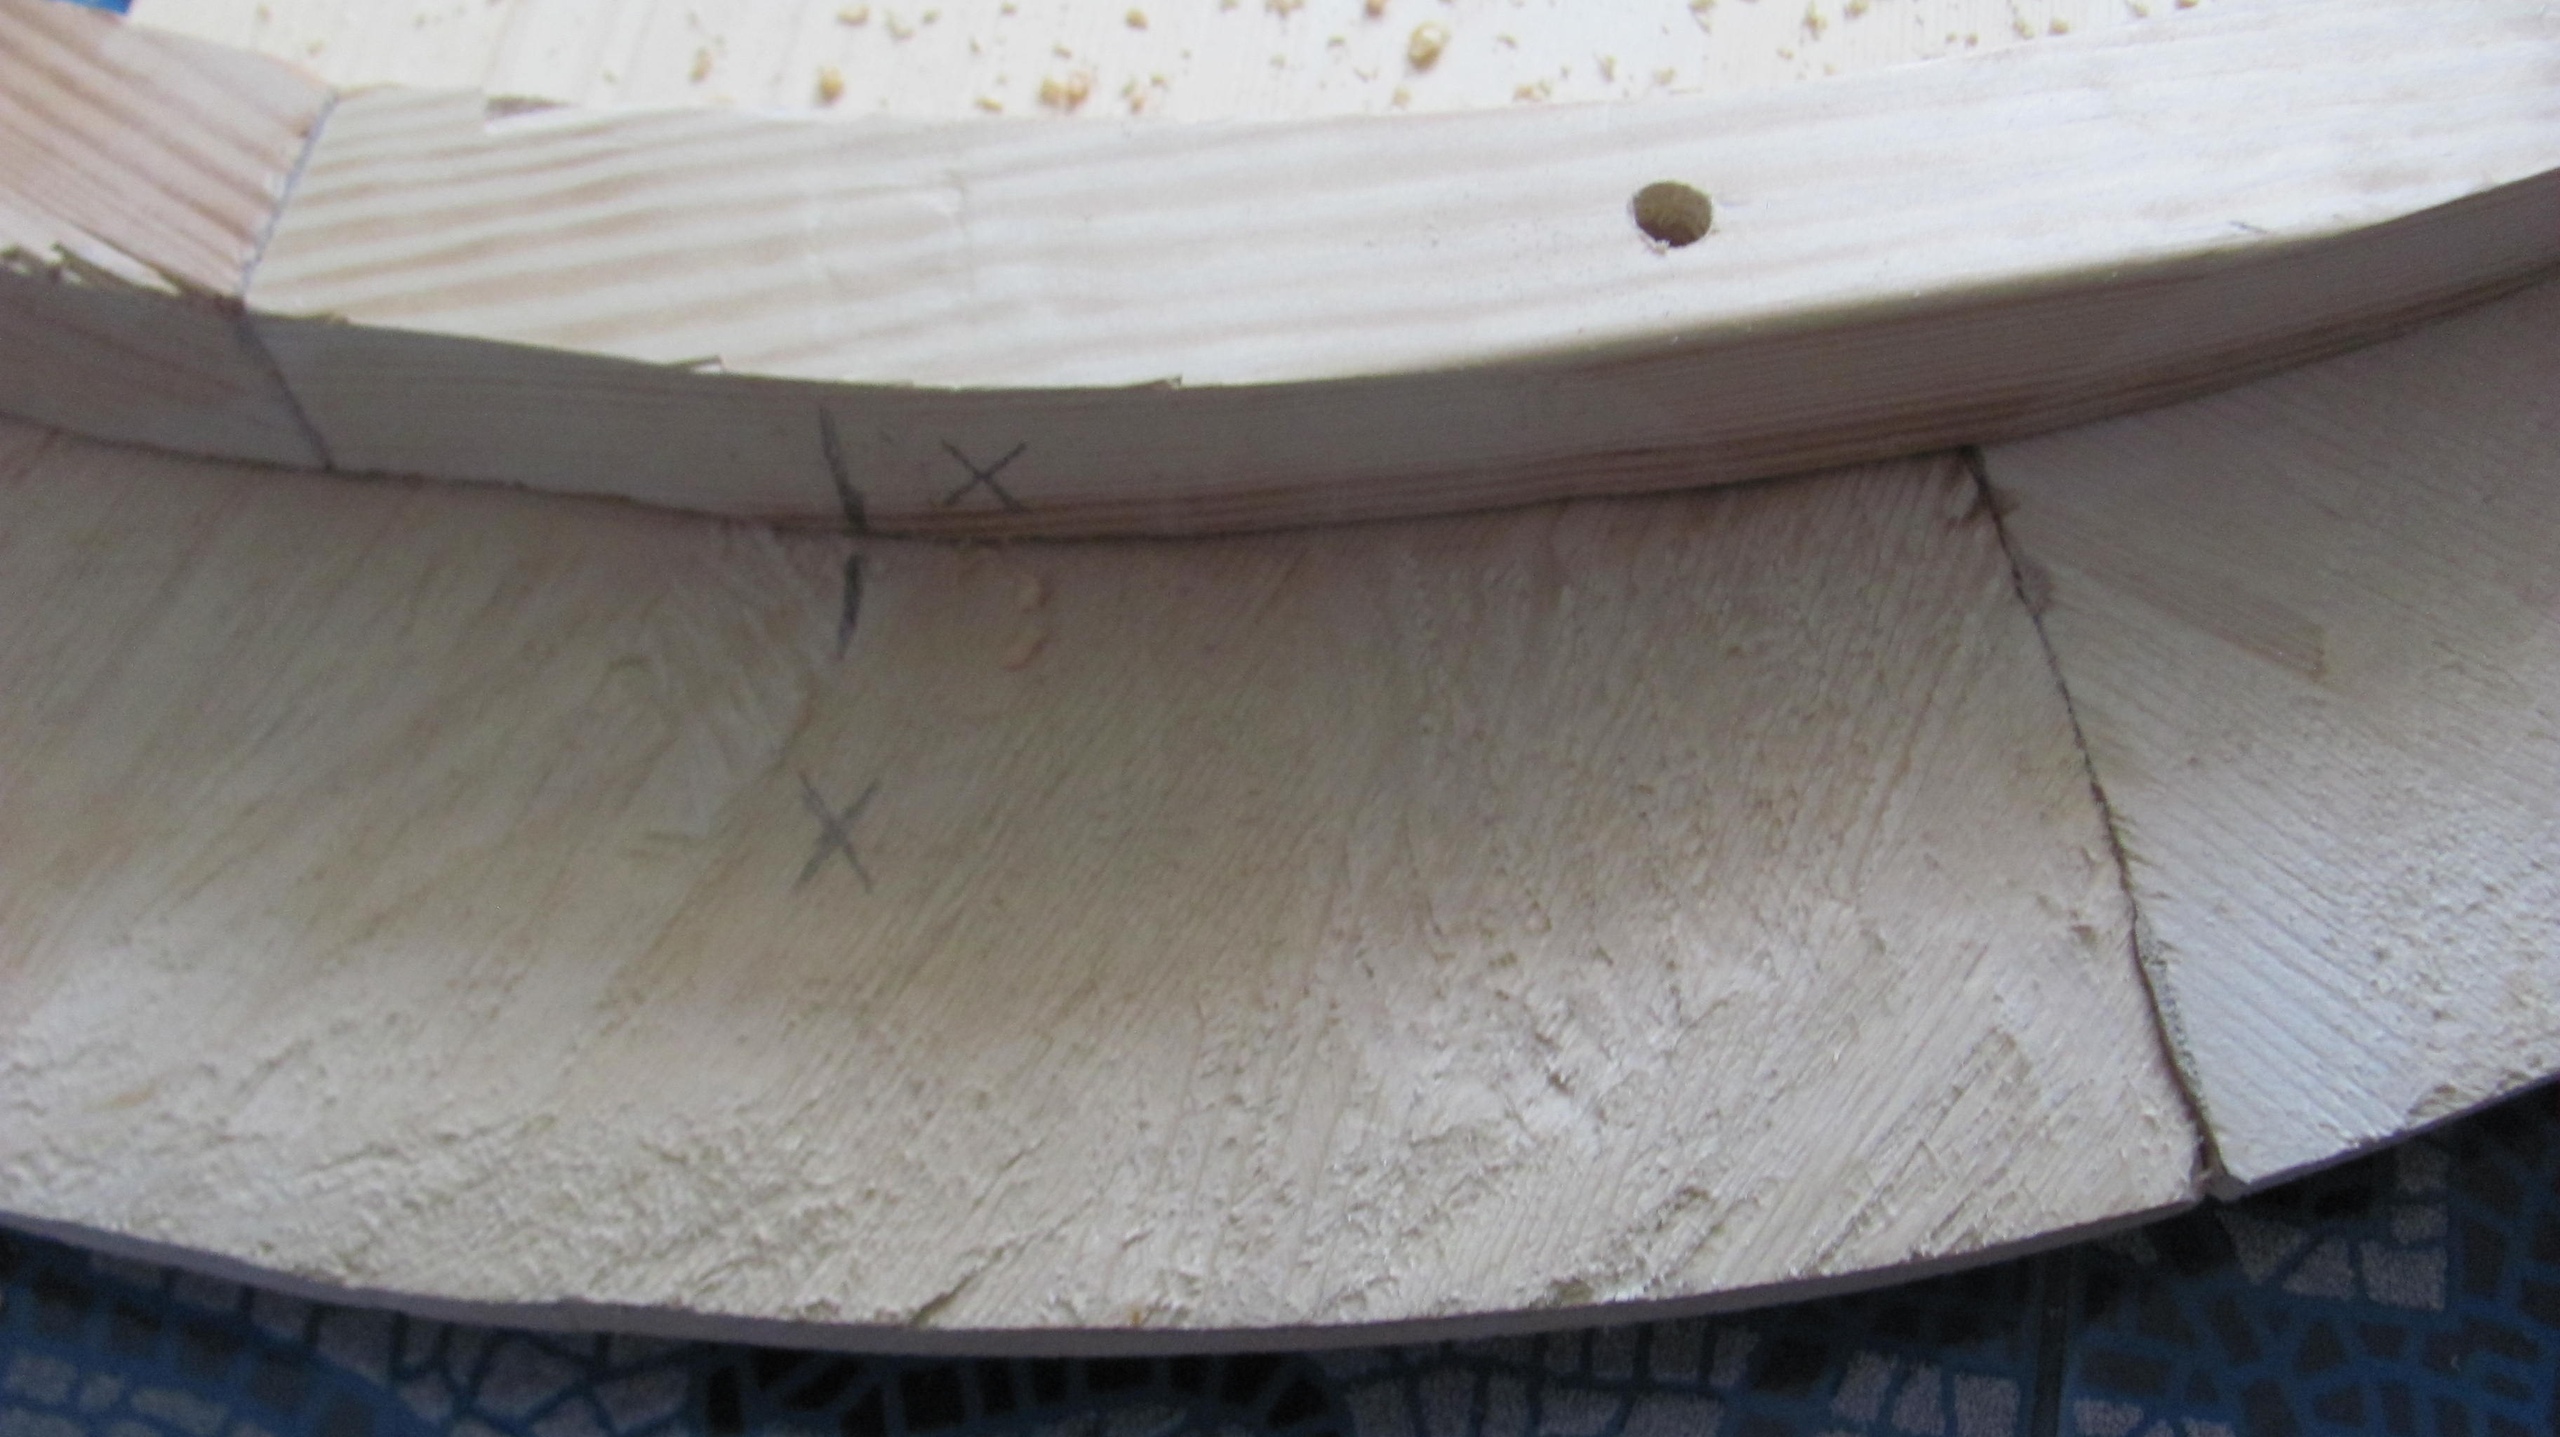
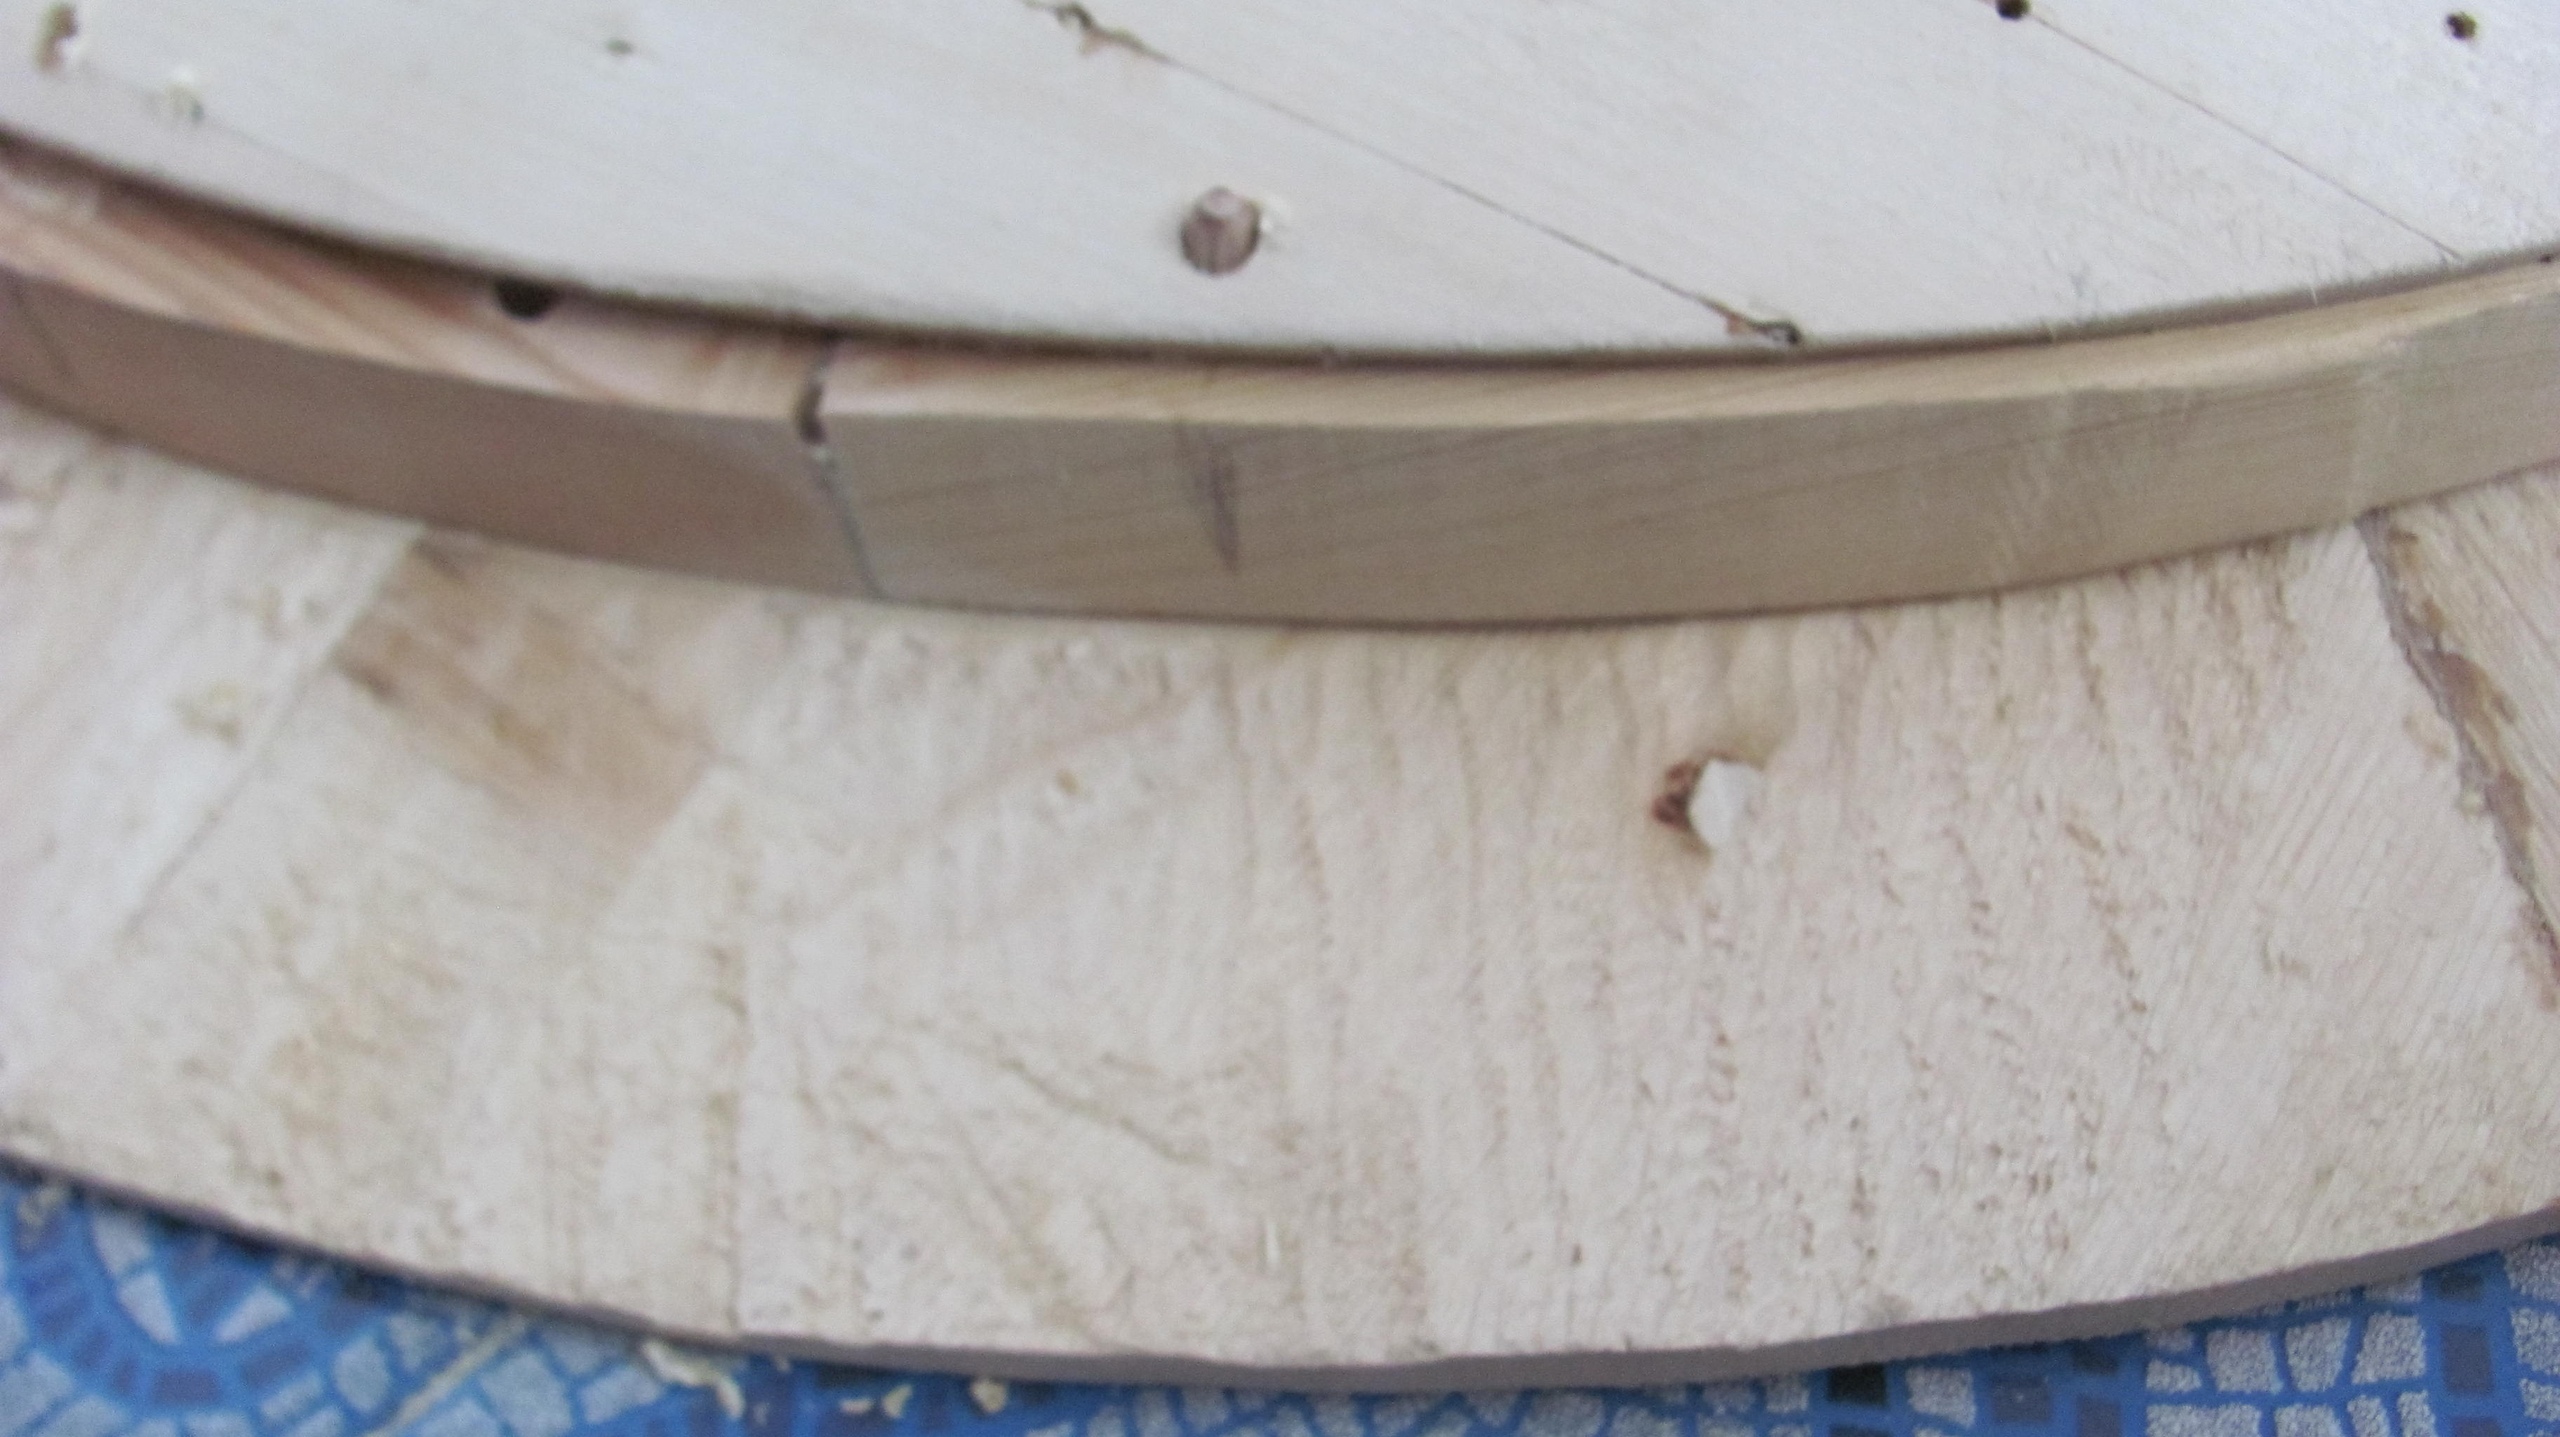
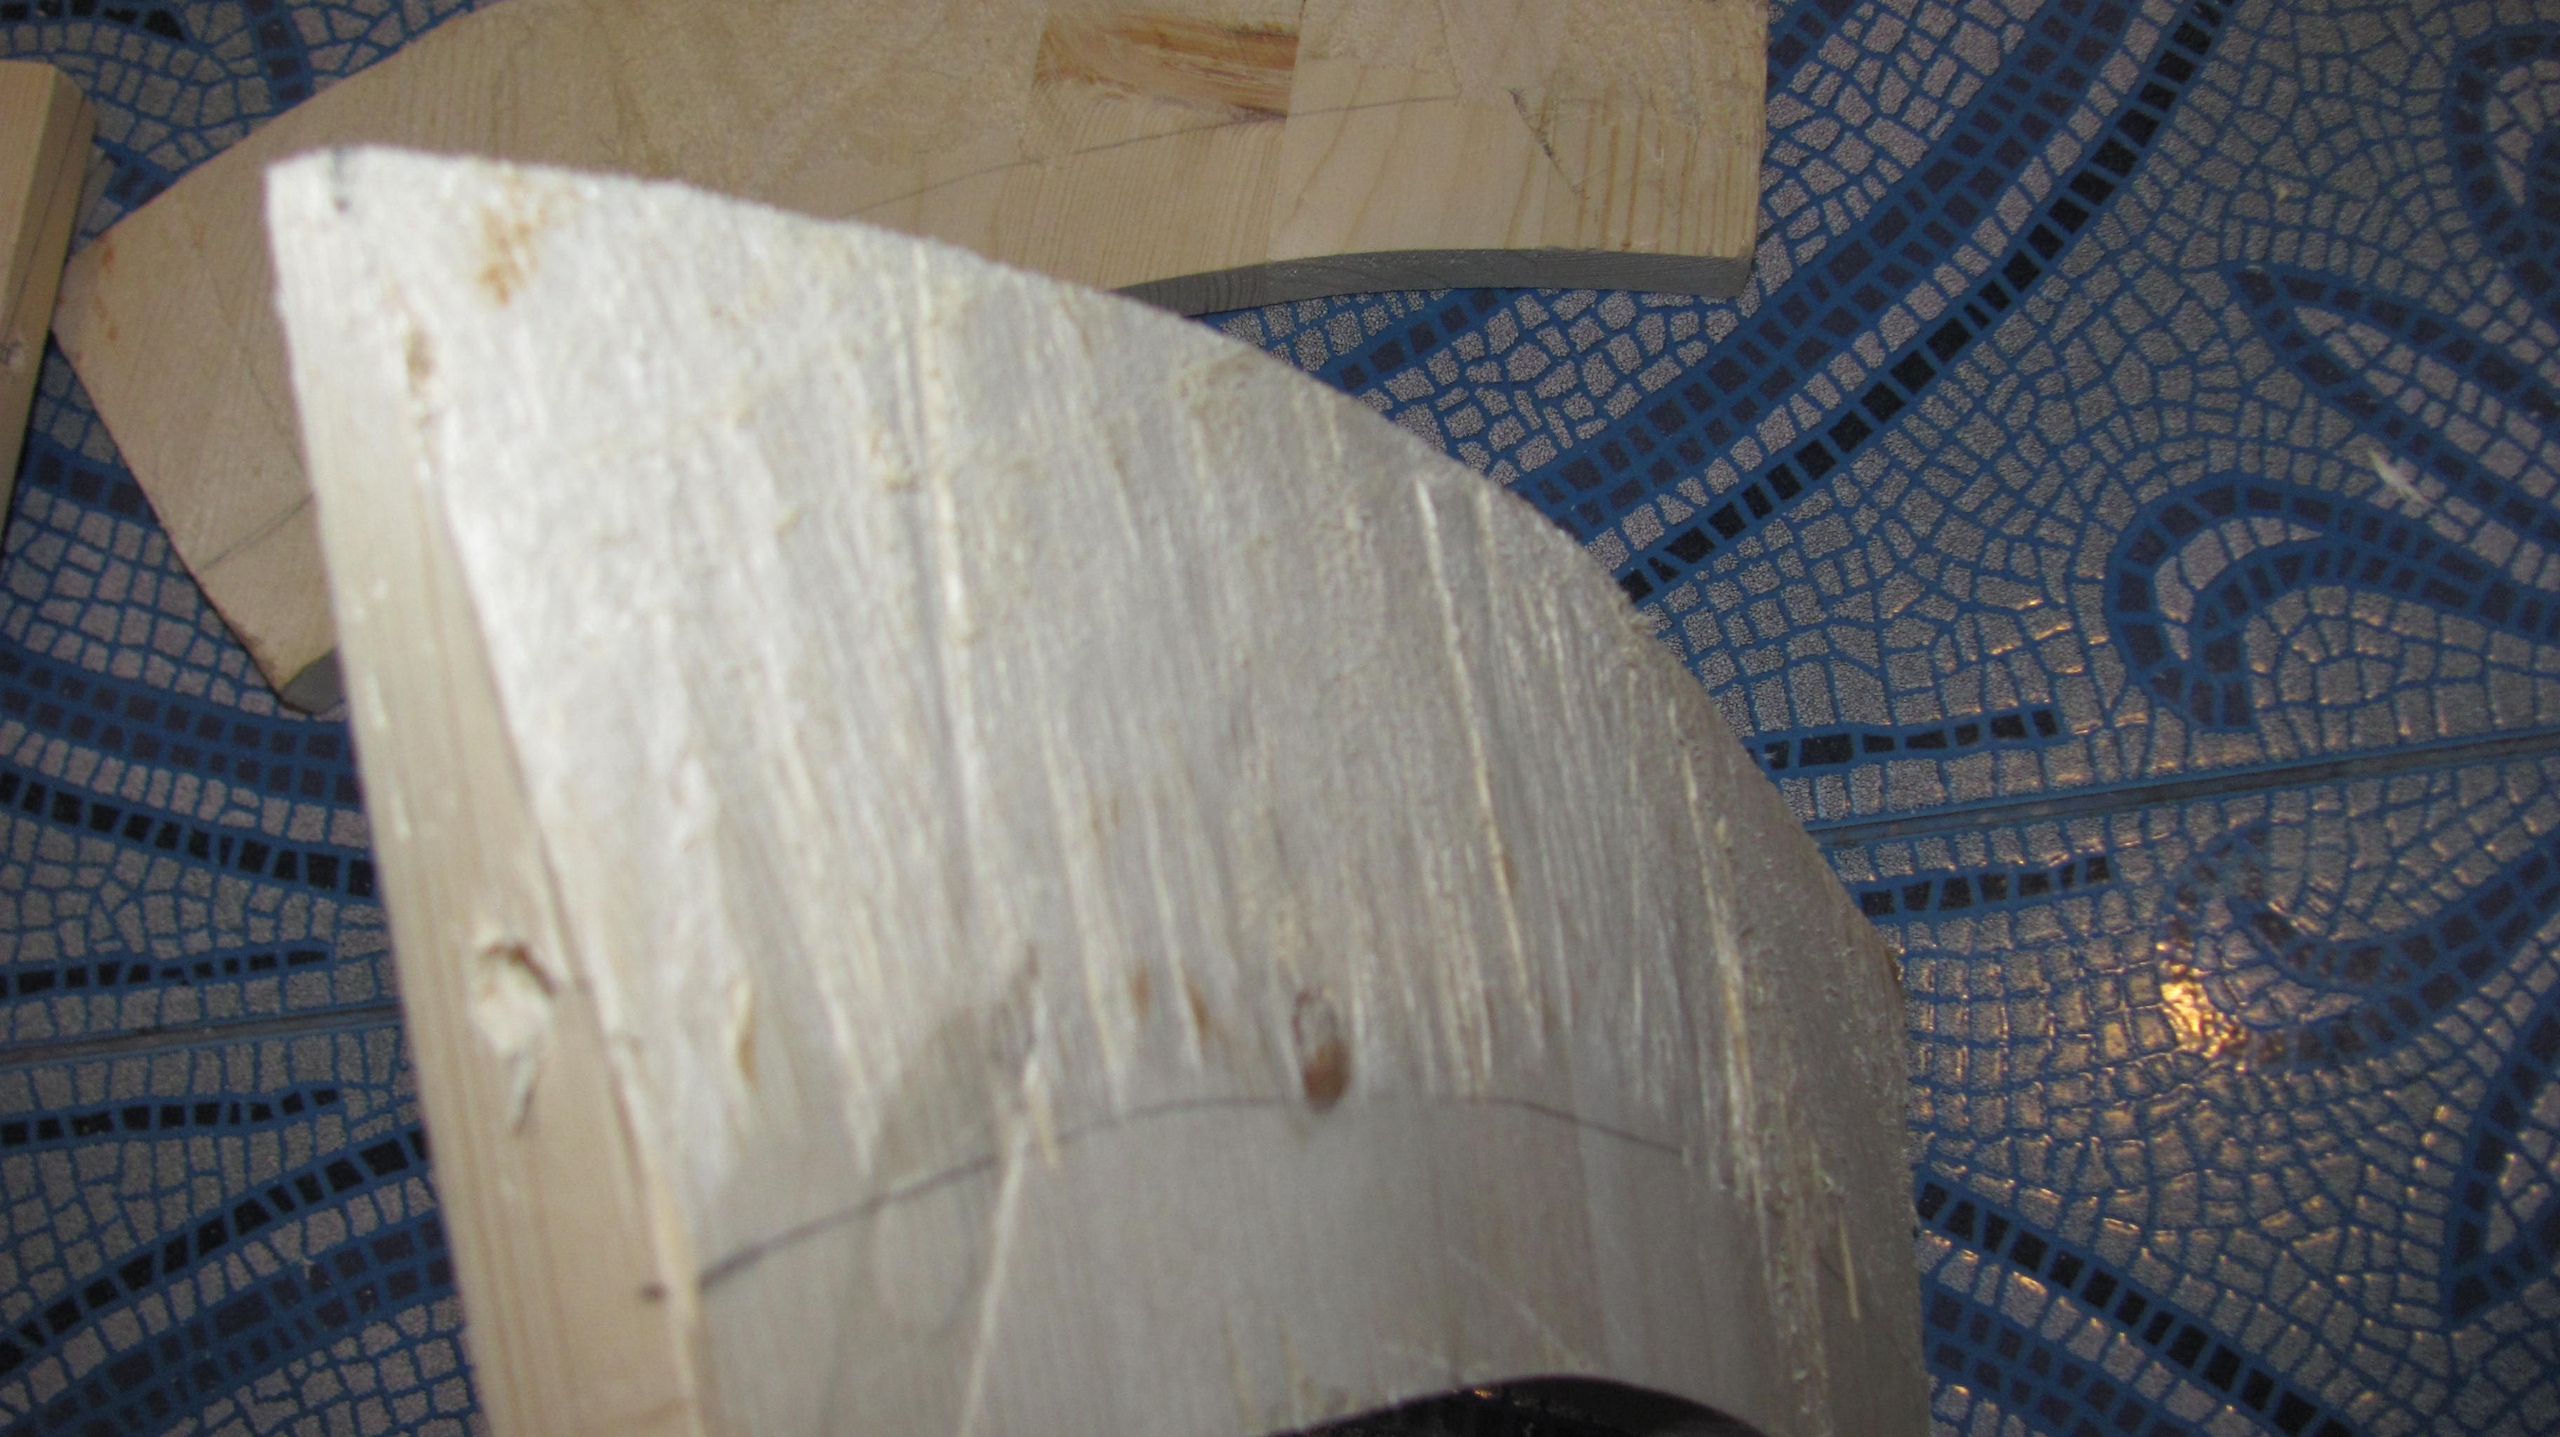
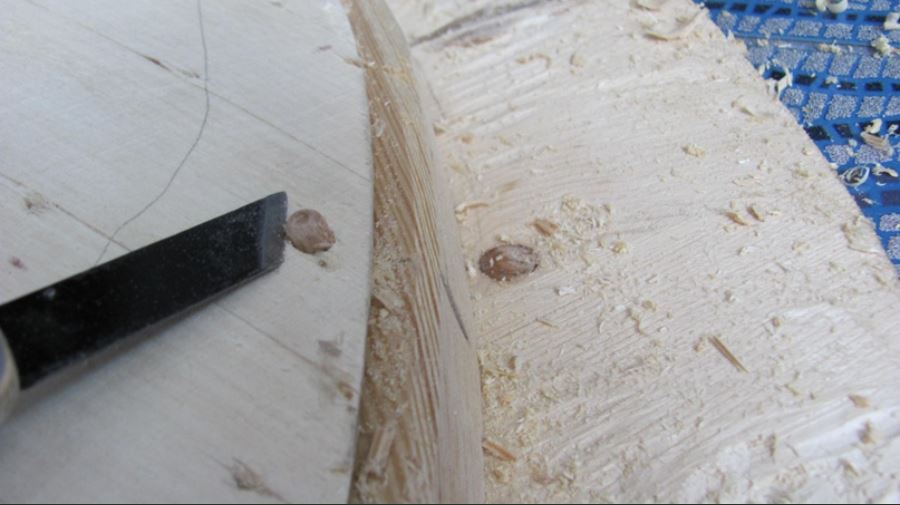
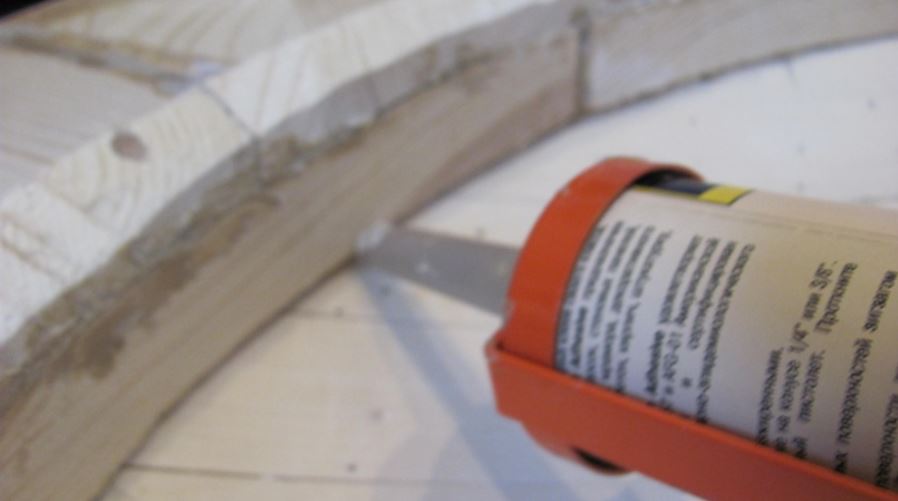
First,connect the ring to the rim. In order not to calculate and not to connect the holes with each other,we put the ring down,the rim on it,so that the flat part is on top,and drill holes for the nagels through the rim,going to the desired depth in the ring. We connect everything to the glue,not forgetting to squeeze out a drop and into the holes for the pins. Next,you need to grind off the inside corner of the rim,otherwise it will cut into the body or armor. Here you need to remove more,make a rounding of a large radius. It would be possible to remove even more,which would make the shield even easier,but there is no noticeable slope on the springs in this place,so I did not do it either. If you put the lens on a flat surface,you can see that it fits very loosely – it rests on a narrow edge that has formed naturally on its edge. If possible,this edge should be cut off with a file,but it is not necessary to make it completely flat. The rim edge should be slightly rounded with a file,both from the inside and from the outside. This is convenient to do even before connecting to the lens.
 Rounding the radius
 Rounding the rim edge
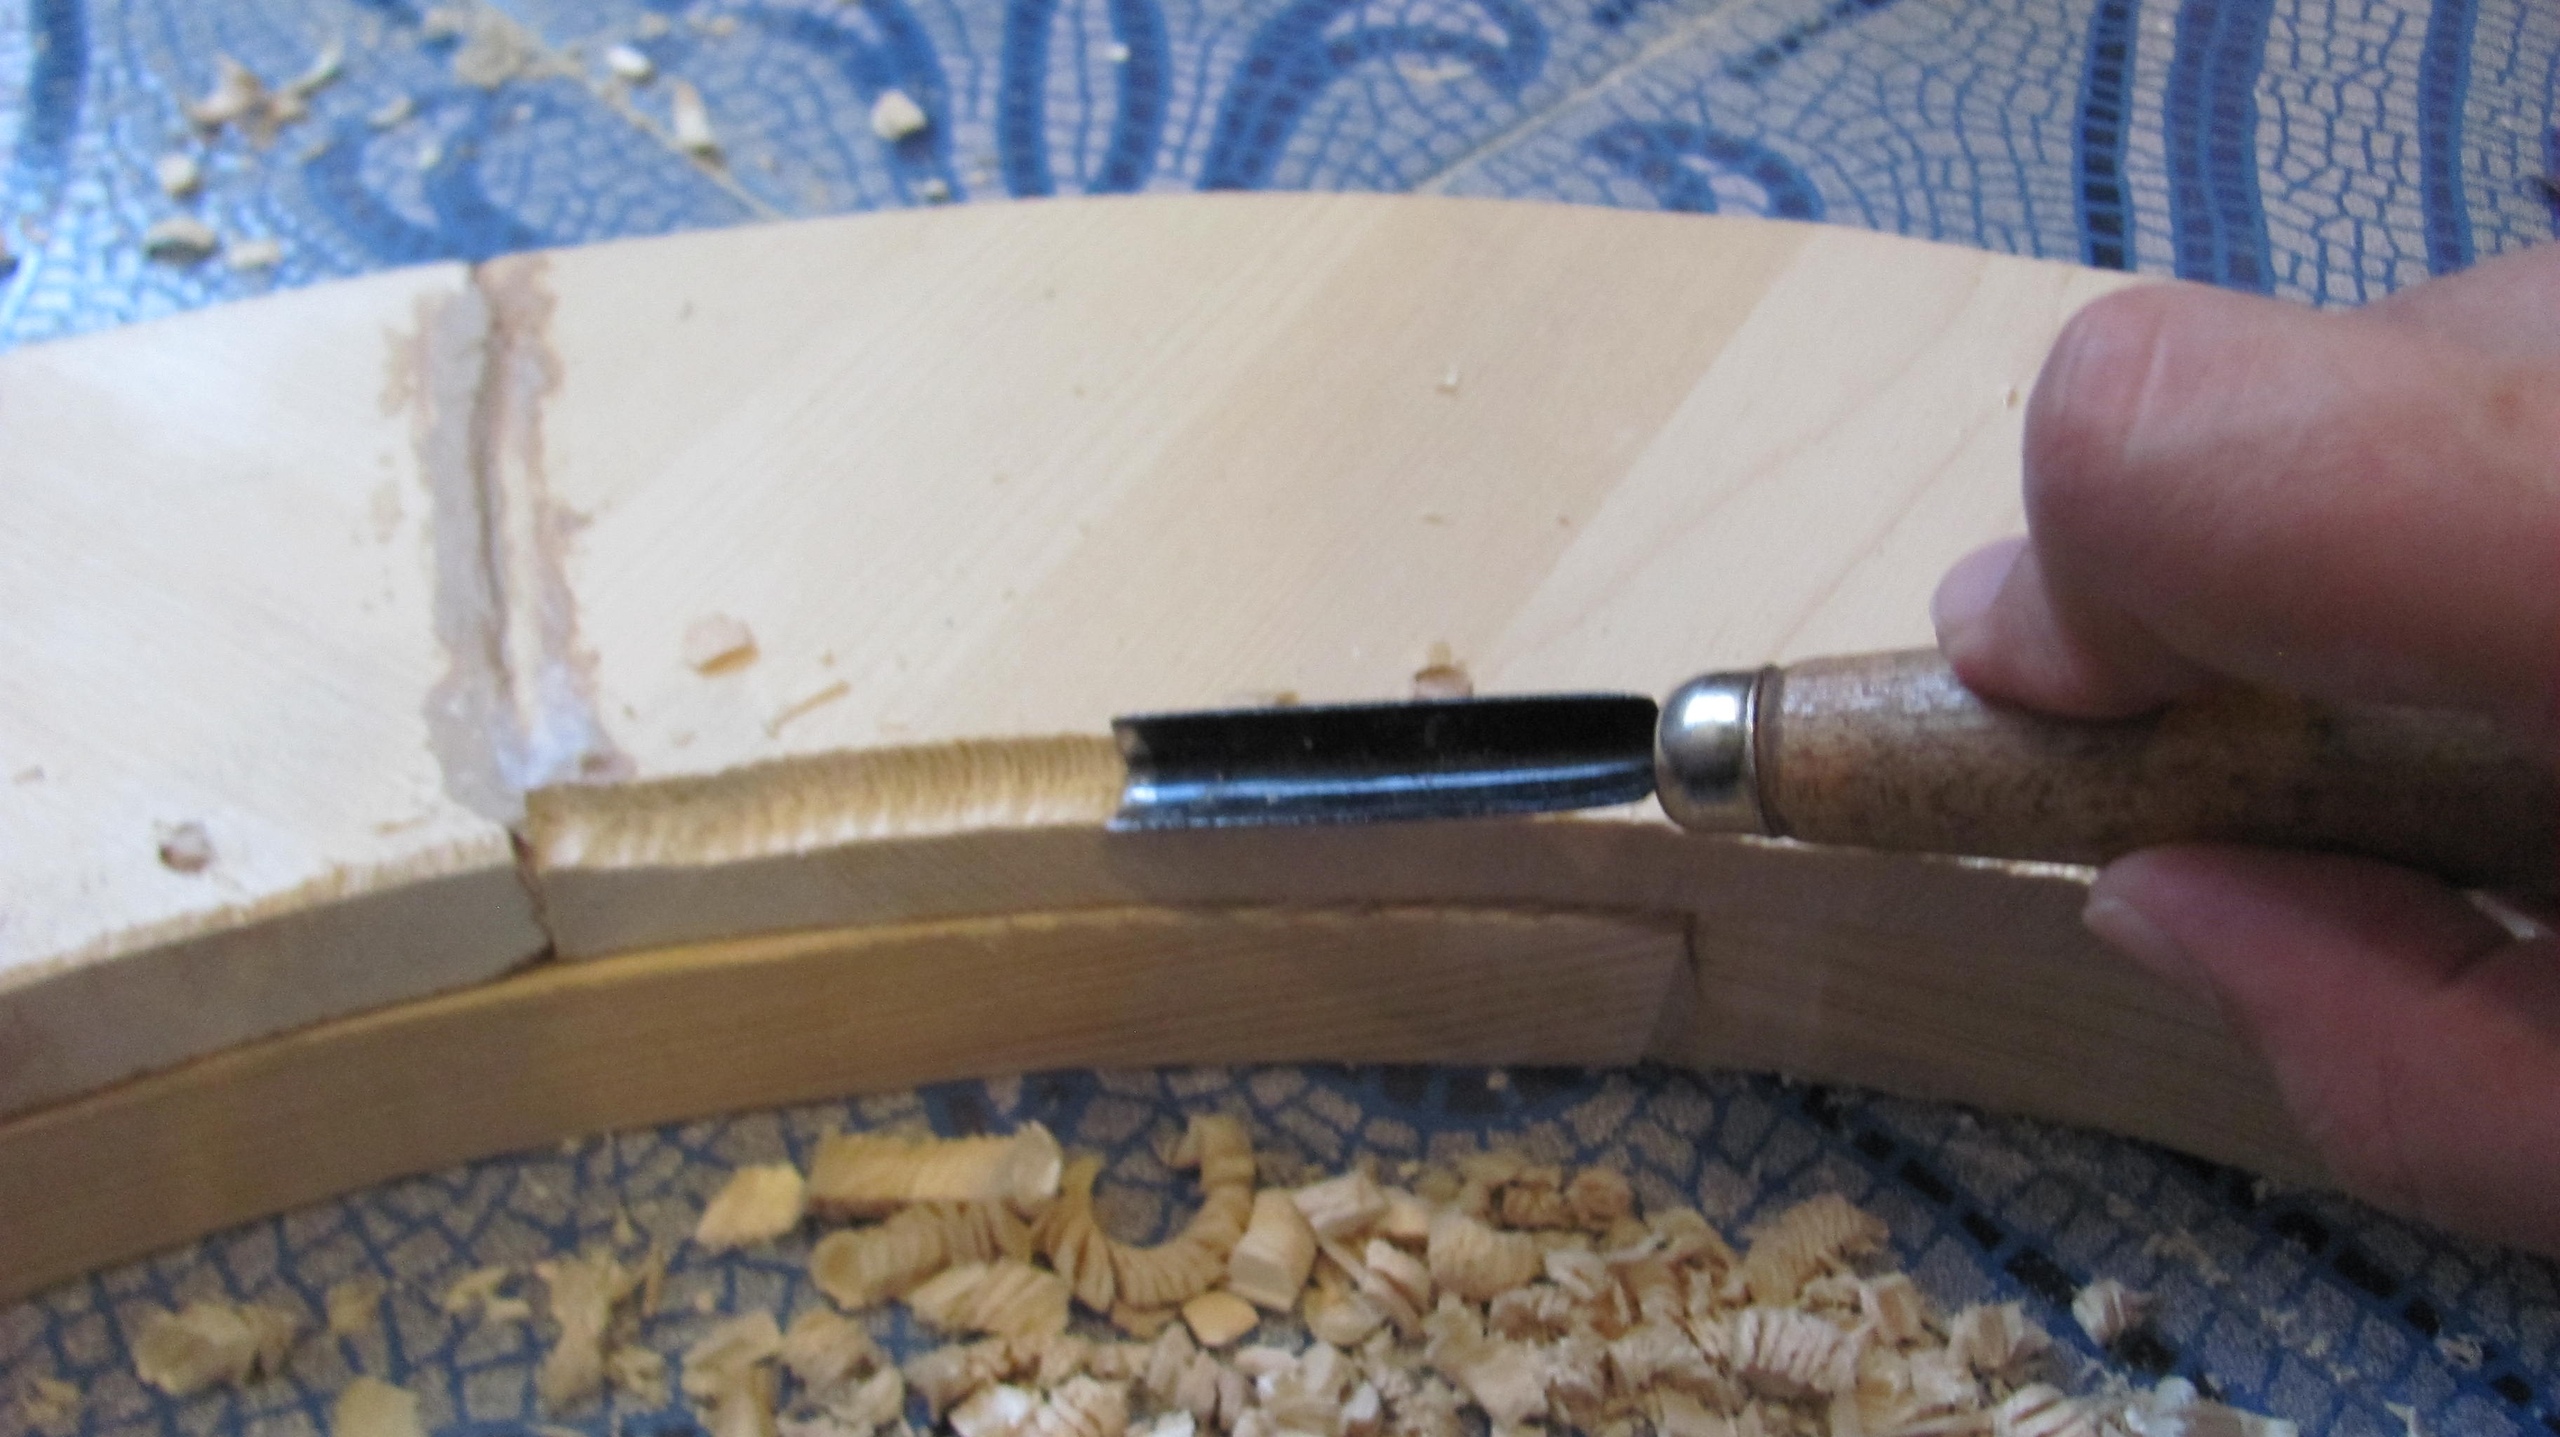 We grind off the rim corner
 Matching the rim with the ring
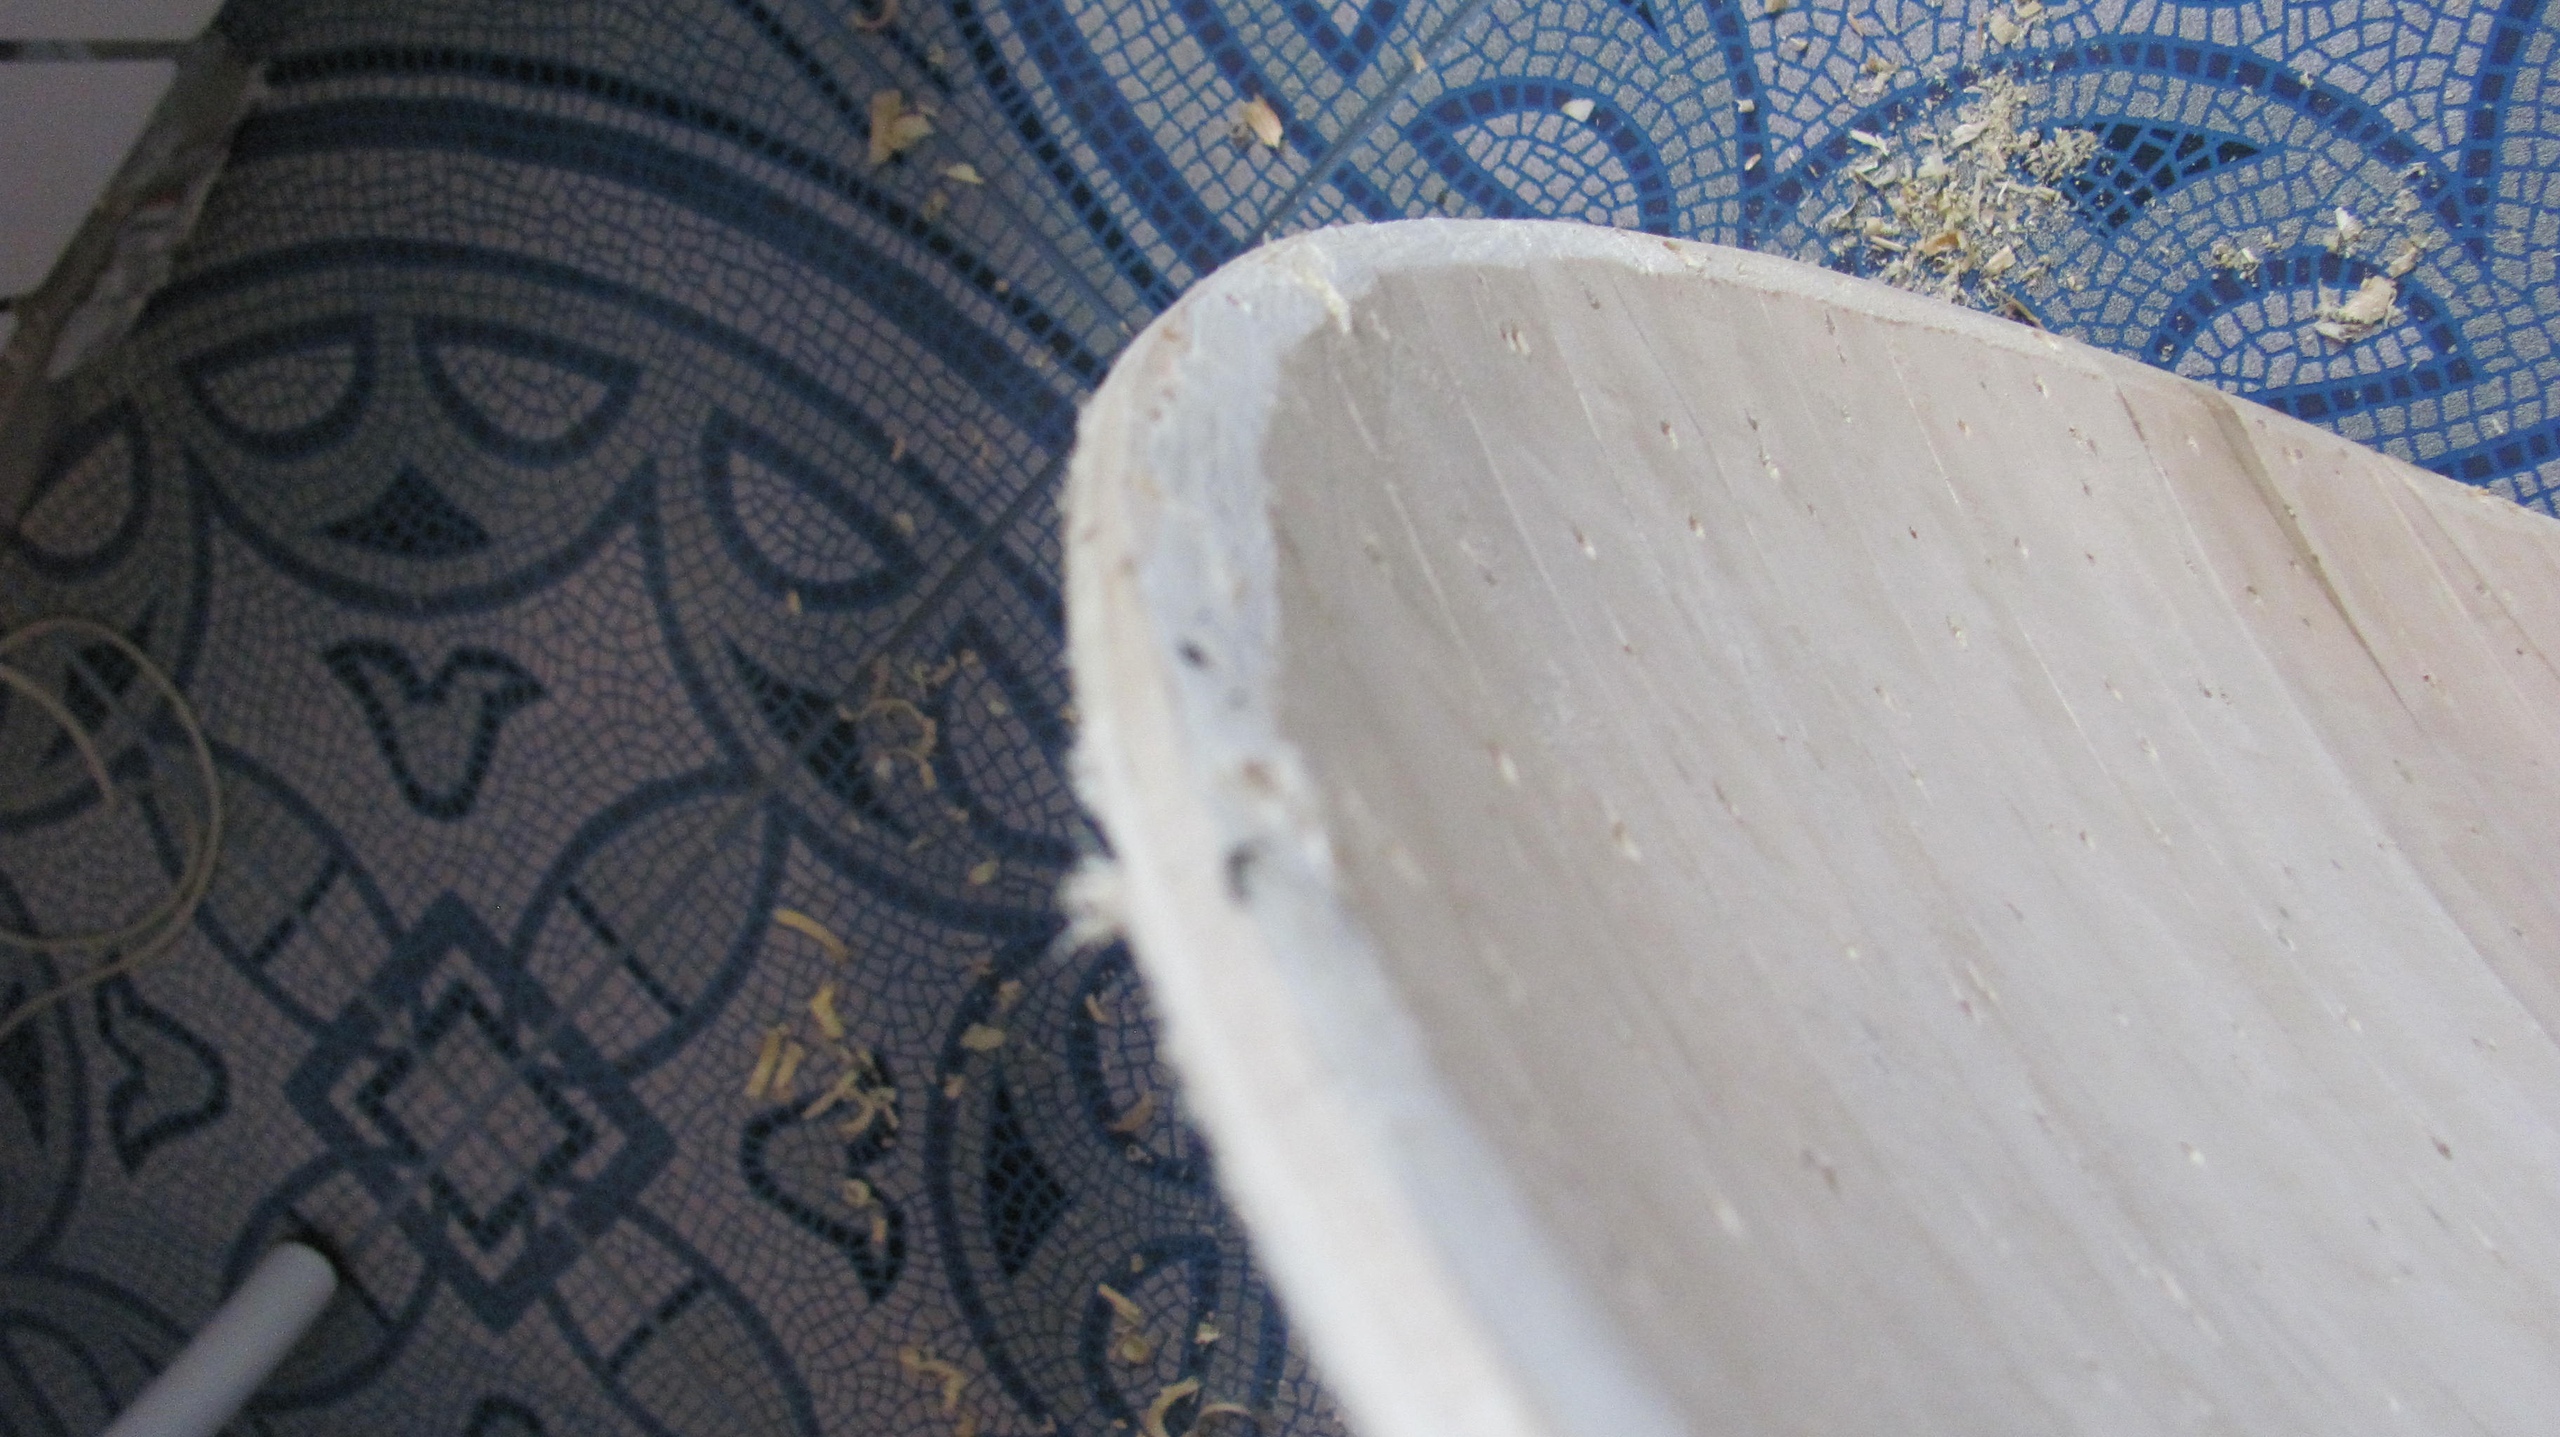 Worn-out rib
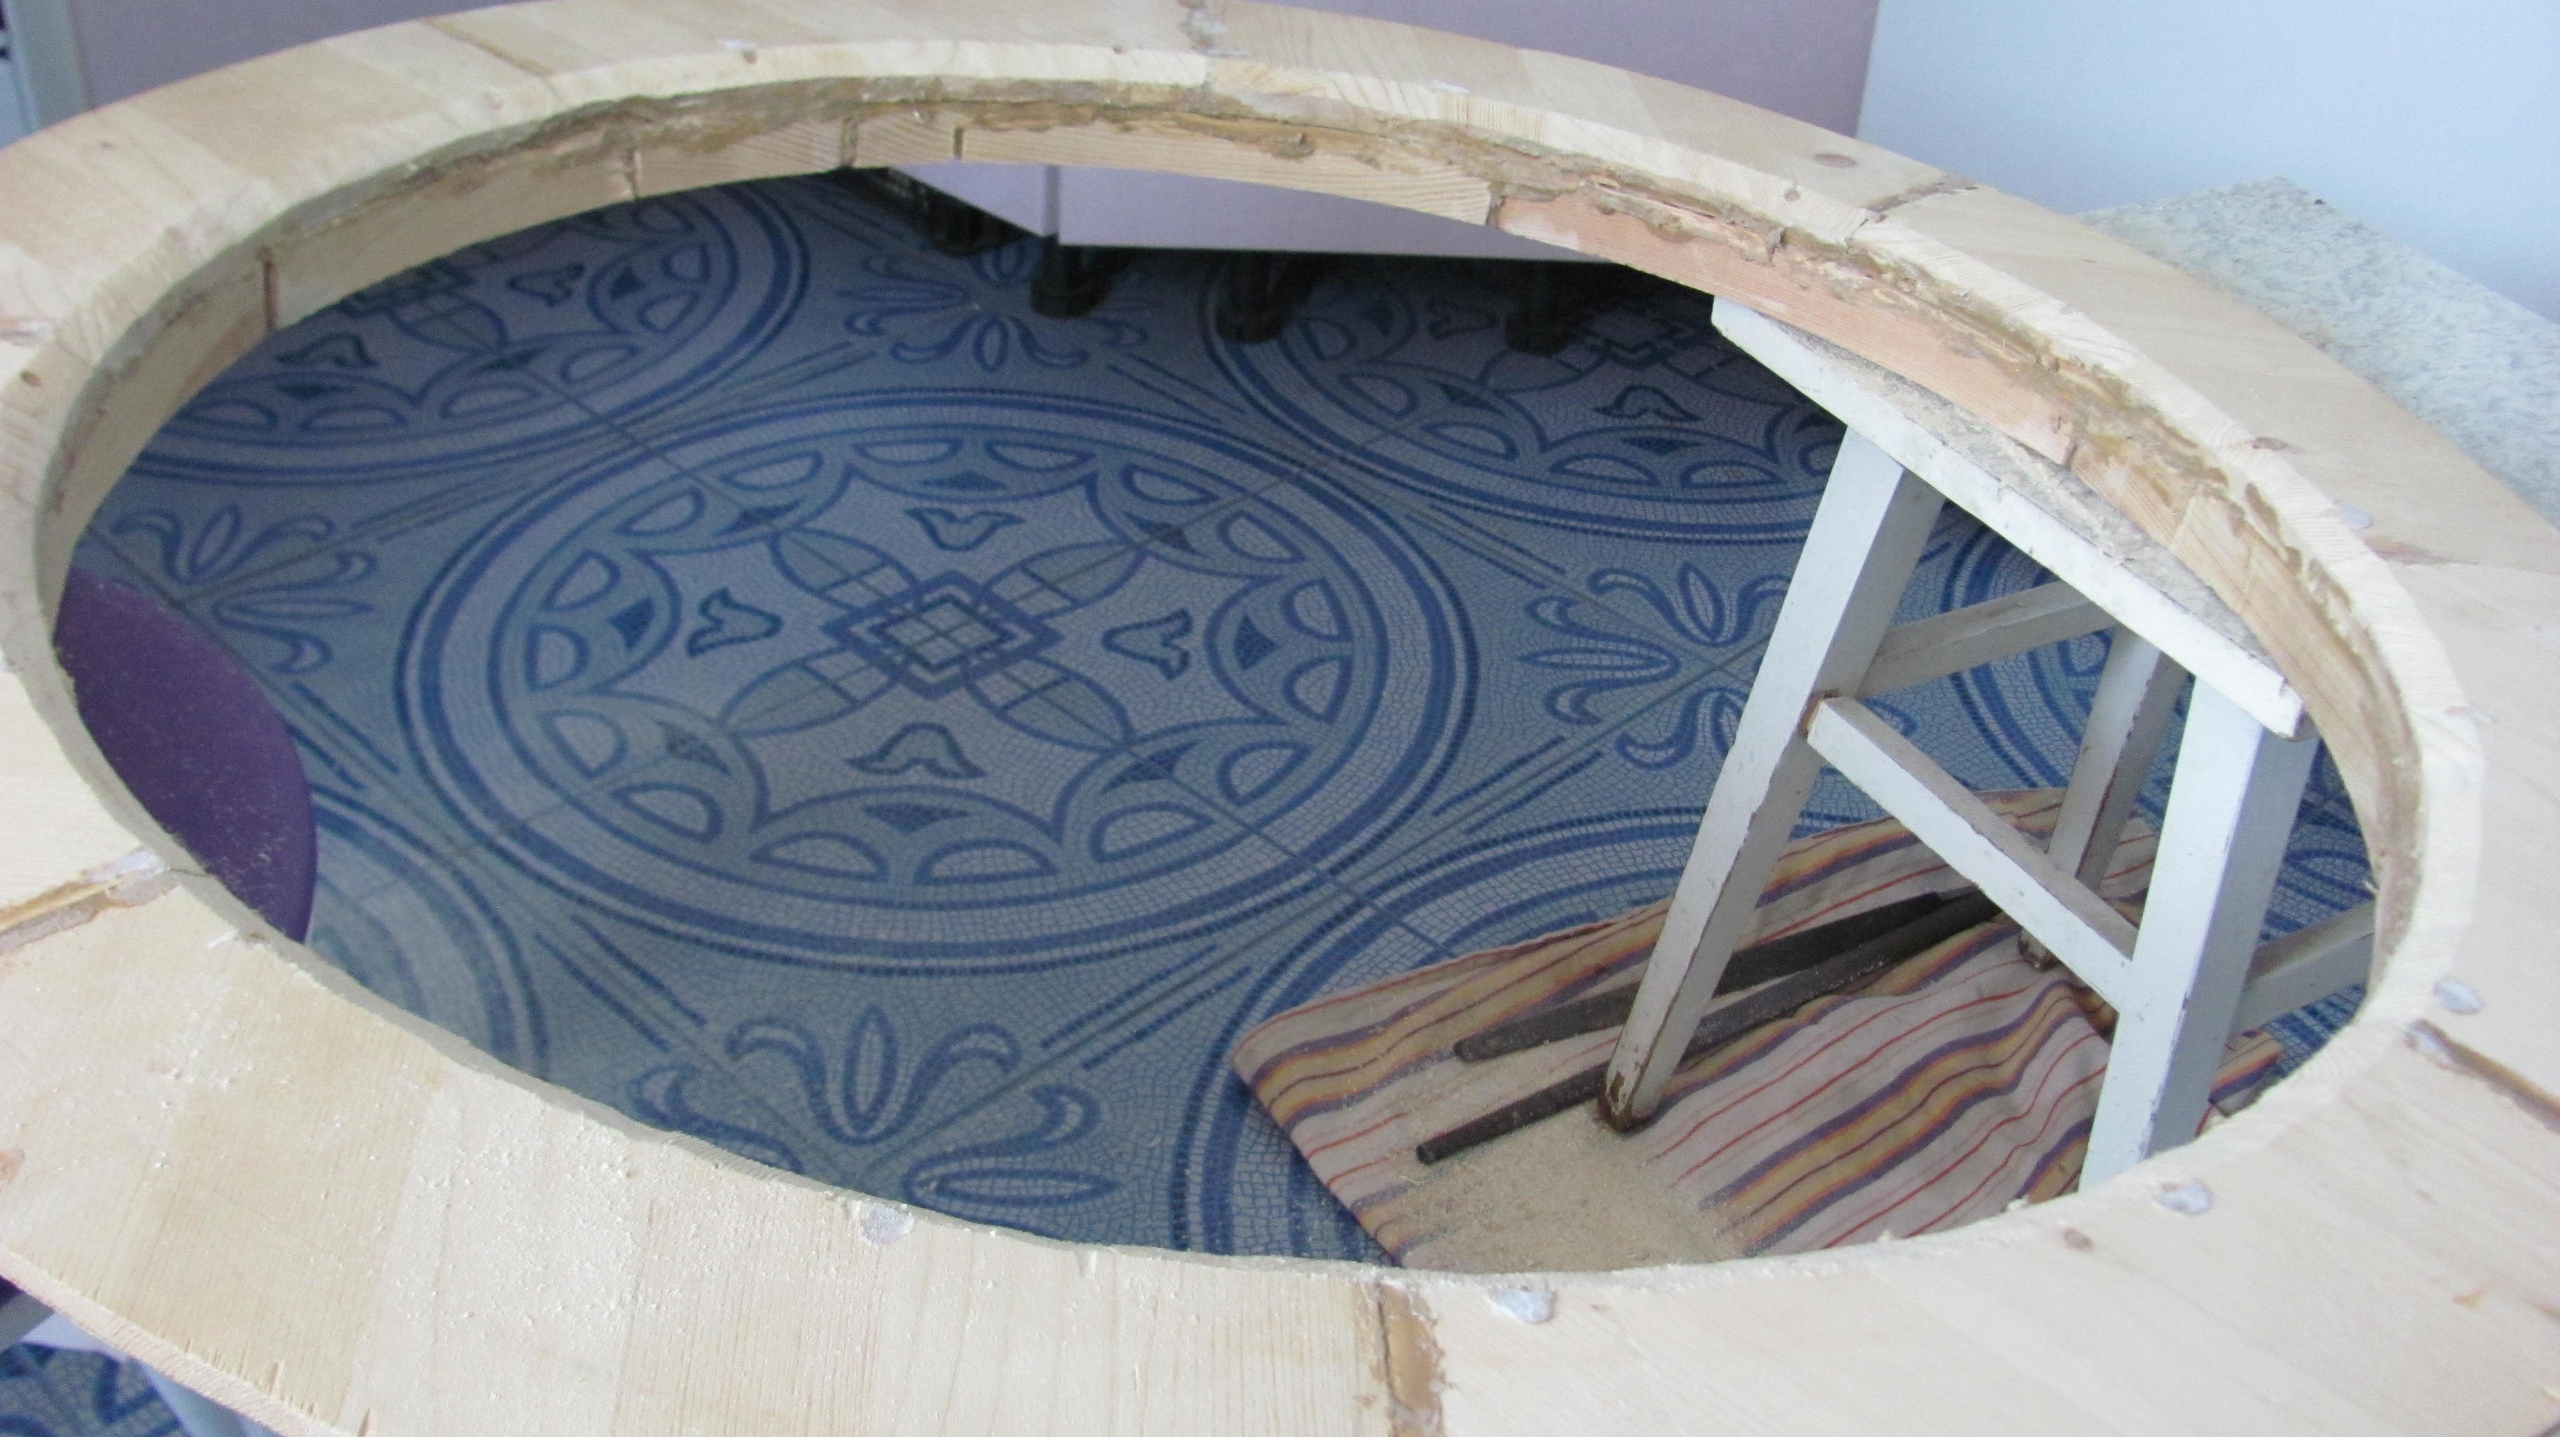
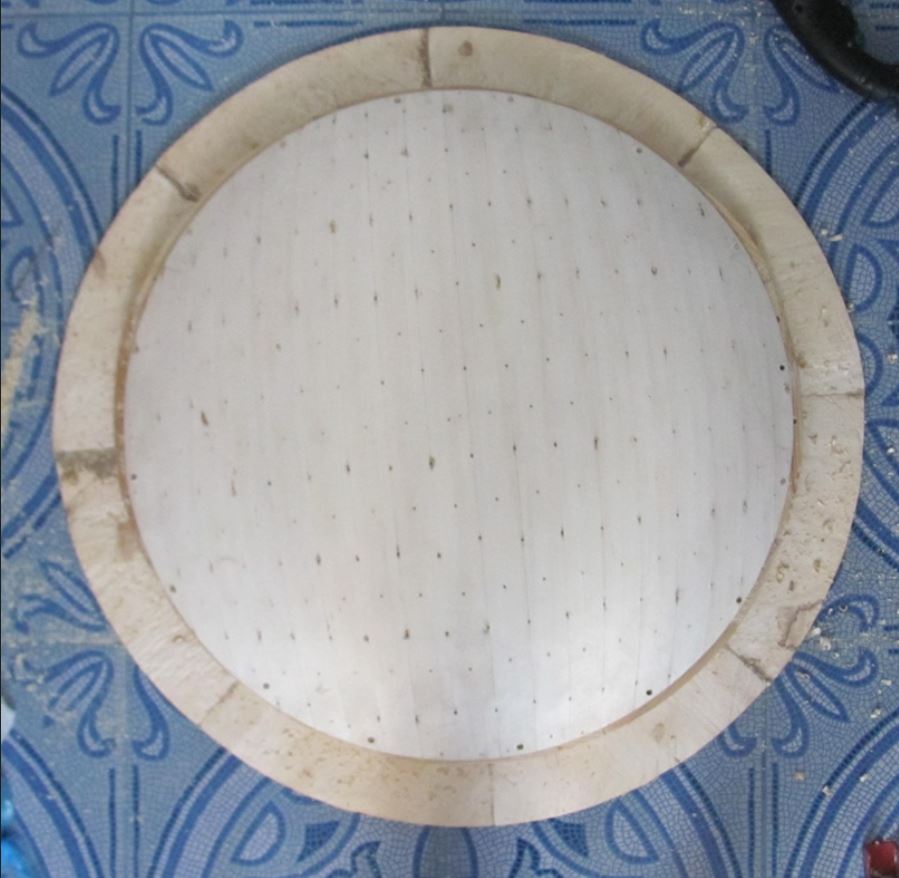
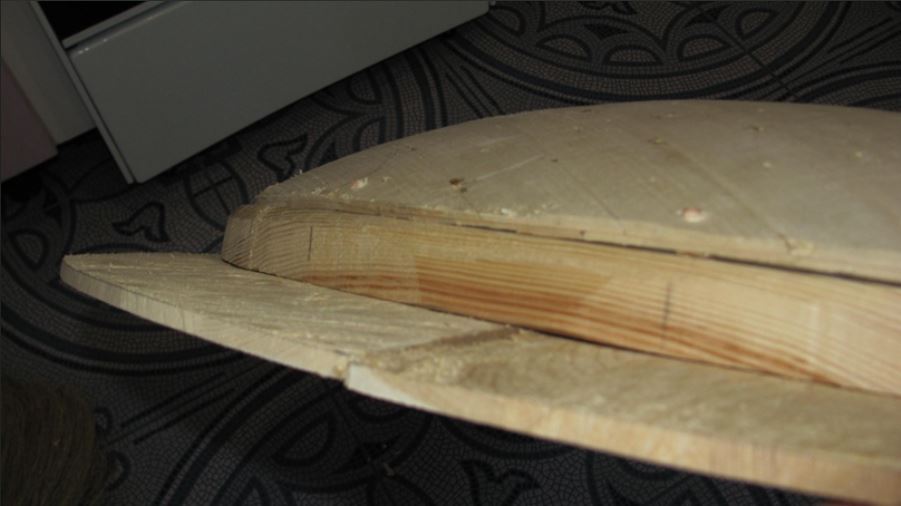
Now we put the resulting structure with the rim on the floor,put the lens on top and drill holes through its edge,leaving in the ring. The lens is strong,you can not be afraid that it will crack and make holes only 0.7-1 cm from the edge. The edge of the ring extends beyond the edge of the lens by 1-1. 5 cm. We grind it off with a small plane,giving the transition between the ring and the lens a smooth rounded shape like on the sources. At the junction,a depression is obtained due to the fact that the edge of the lens is non-planar and loosely adjoins the ring. Fill this recess with glue. After drying,we turn the shield over and fill the same joint between the lens and the ring from the inside with glue. The total depth of the resulting shield is 13 cm. This is pure depth,the thickness of the lens adds another 1.5 cm to the total thickness of the shield. The total diameter is 84 cm,the diameter of the inner part (between the inner edges of the ring) is 65 cm.
 Hoplon rim on the floor
 Drilling holes
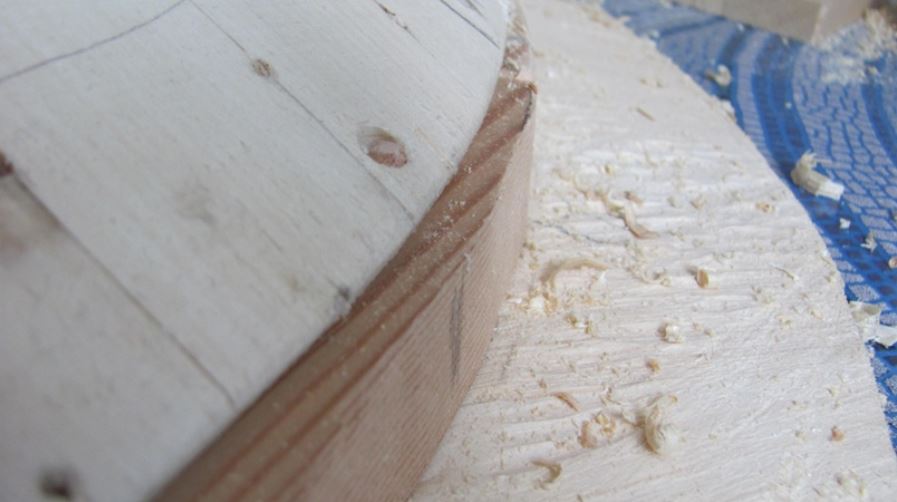 Ring edge extending beyond the lens edge
 Grind to a smooth transition
 Loosely adjacent edge of the lens
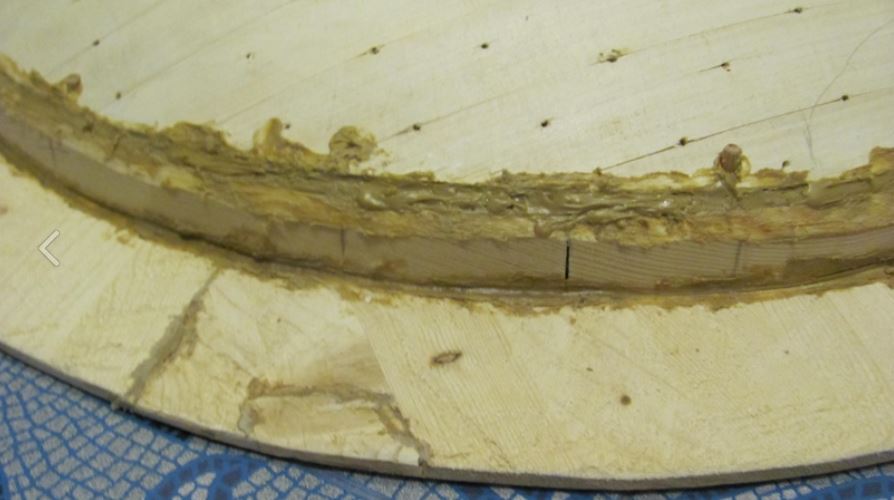 Filling with glue
 Filling the internal joint with glue
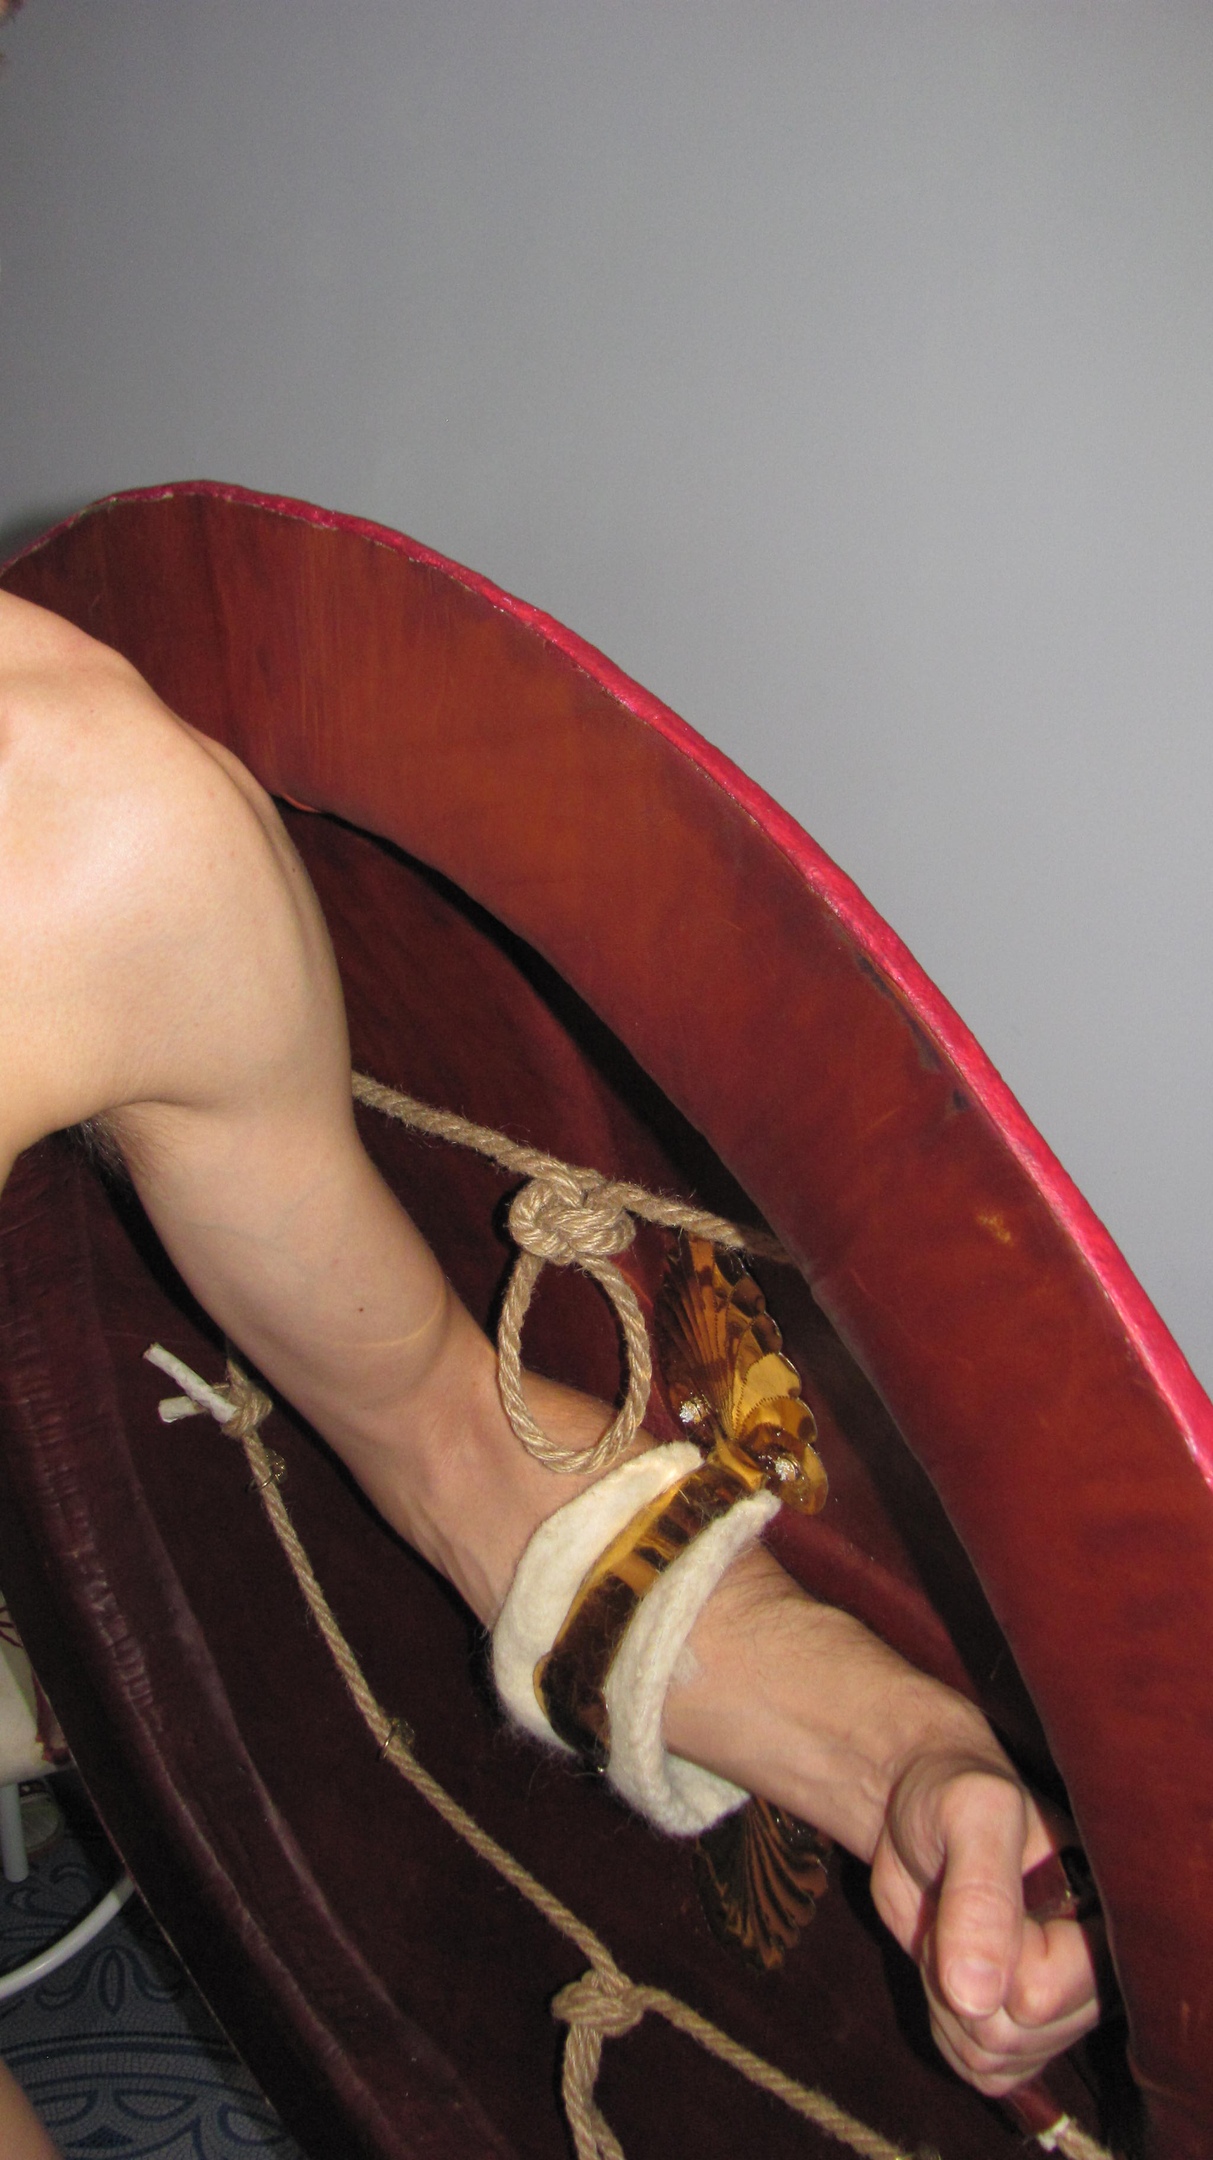
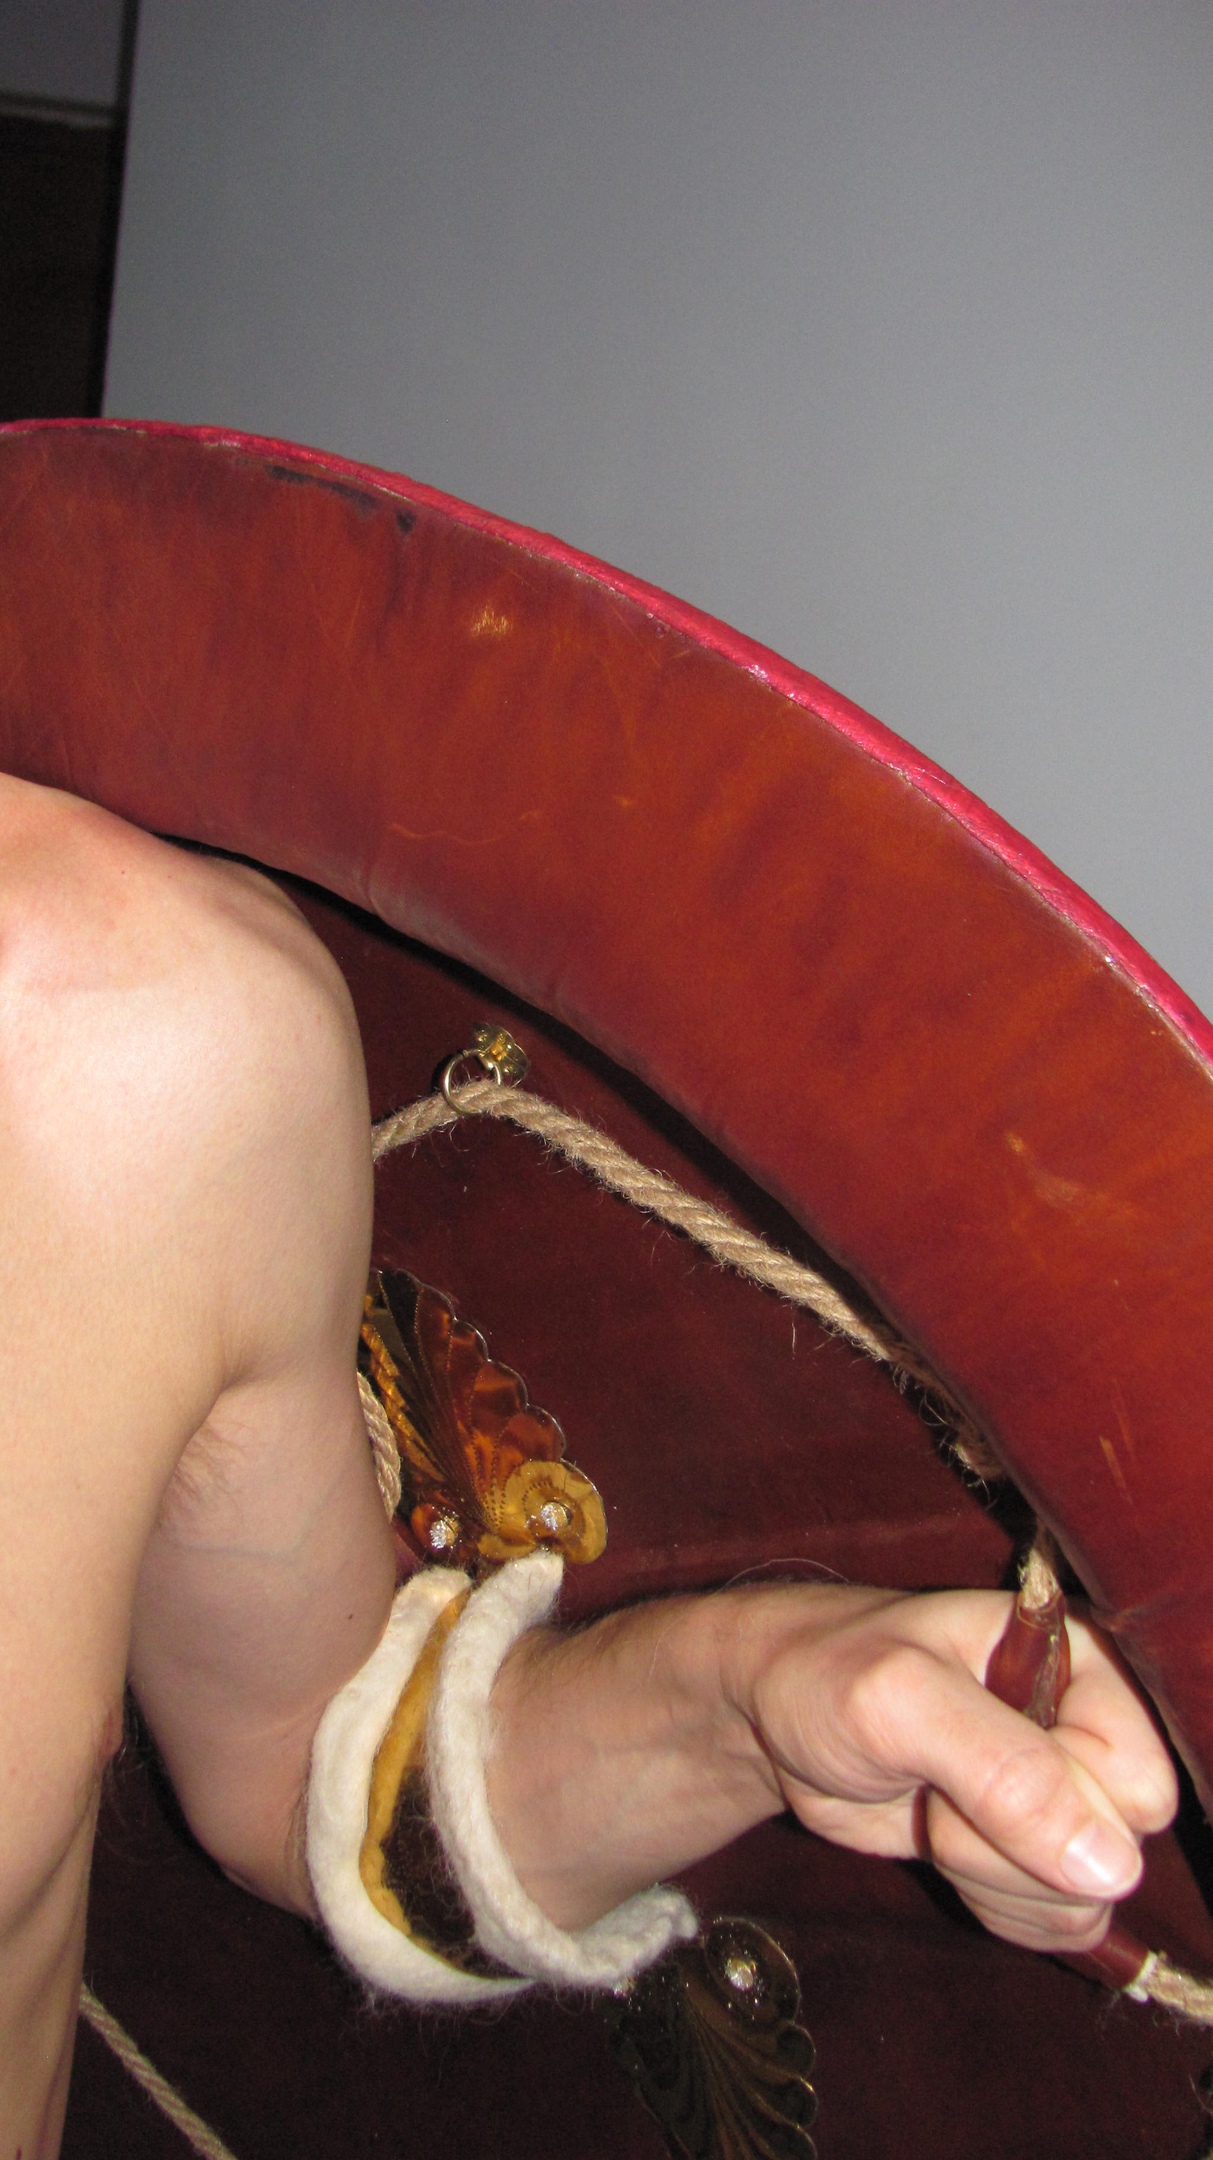
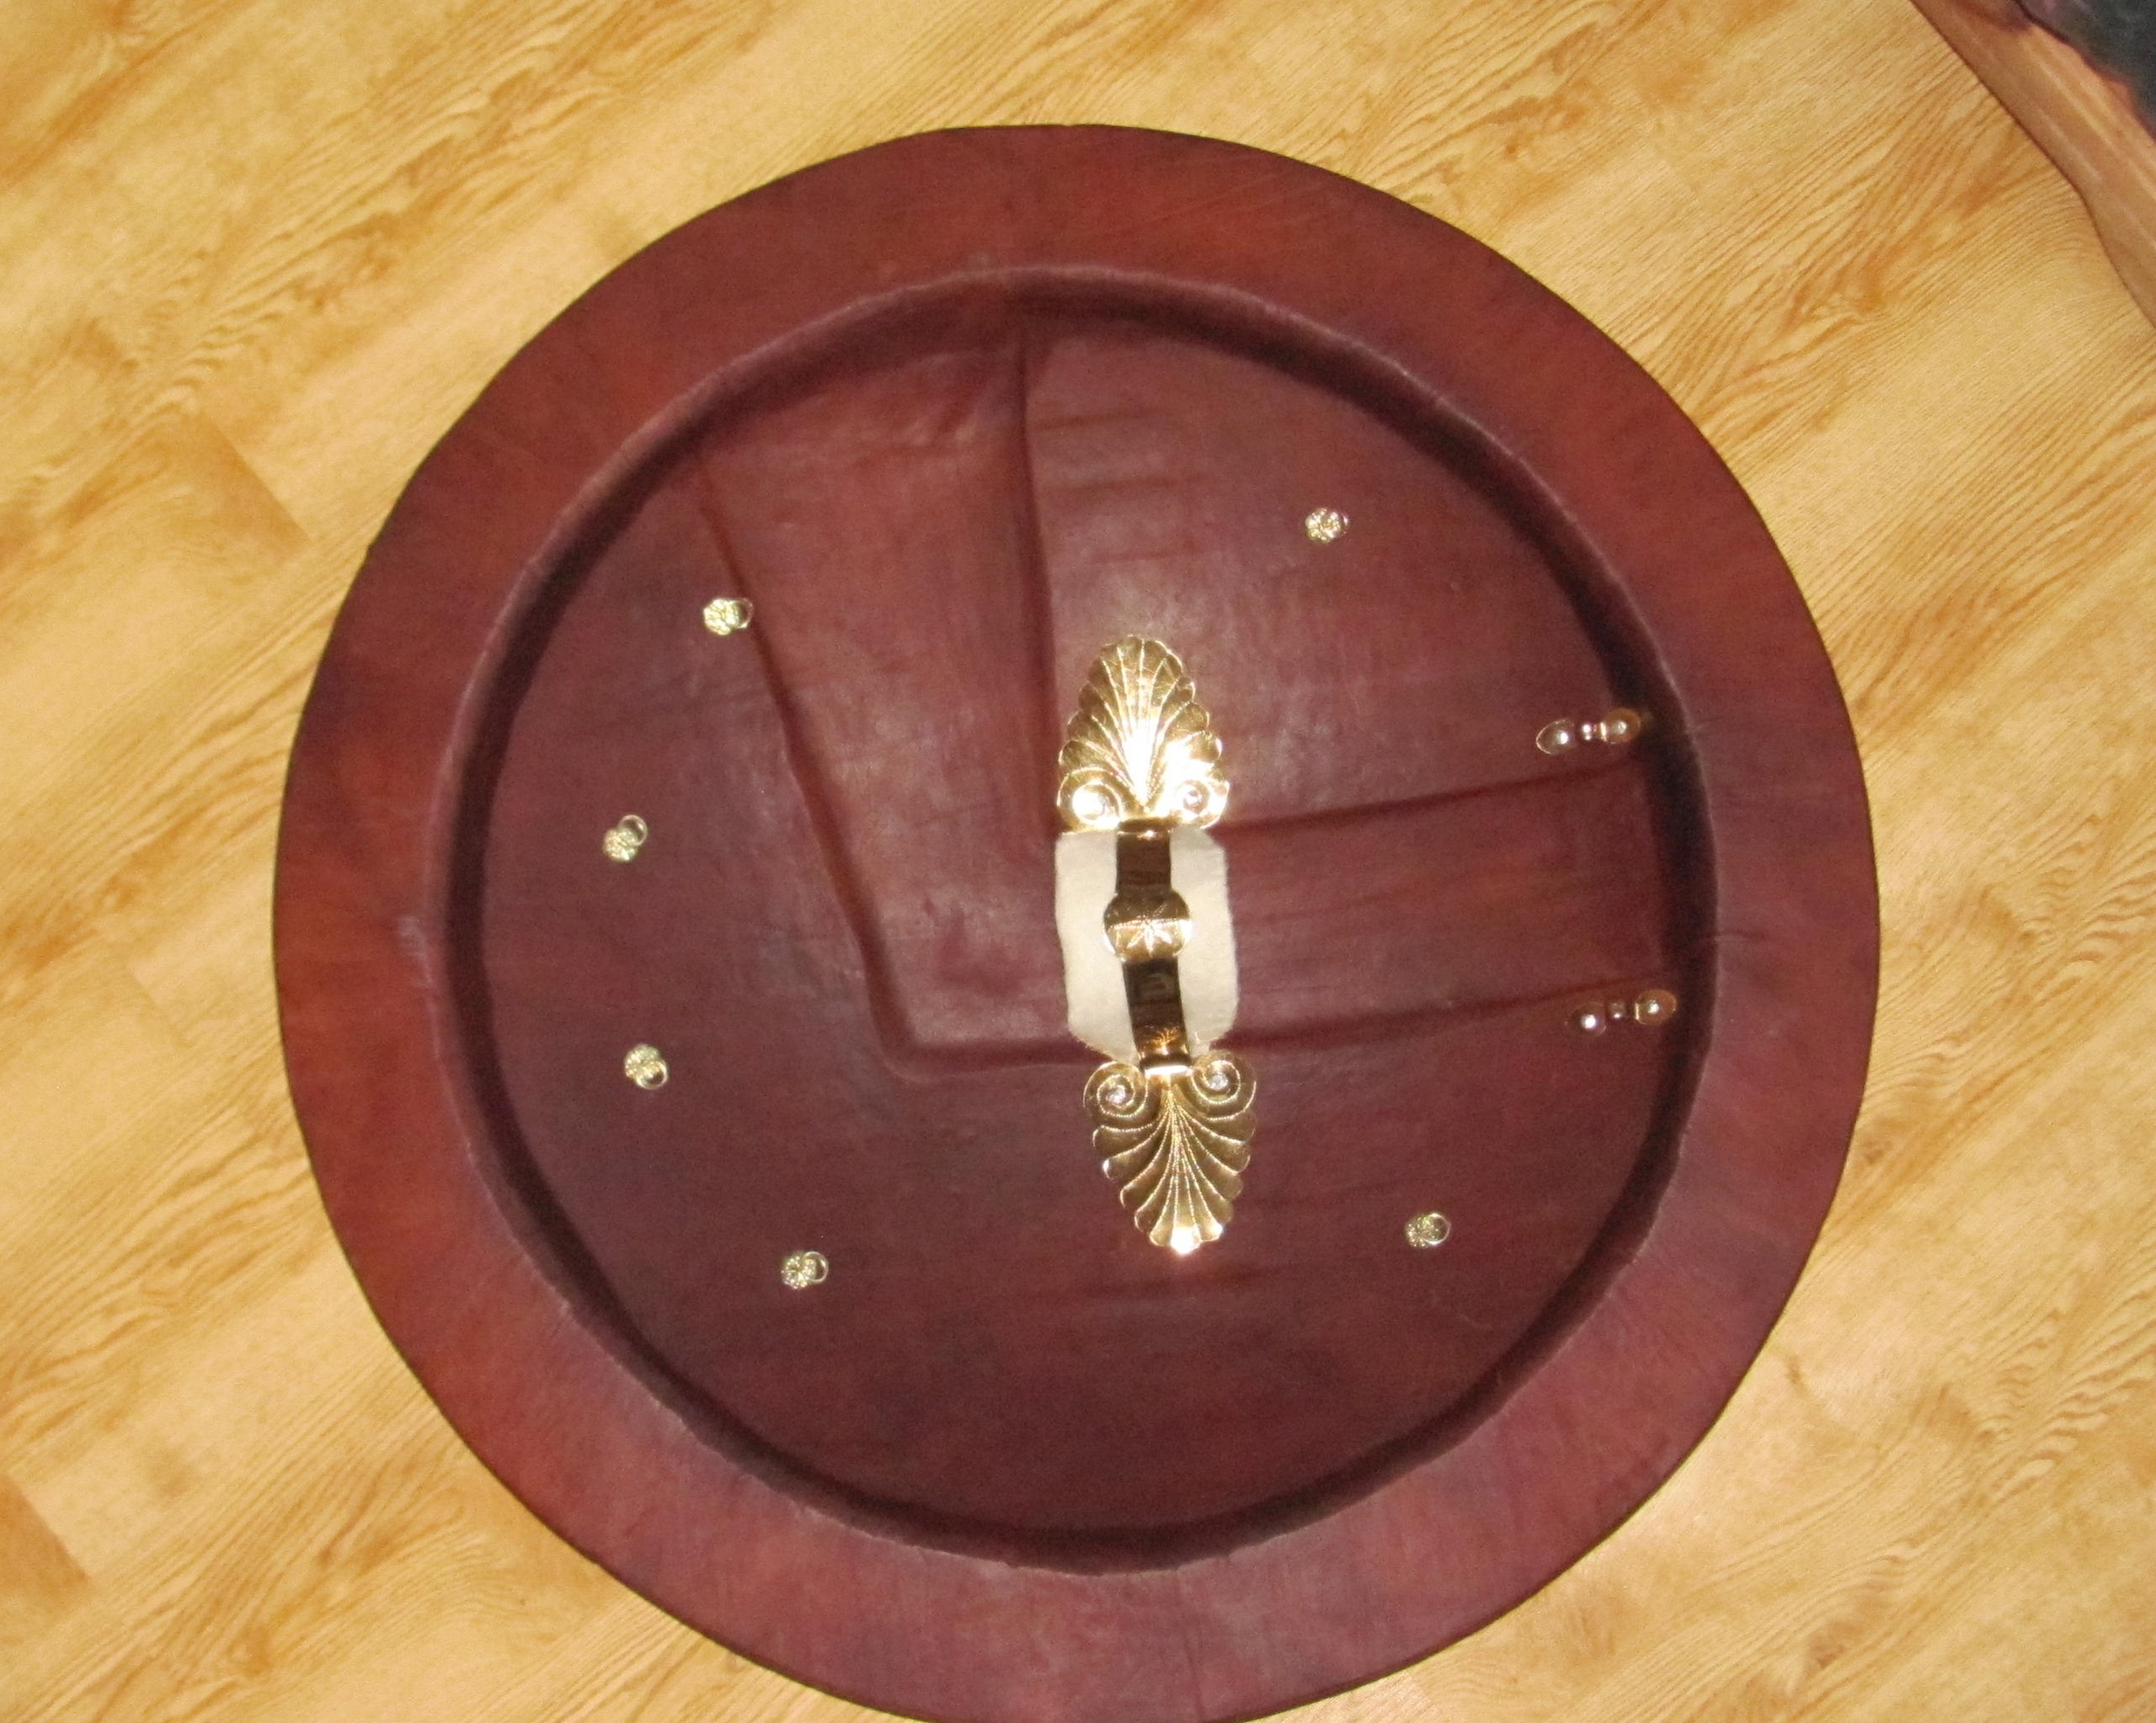
For the inner side of the hoplon,you need a handle (porpax),loops for the cord under the hand and rings for the cord around the perimeter. Unfortunately,I did not have accurate measurements of the fittings of genuine shields indicating the thickness of metal in various parts,ring diameters,etc.,so I will not talk in detail about the set that I made. I will only say that all this can be made with metal scissors from a relatively thin sheet of brass. To give strength to the porpack and handle loops,you need to bend their edges,creating a stiffener. You can order fittings from the Viland Artisan workshop (https://vk.com/vilandartisangroup). A complete set of accessories,including cord rings,is important not only for the appearance. For example,using a cord running around the perimeter,you can hang a shield behind your back. I hope to write about this separately.
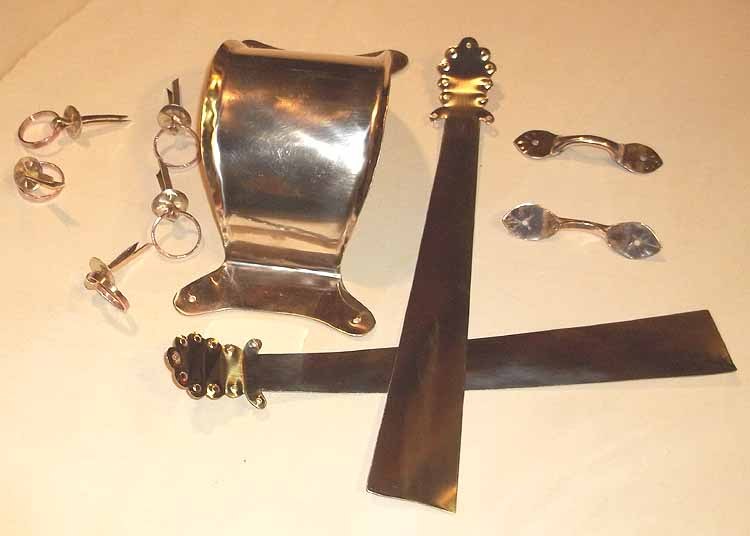 Porpax handle,loops and rings
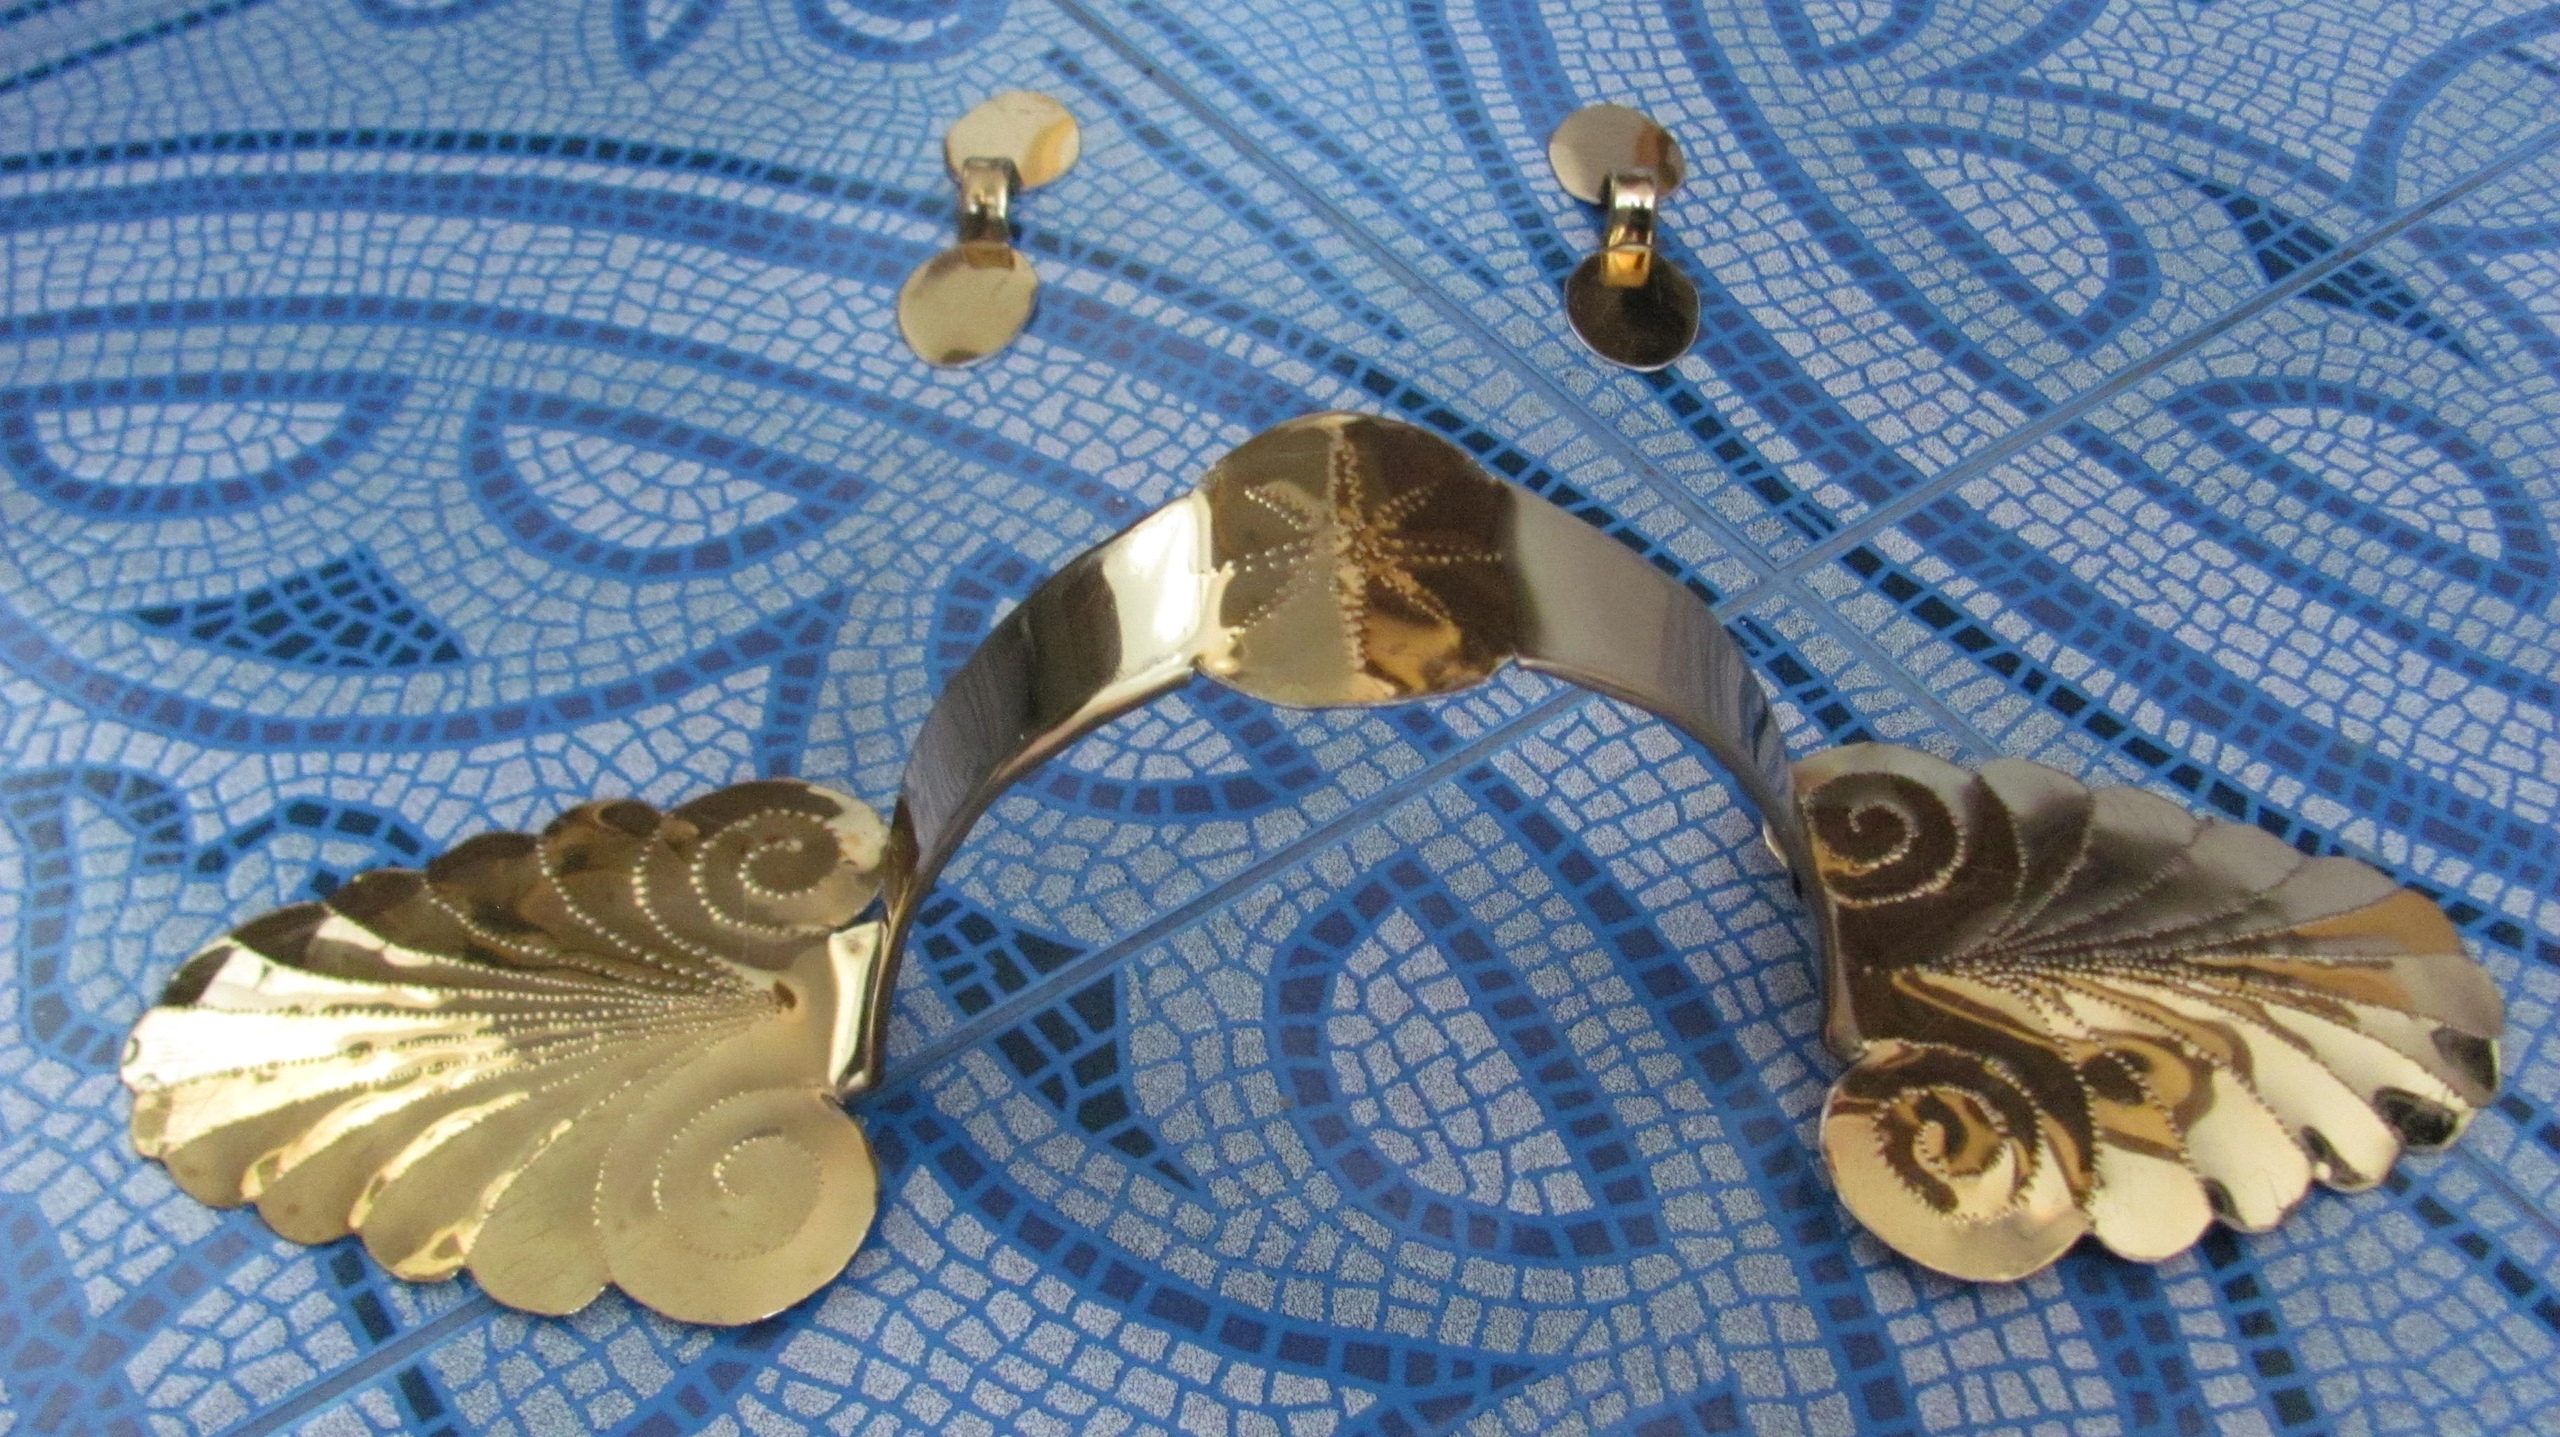 Porpacks and self-made hinges
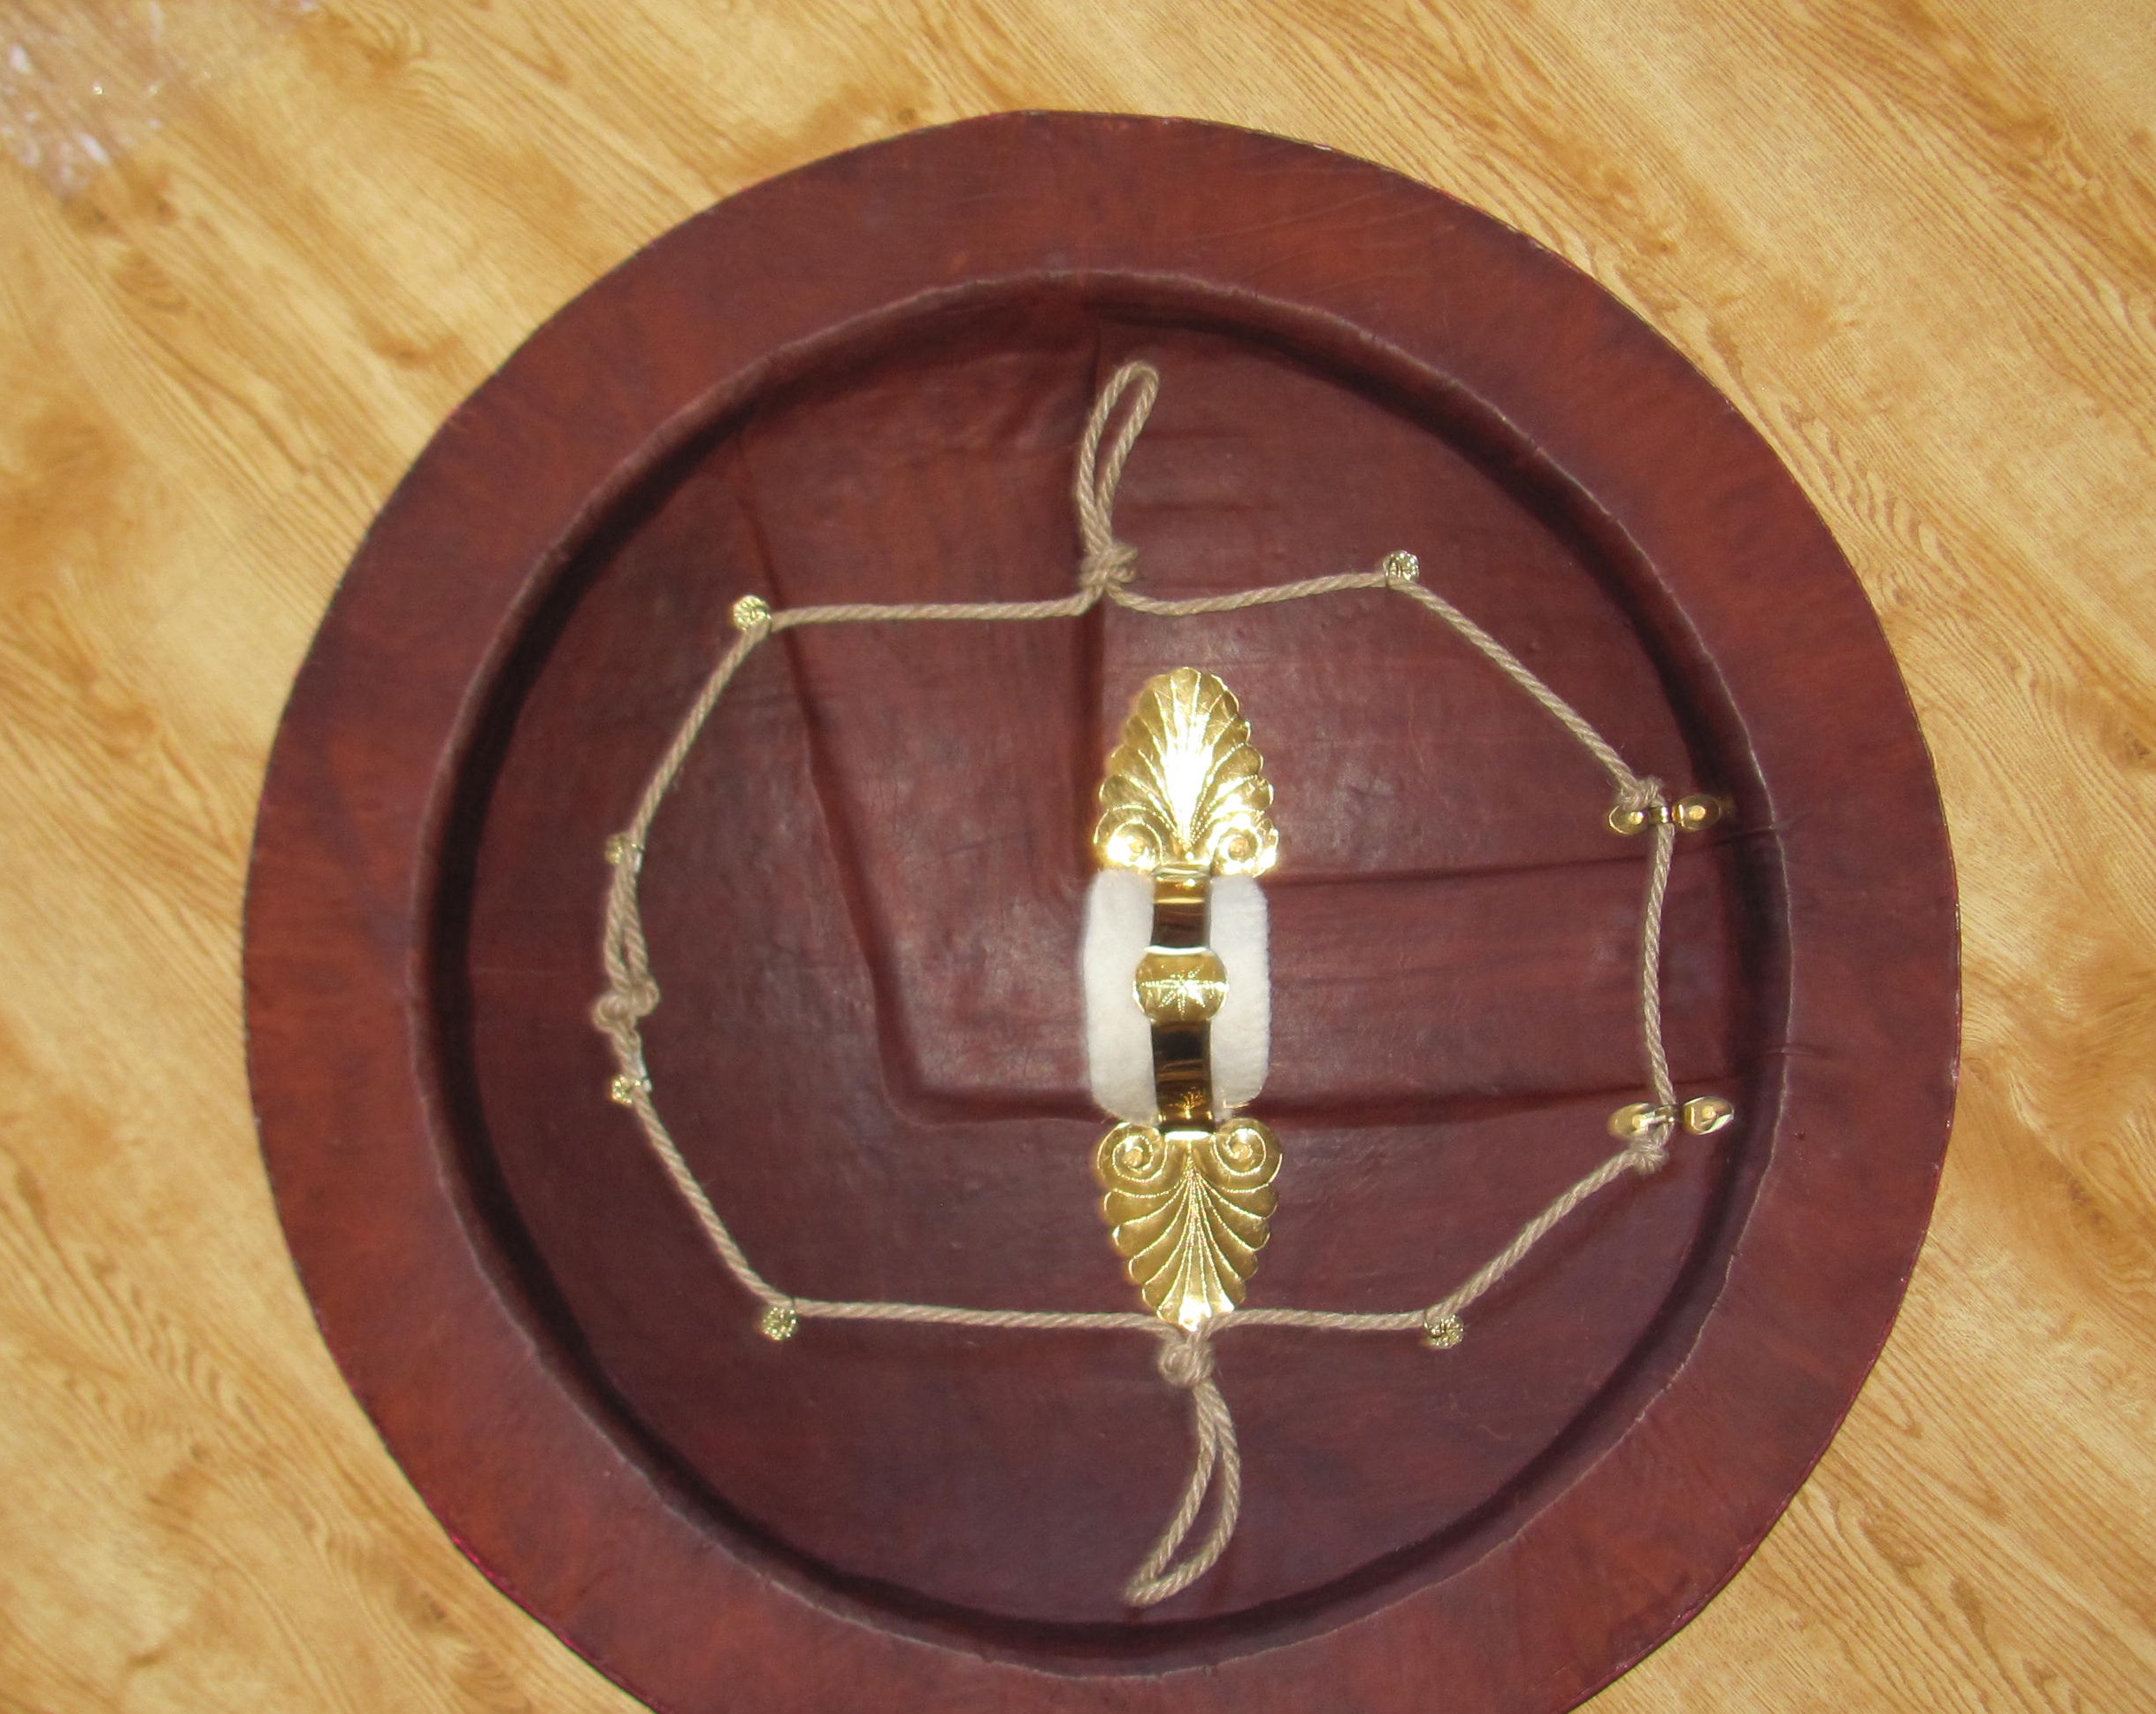 Ready-made type of hoplon with accessories
At the base,we make all the holes for fixing the porpack,loops for the handle under the brush and rings around the perimeter. To balance the shield,it is important that the porpack is in the center. The diameter of the shield lens should be sufficient so that the knuckles do not rest against the ring and rim. At this stage,you can fasten the mount to the bolts and play with the shield to see if everything is convenient. The shield is large,heavy,and the correct size and ease of attachment are very important.
 Holes for fixing porpacks,hinges and rings
Under the place where the hand will fit to the shield,it is good to make a soft substrate. This is recorded by sources. Exactly what it should be made of is unknown. As a result,it will still be covered with skin and will only be visible as a silhouette. The most important areas are under the hand,elbow and shoulder,and on the inner side of the ring under the shoulder,it is also desirable to make a substrate,and on a significant part of the ring.the shield in battle can rest on the shoulder in different places. Interestingly,when wearing a linothorax,this problem disappears. The shield can be placed on the edge of the shoulder pad. However,historically,not all Hoplites could wear linothorax,so the pad on the shield ring may have been necessary for them. You may even be able to see it on some sources,but you need to purposefully look under the rim.
 Soft backing on sources
 Silhouette of the substrate on the hoplon
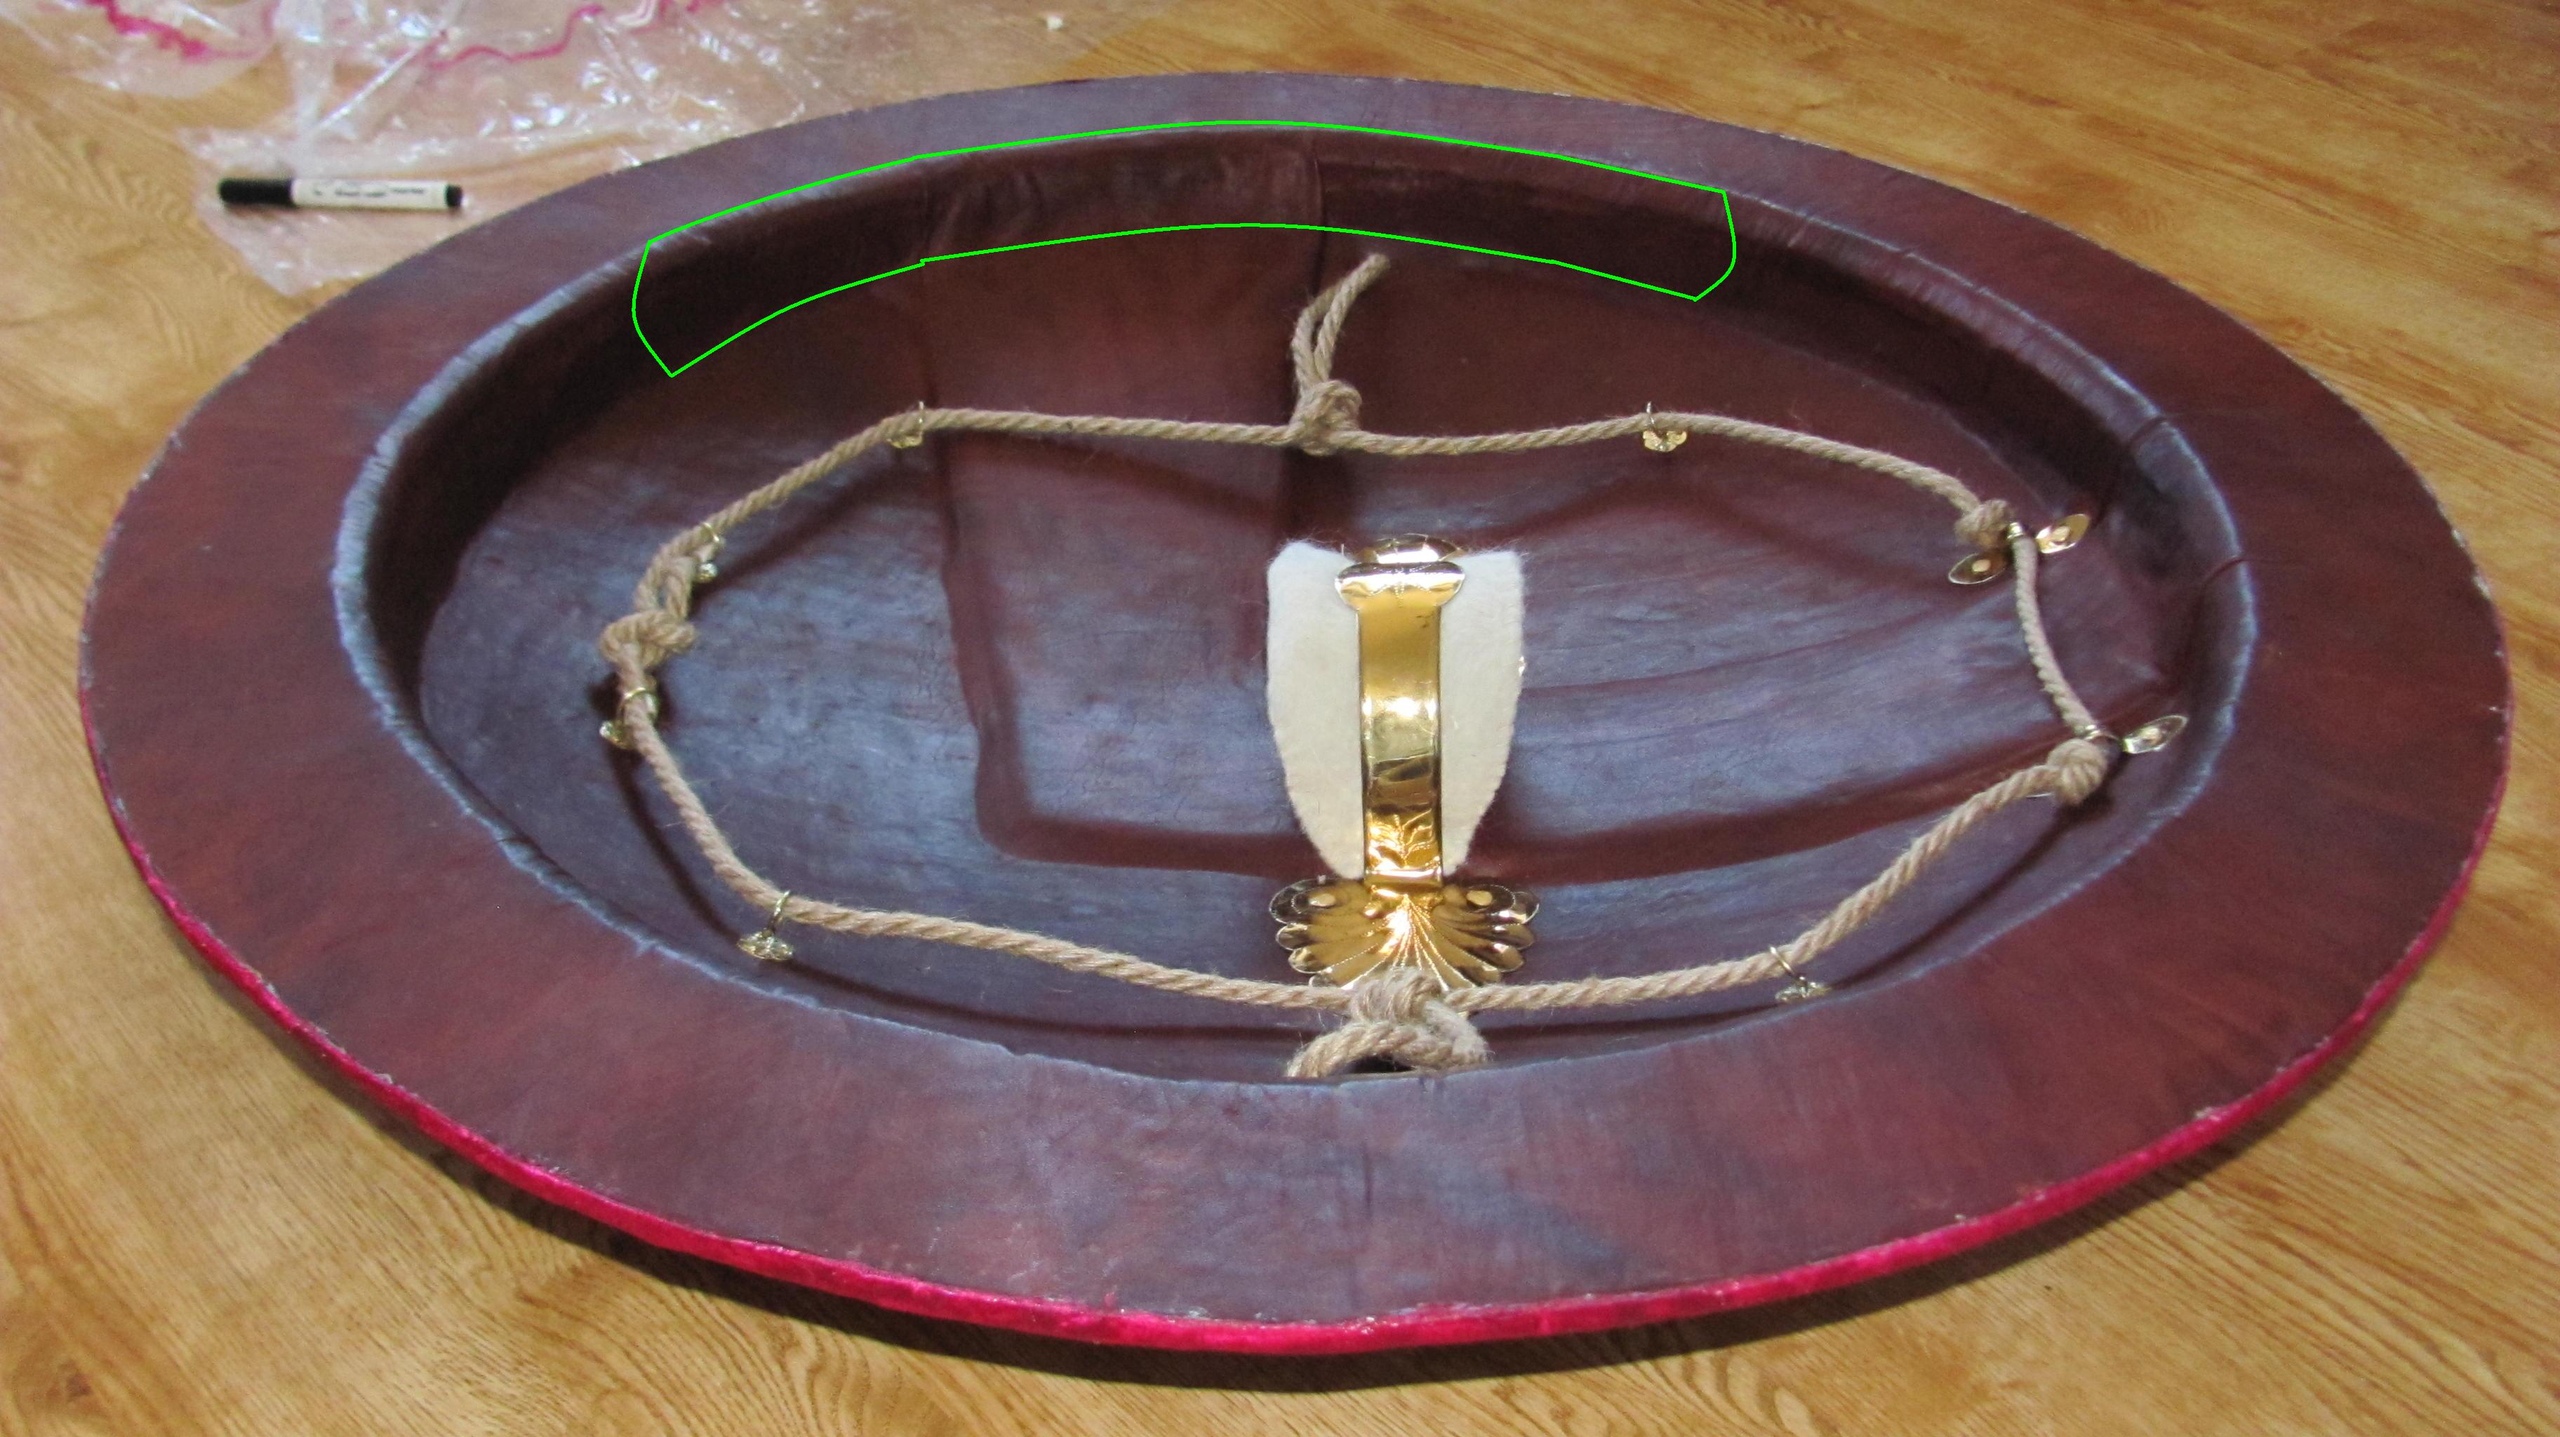 Backing on the inner side of the ring
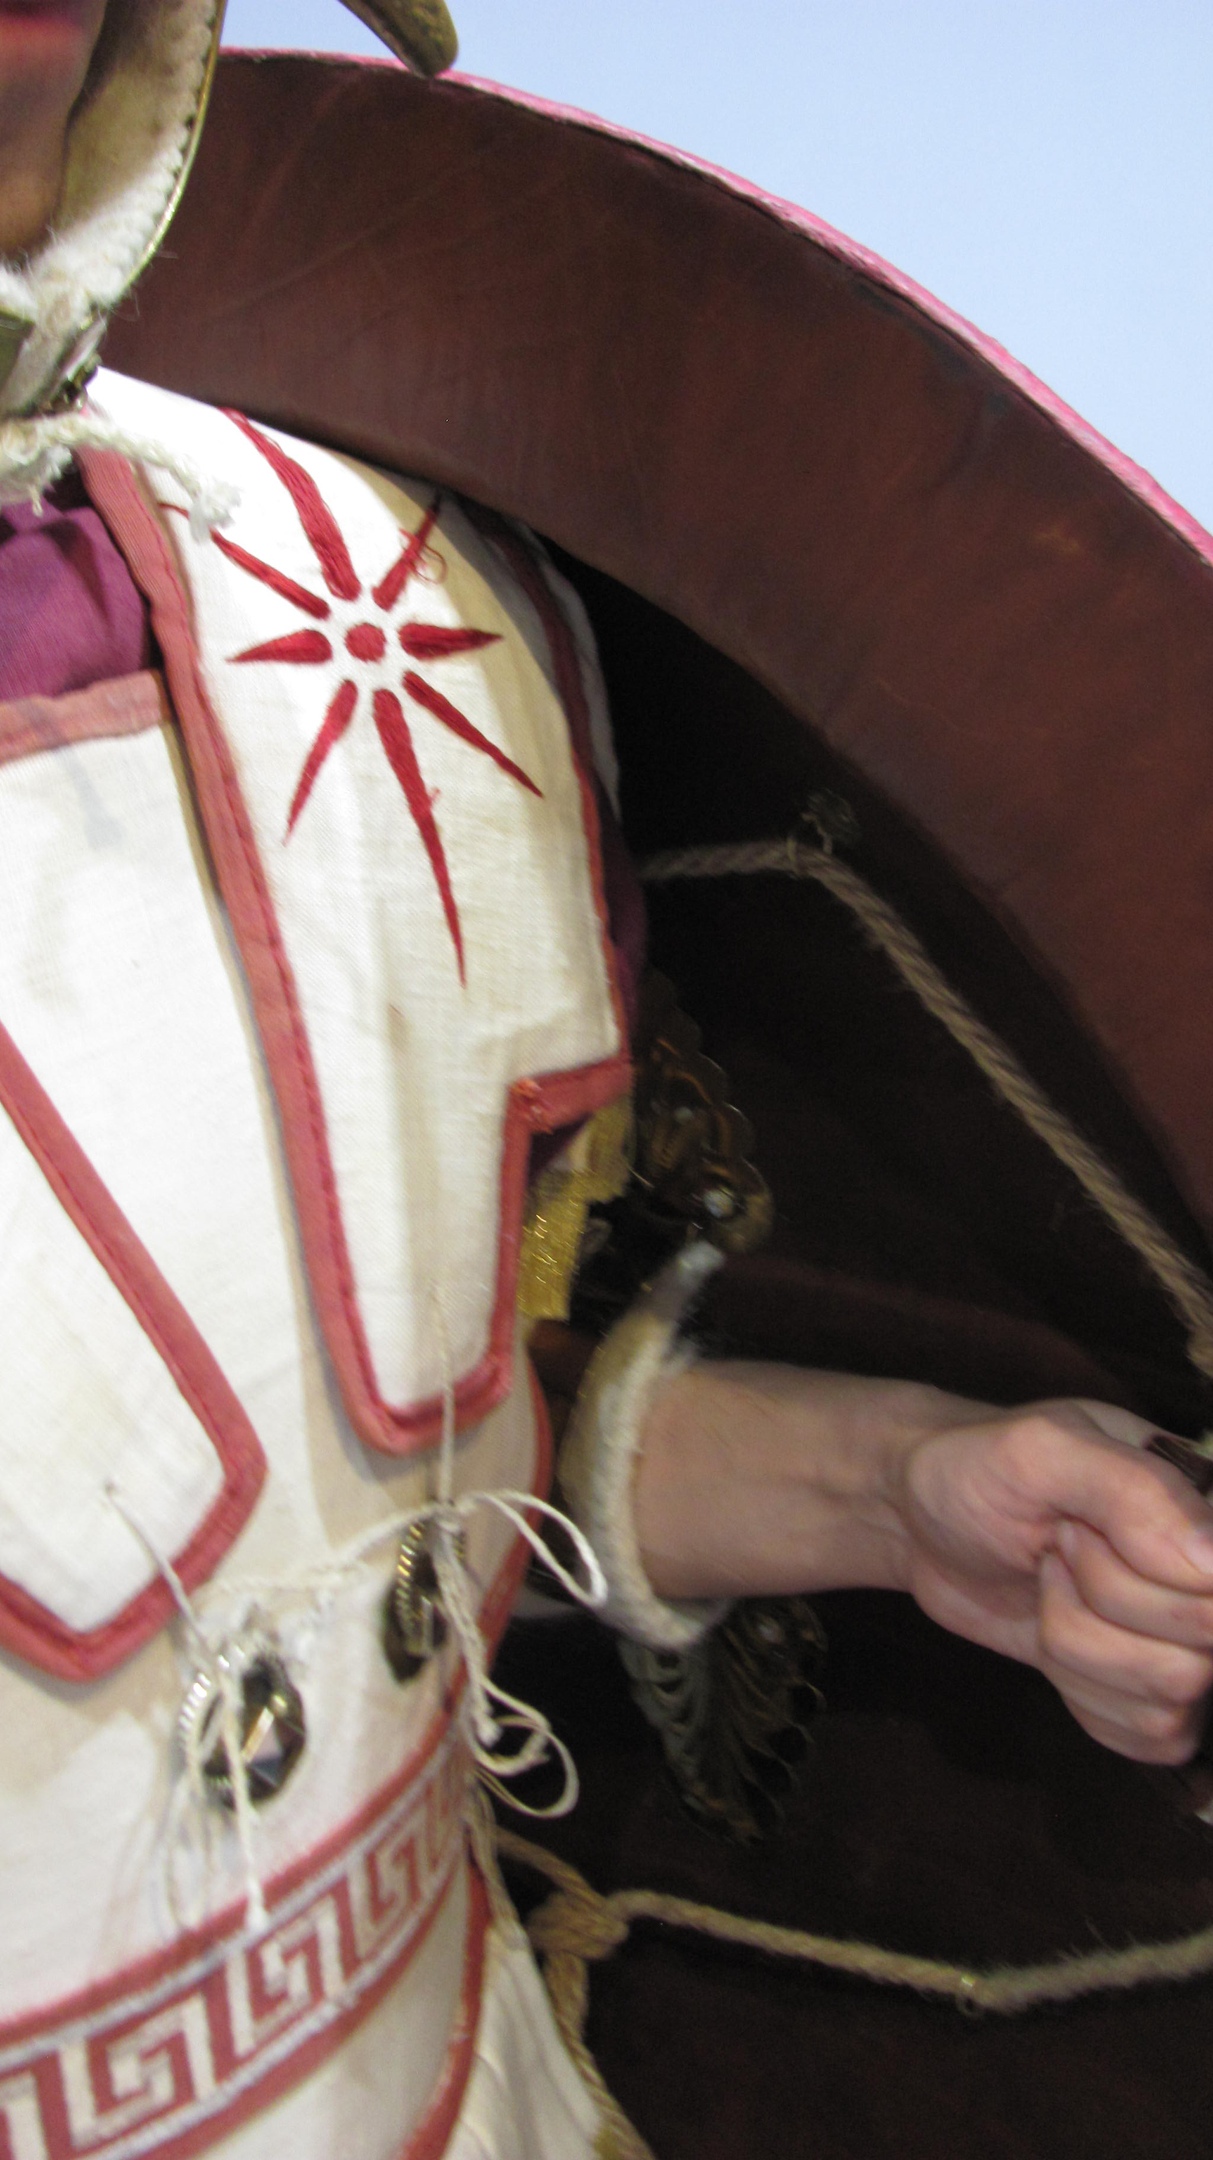 Option of wearing a hoplon with linothorax
The inner surface is covered with leather. The skin thickness is 1-1. 5 cm. We wet the skin,let it drain,dry a little (not in the sun and not on the battery) for about half an hour,so that the skin is moist,but no longer wet.We cover the shield,starting from the center. I used glue Moment-joiner. It seems to hold well. We cover the shield,starting from the center. Wet skin stretches perfectly and fits even such a complex shape with almost no wrinkles. True,and all the irregularities of the base perfectly outlines. I had hoped in vain that the tightness would hide a lot. The fitting process was described in more detail by colleagues from the glorious Anabasis Reconstruction Club (http://mreen.org/club/anabasis/blog/).
 Skin-tightness of the inner surface
 Irregularities in the design of the hoplon under the skin
After the skin is glued and dried,we put the accessories described above. On the front side of the shield,we find holes for it,pierce the skin through them and put the parts in the previously defined places. Historically,porpacks and handle loops were nailed with nails,the ends of which were bent on the front side. Porpax made a narrow one with a soft felt pad. Very convenient! The pillow was simply glued with superglue,since there were no holes for sewing on them,as far as I know. It doesn't come off yet. Rings were placed with the help of long ears,unbending on the front side of the shield. Under them and other fasteners,we cut out recesses on the front side of the shield so that nothing protrudes from the surface of the lens. The ears of the rings are filled with completely hardening glue,so that they do not start to bulge and break through the outer skin.
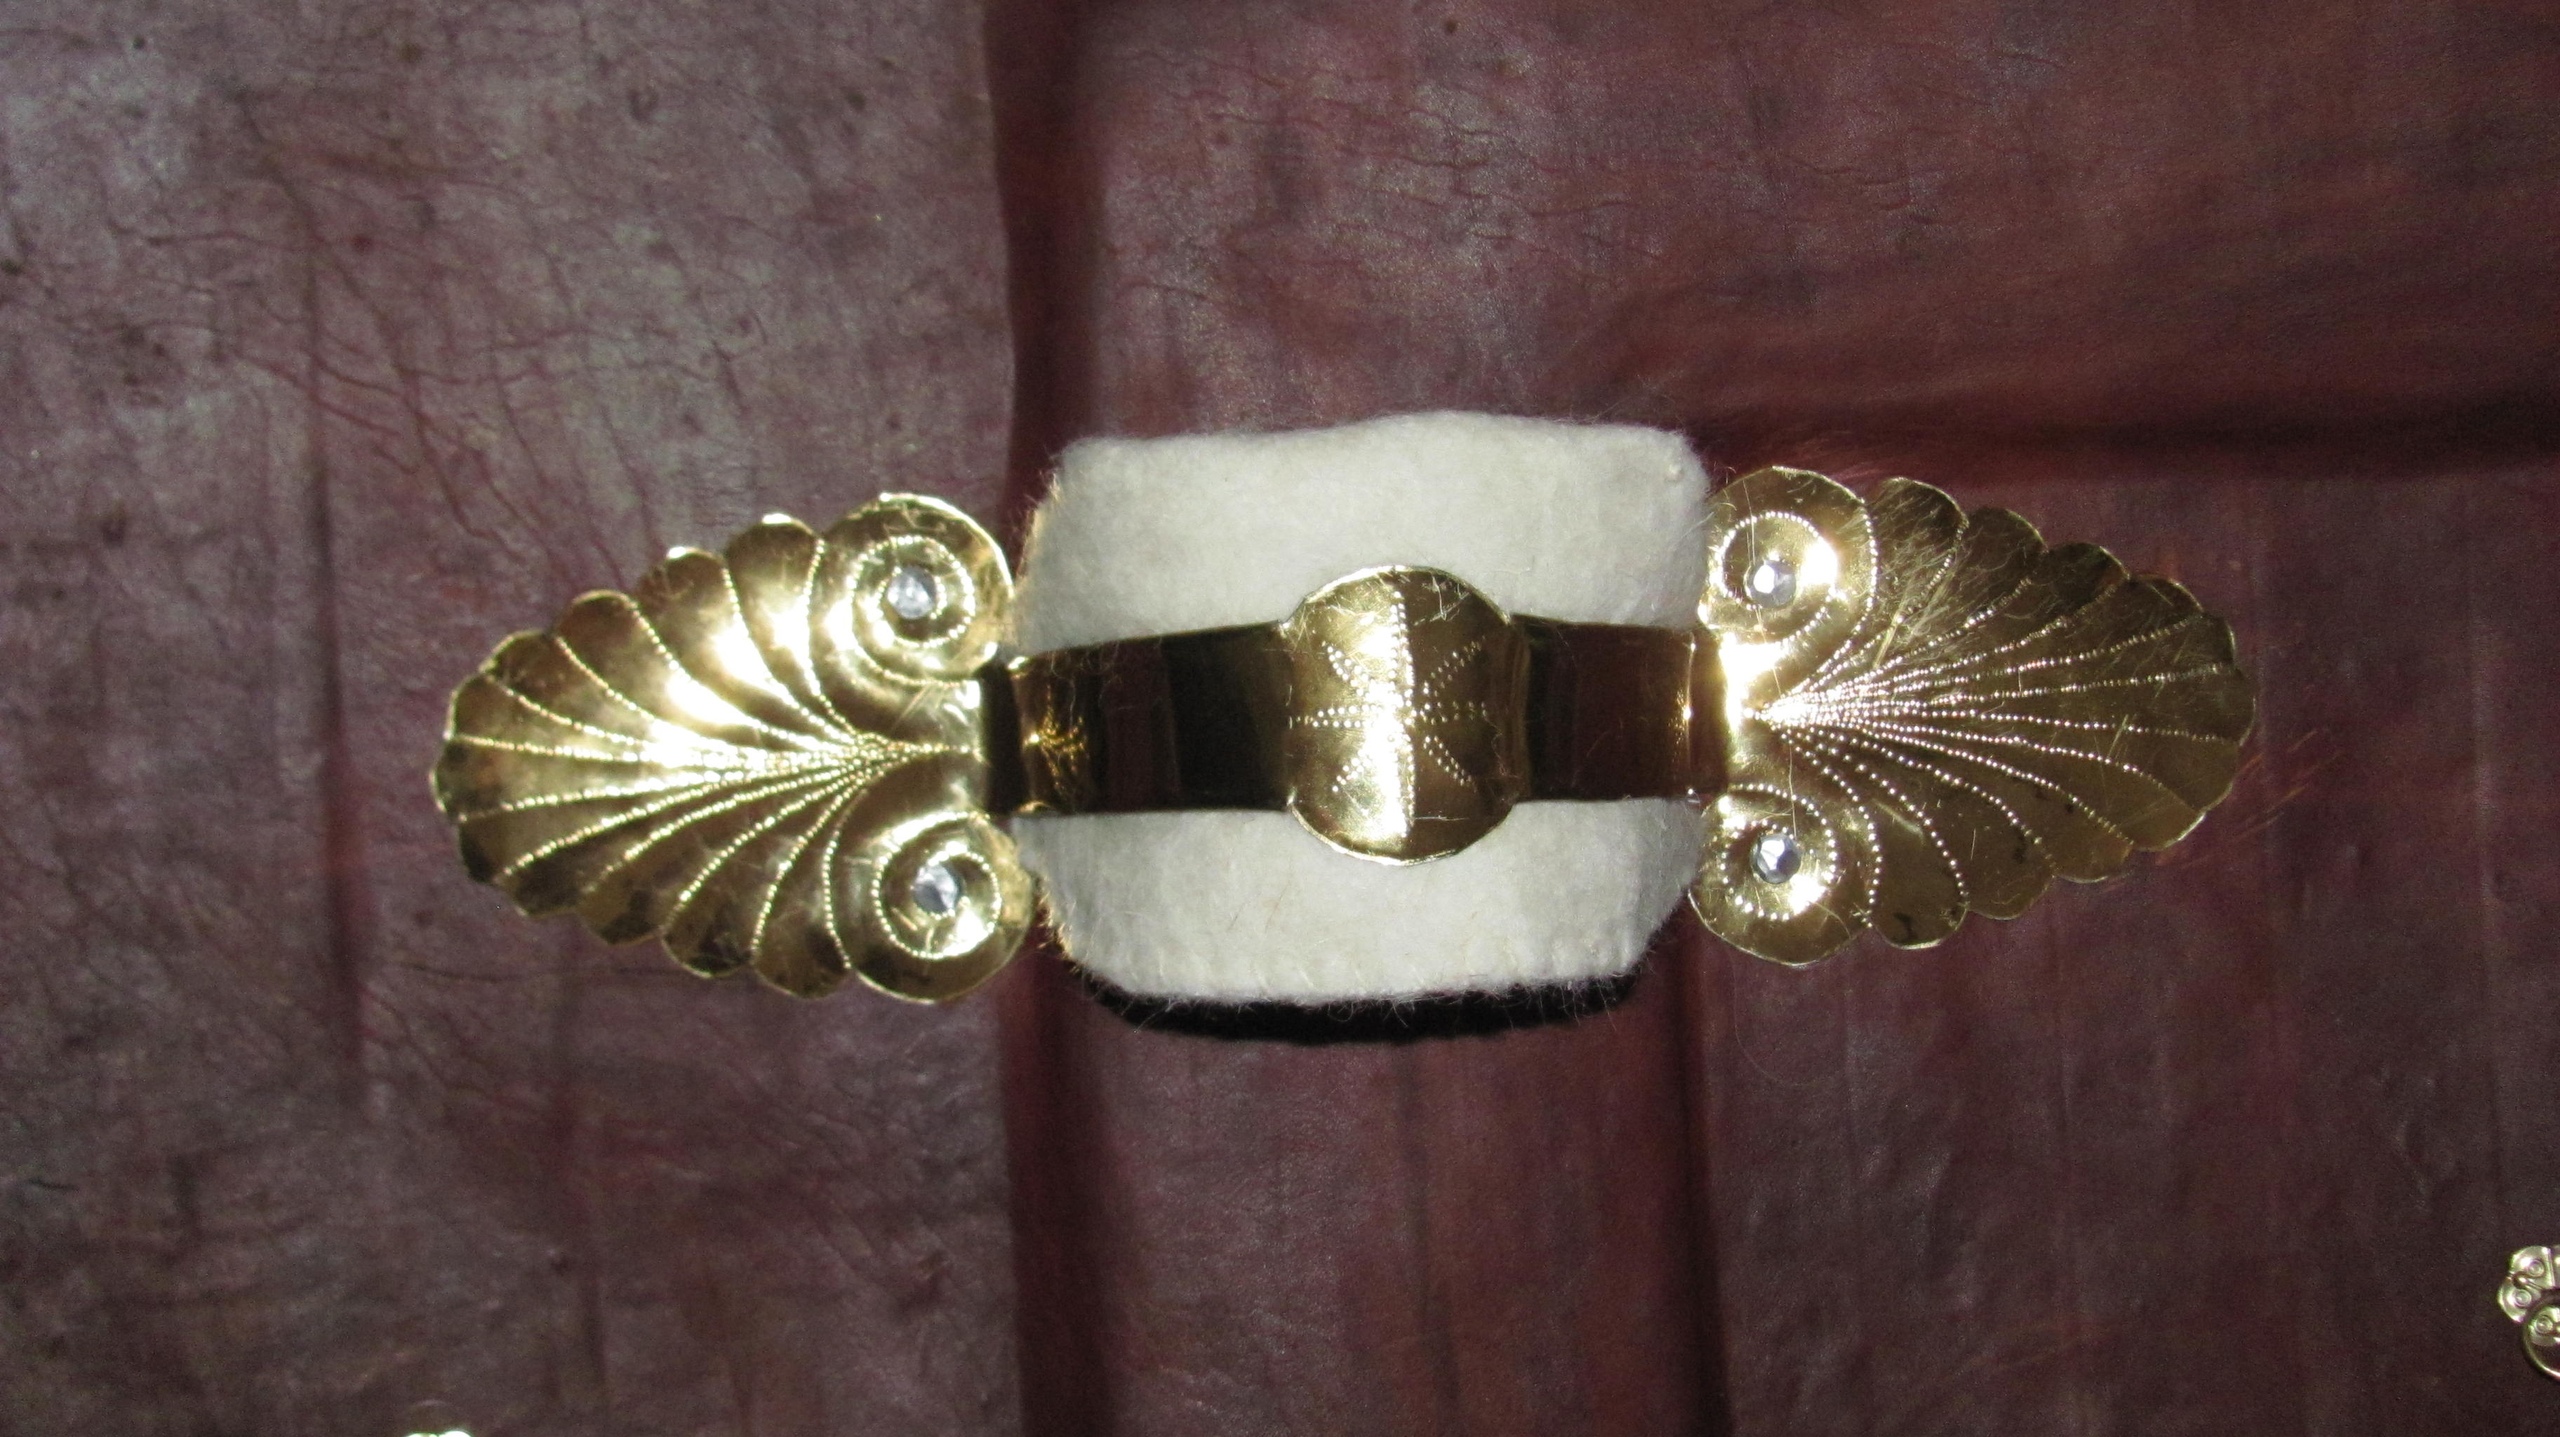 Handle with felt pad
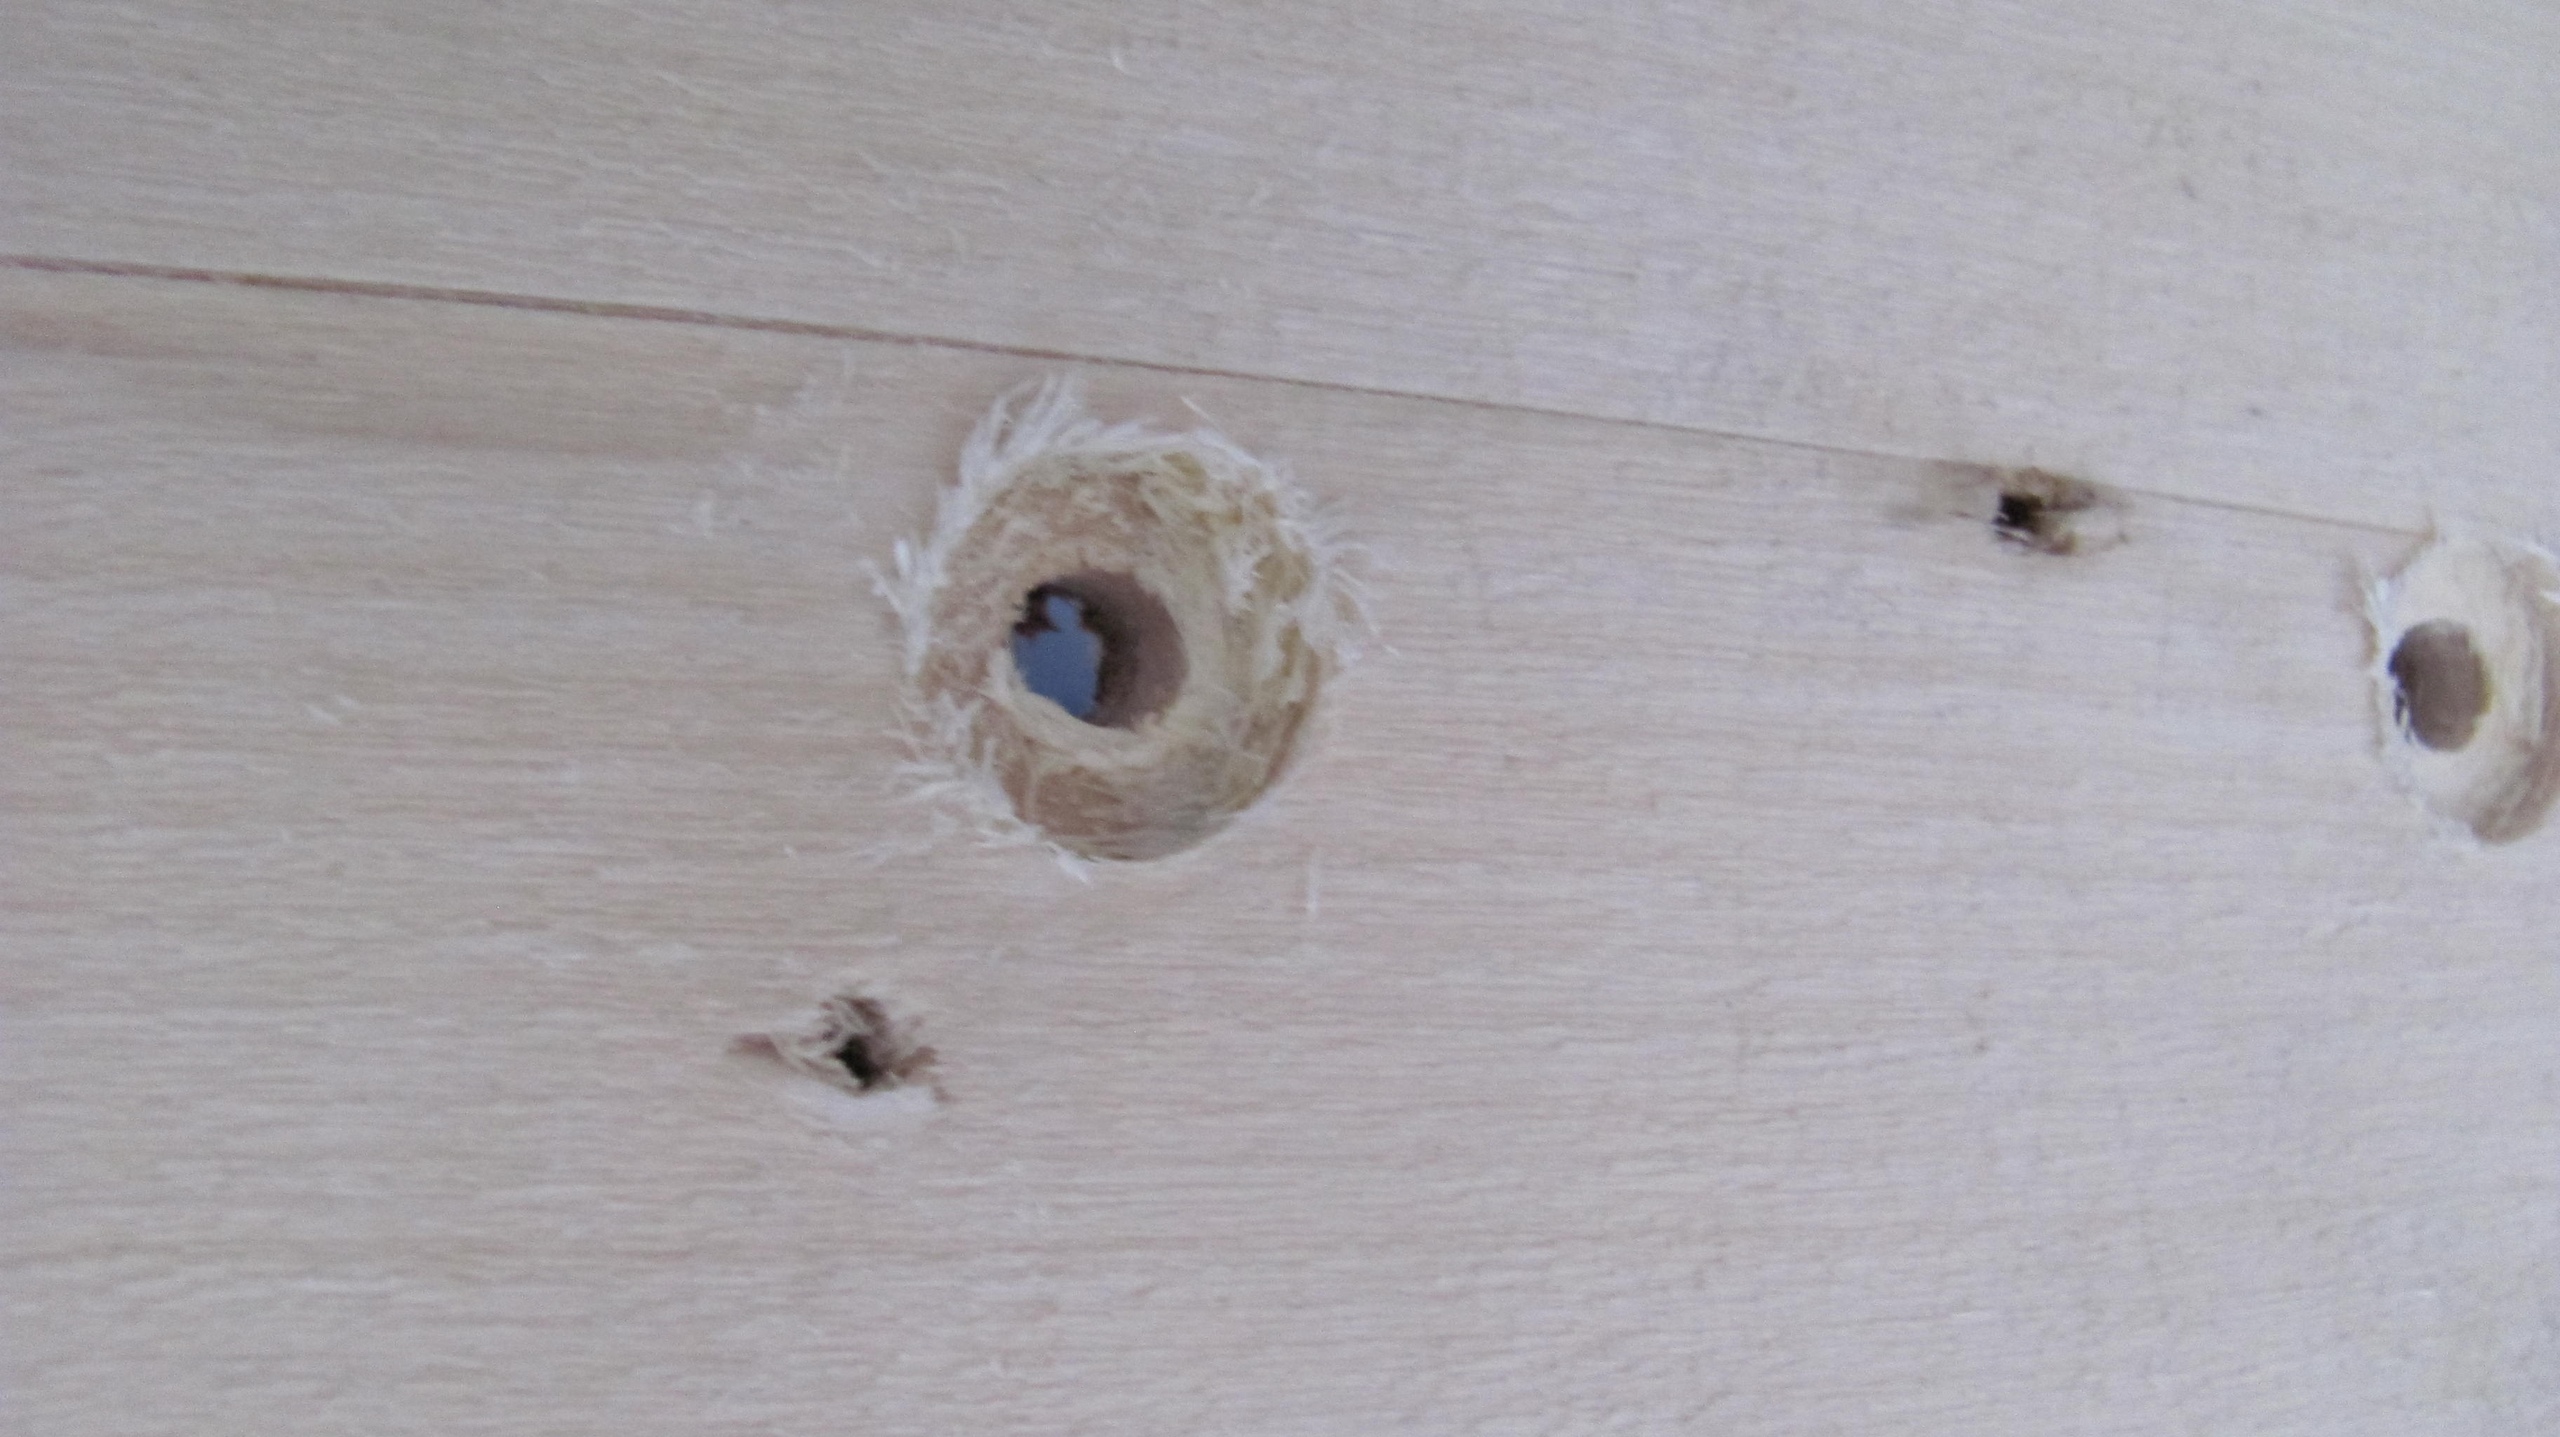 Recesses for fixing rings
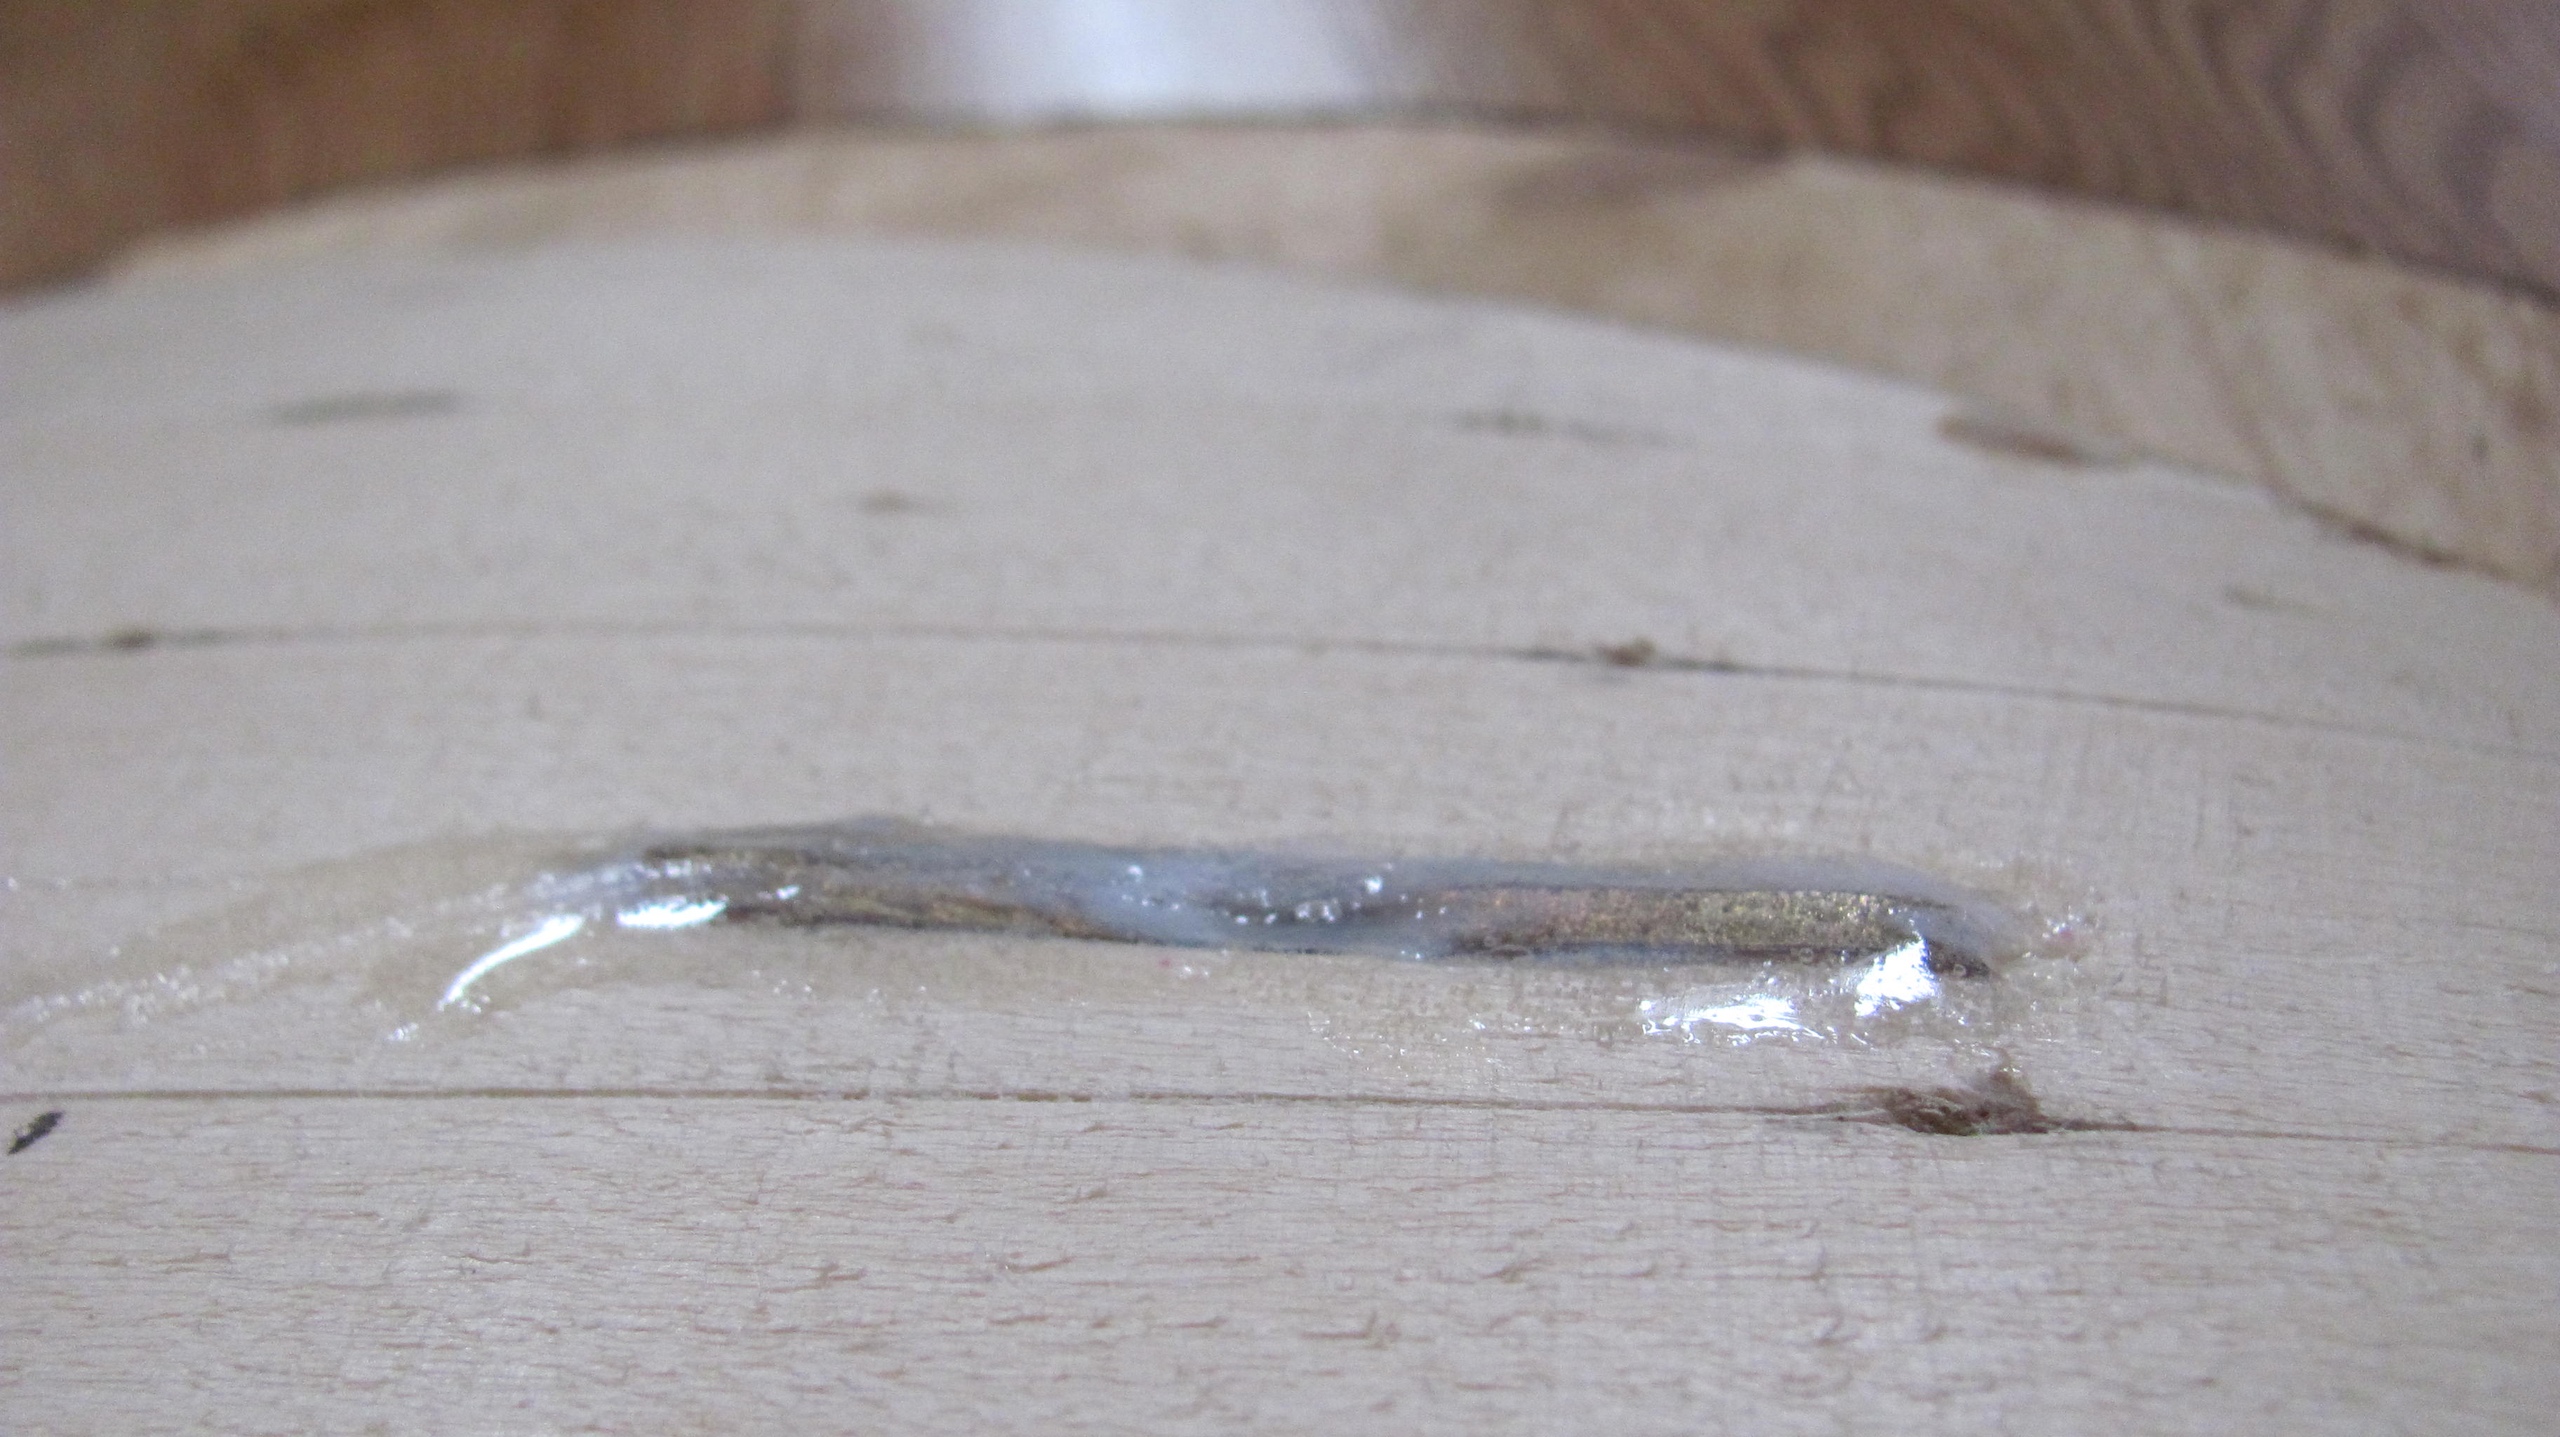 Final processing of ring lugs
 Historical fastening of the porpack and loop
The outer side is covered with two layers of linen. They say that on the preserved samples on the outside under the metal it is flax,although I do not exclude that there were other options. For tightness,I used the same glue Moment-joiner. It is convenient to prime and paint on linen,but if there is a ring on the rim,wrinkles are inevitably obtained. Perhaps you should make incisions here,hoping that they will then be primed. The creases were not primed.

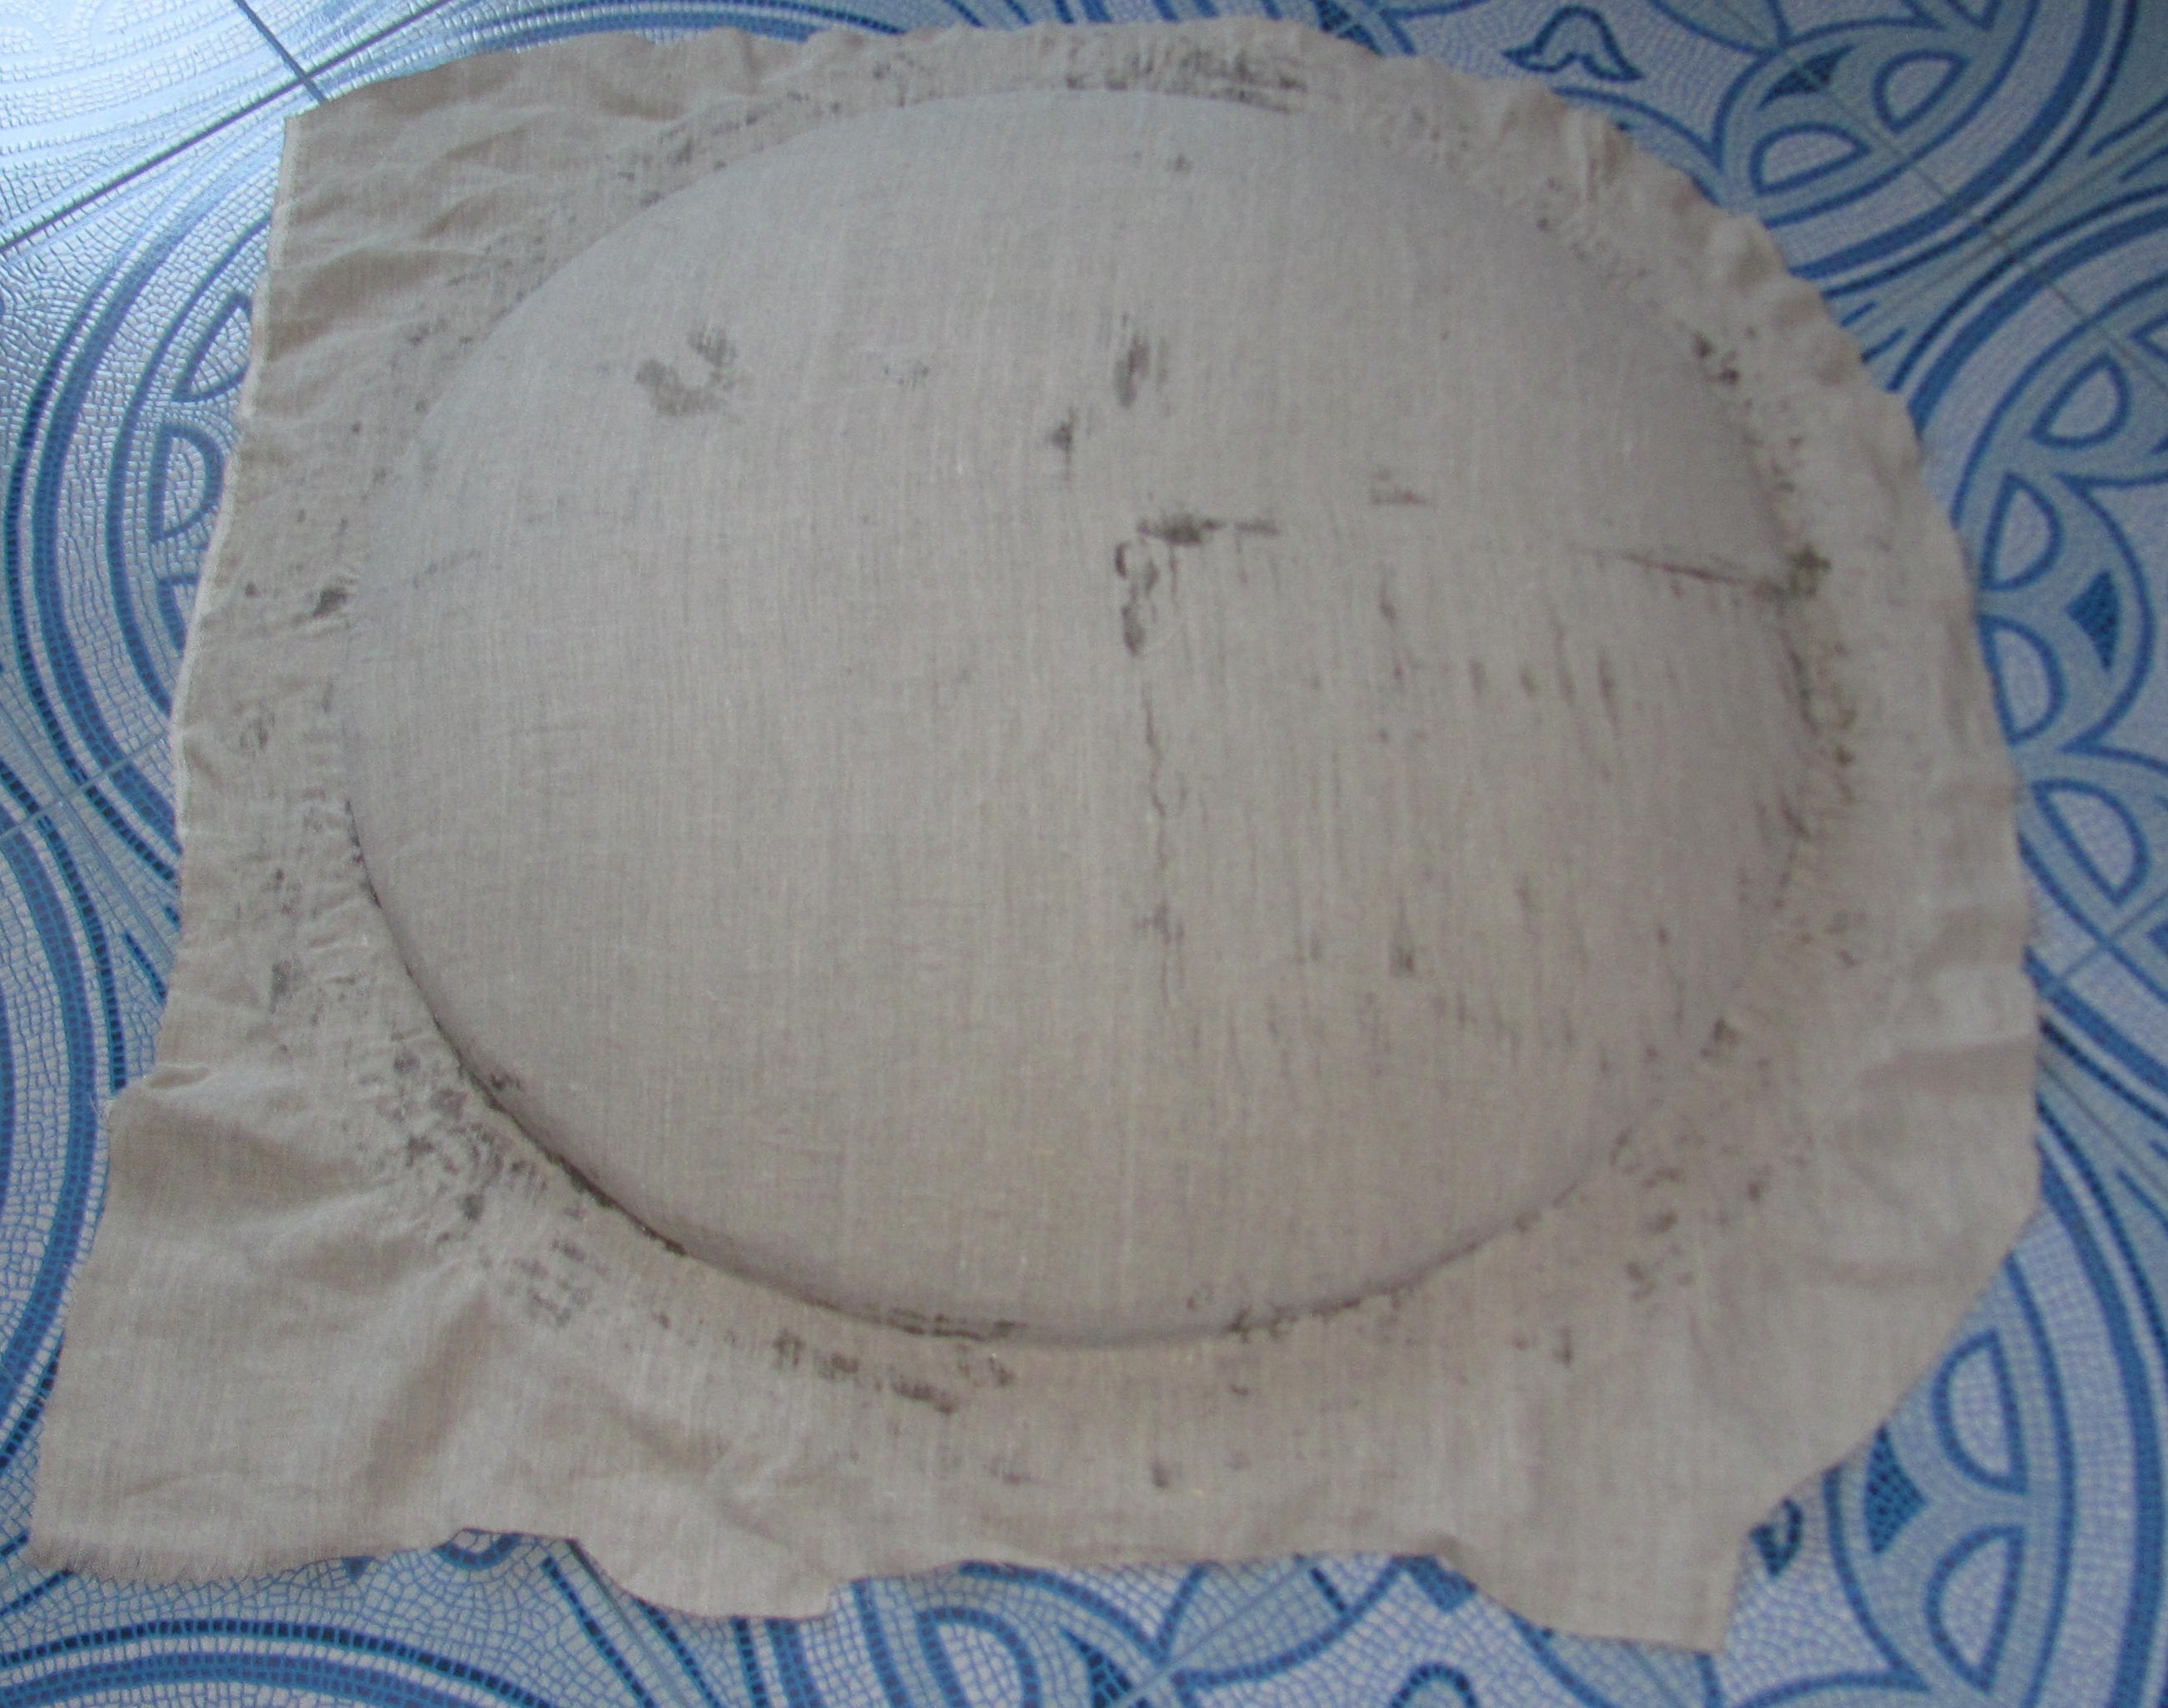 Fitting the ring should be done more carefully
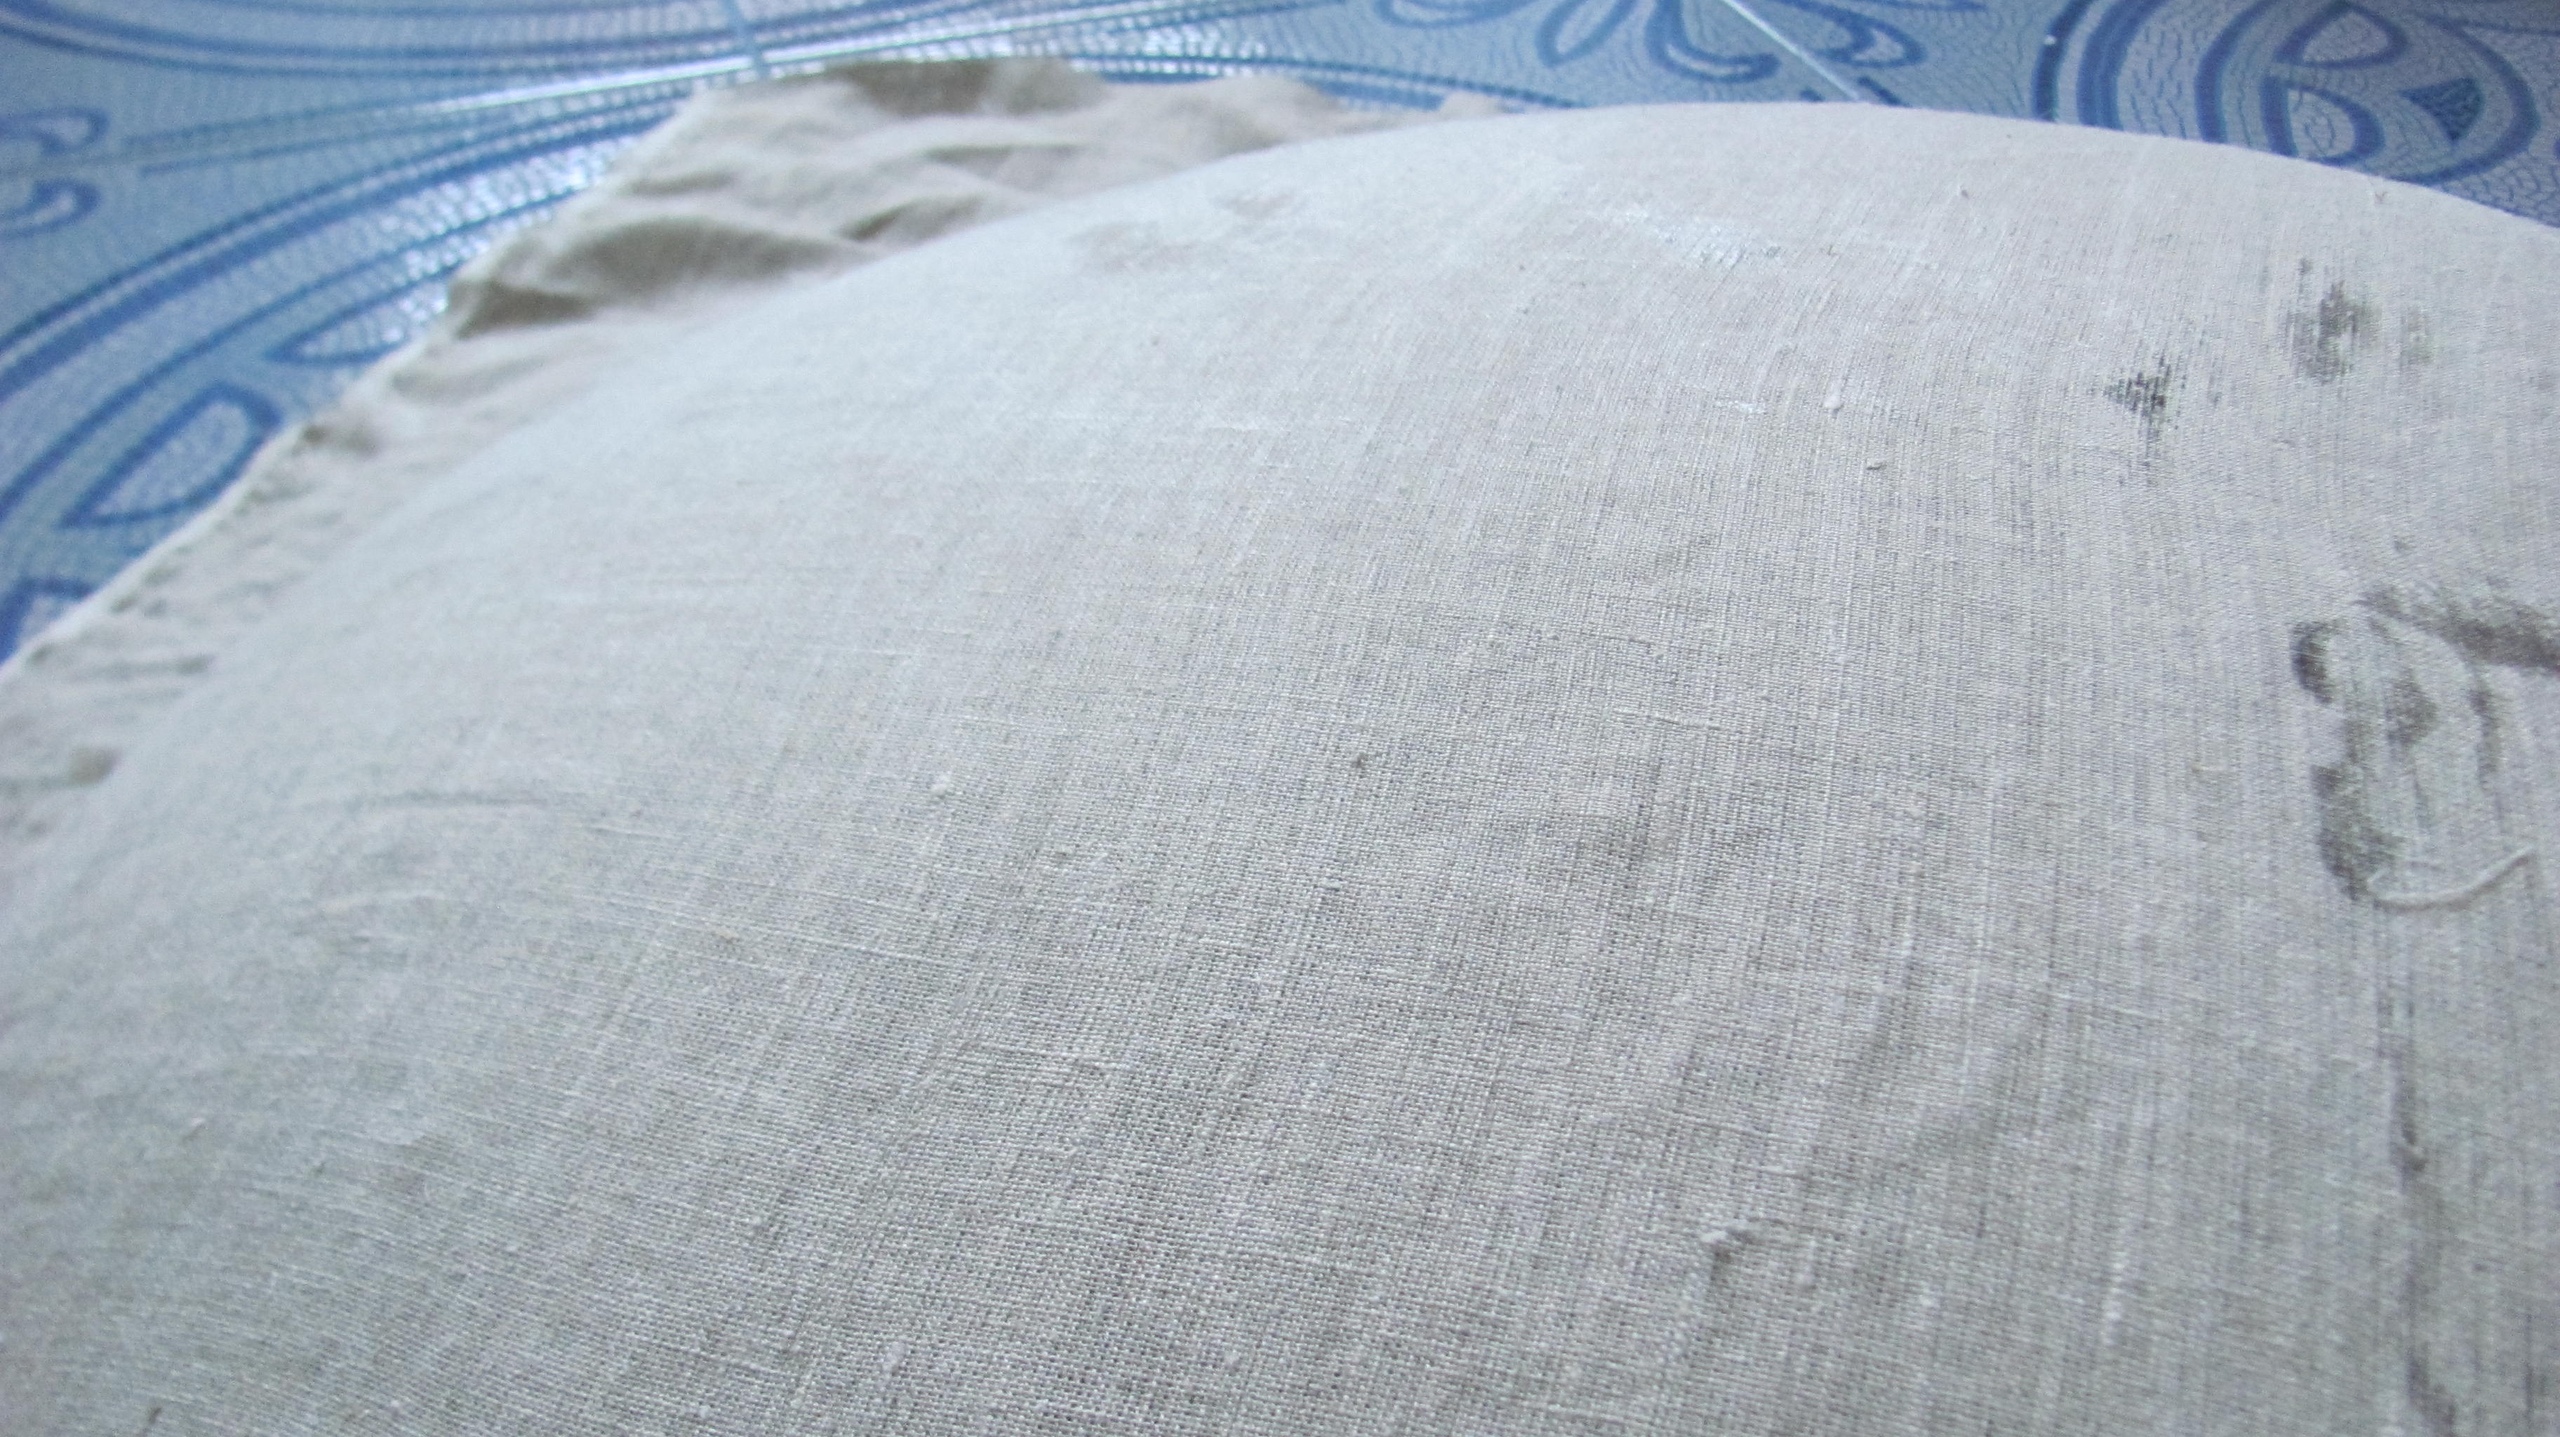 Covering the outer side of the shield with linen
I didn't use a historical primer or tempera paint that was diluted with egg yolk myself,so I won't describe the painting,I'll just show you the result. I will write about the subject of the painting some other time,in connection with the arming of the army of Alexander the Great.
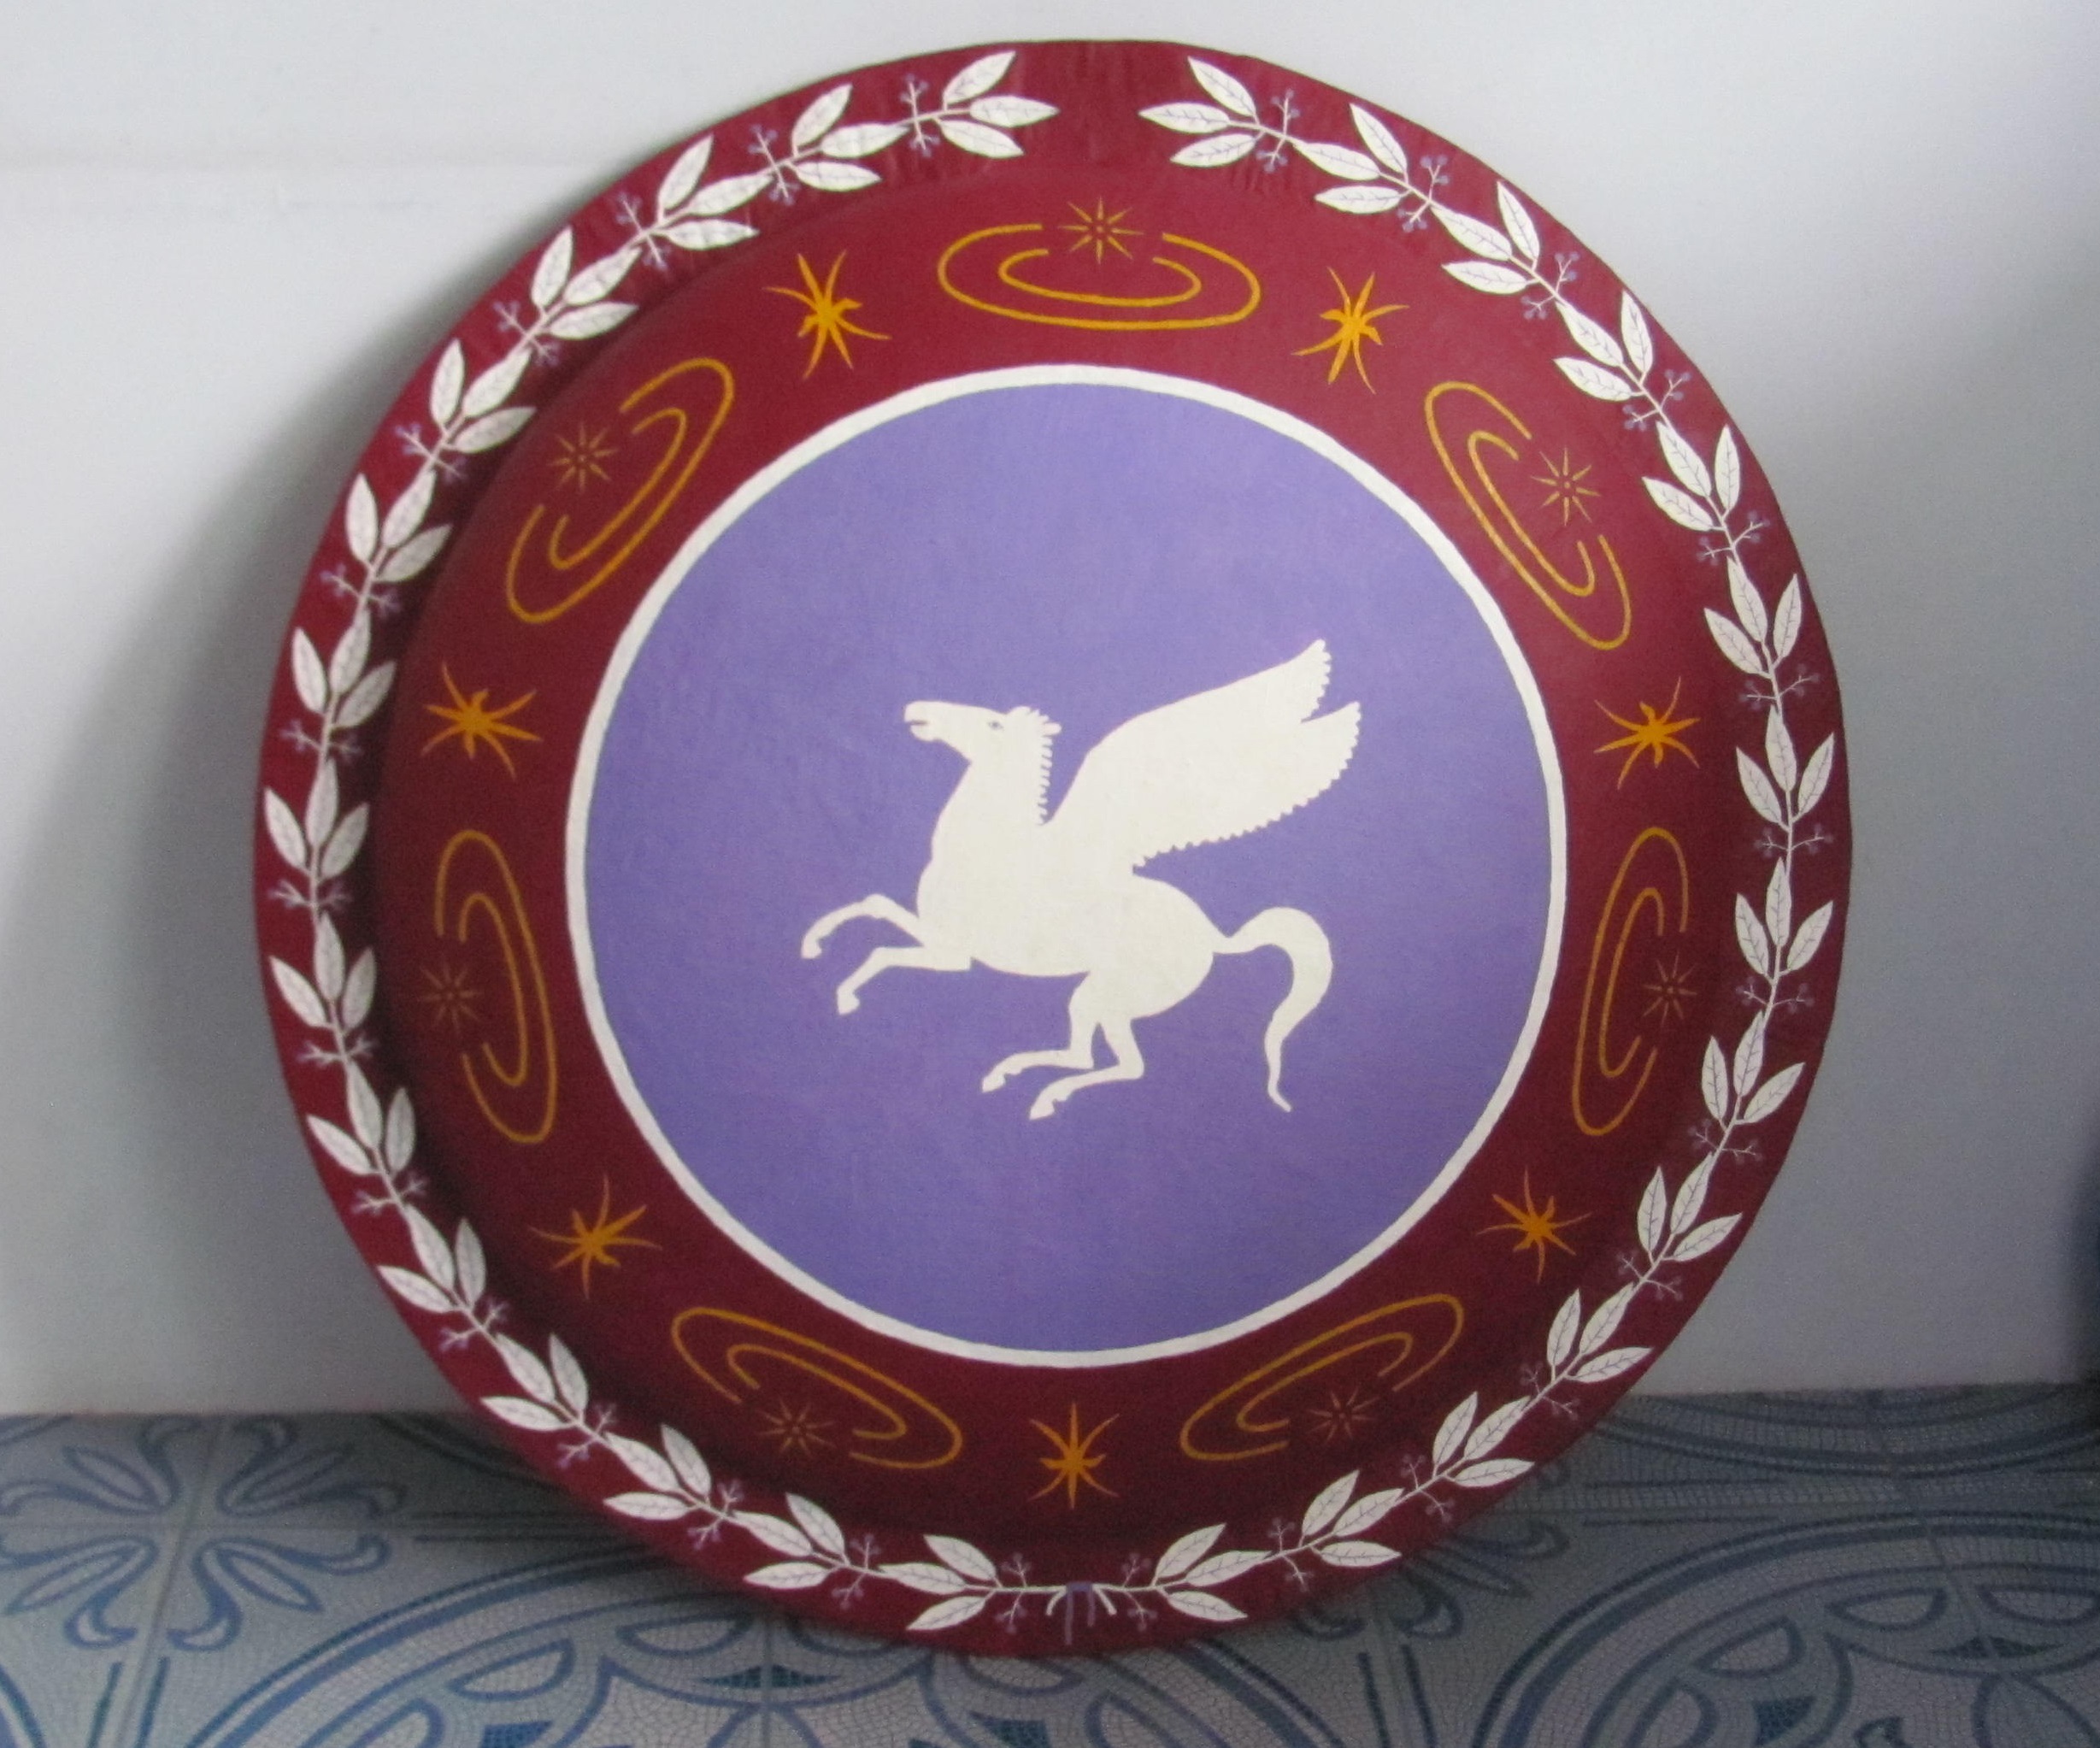
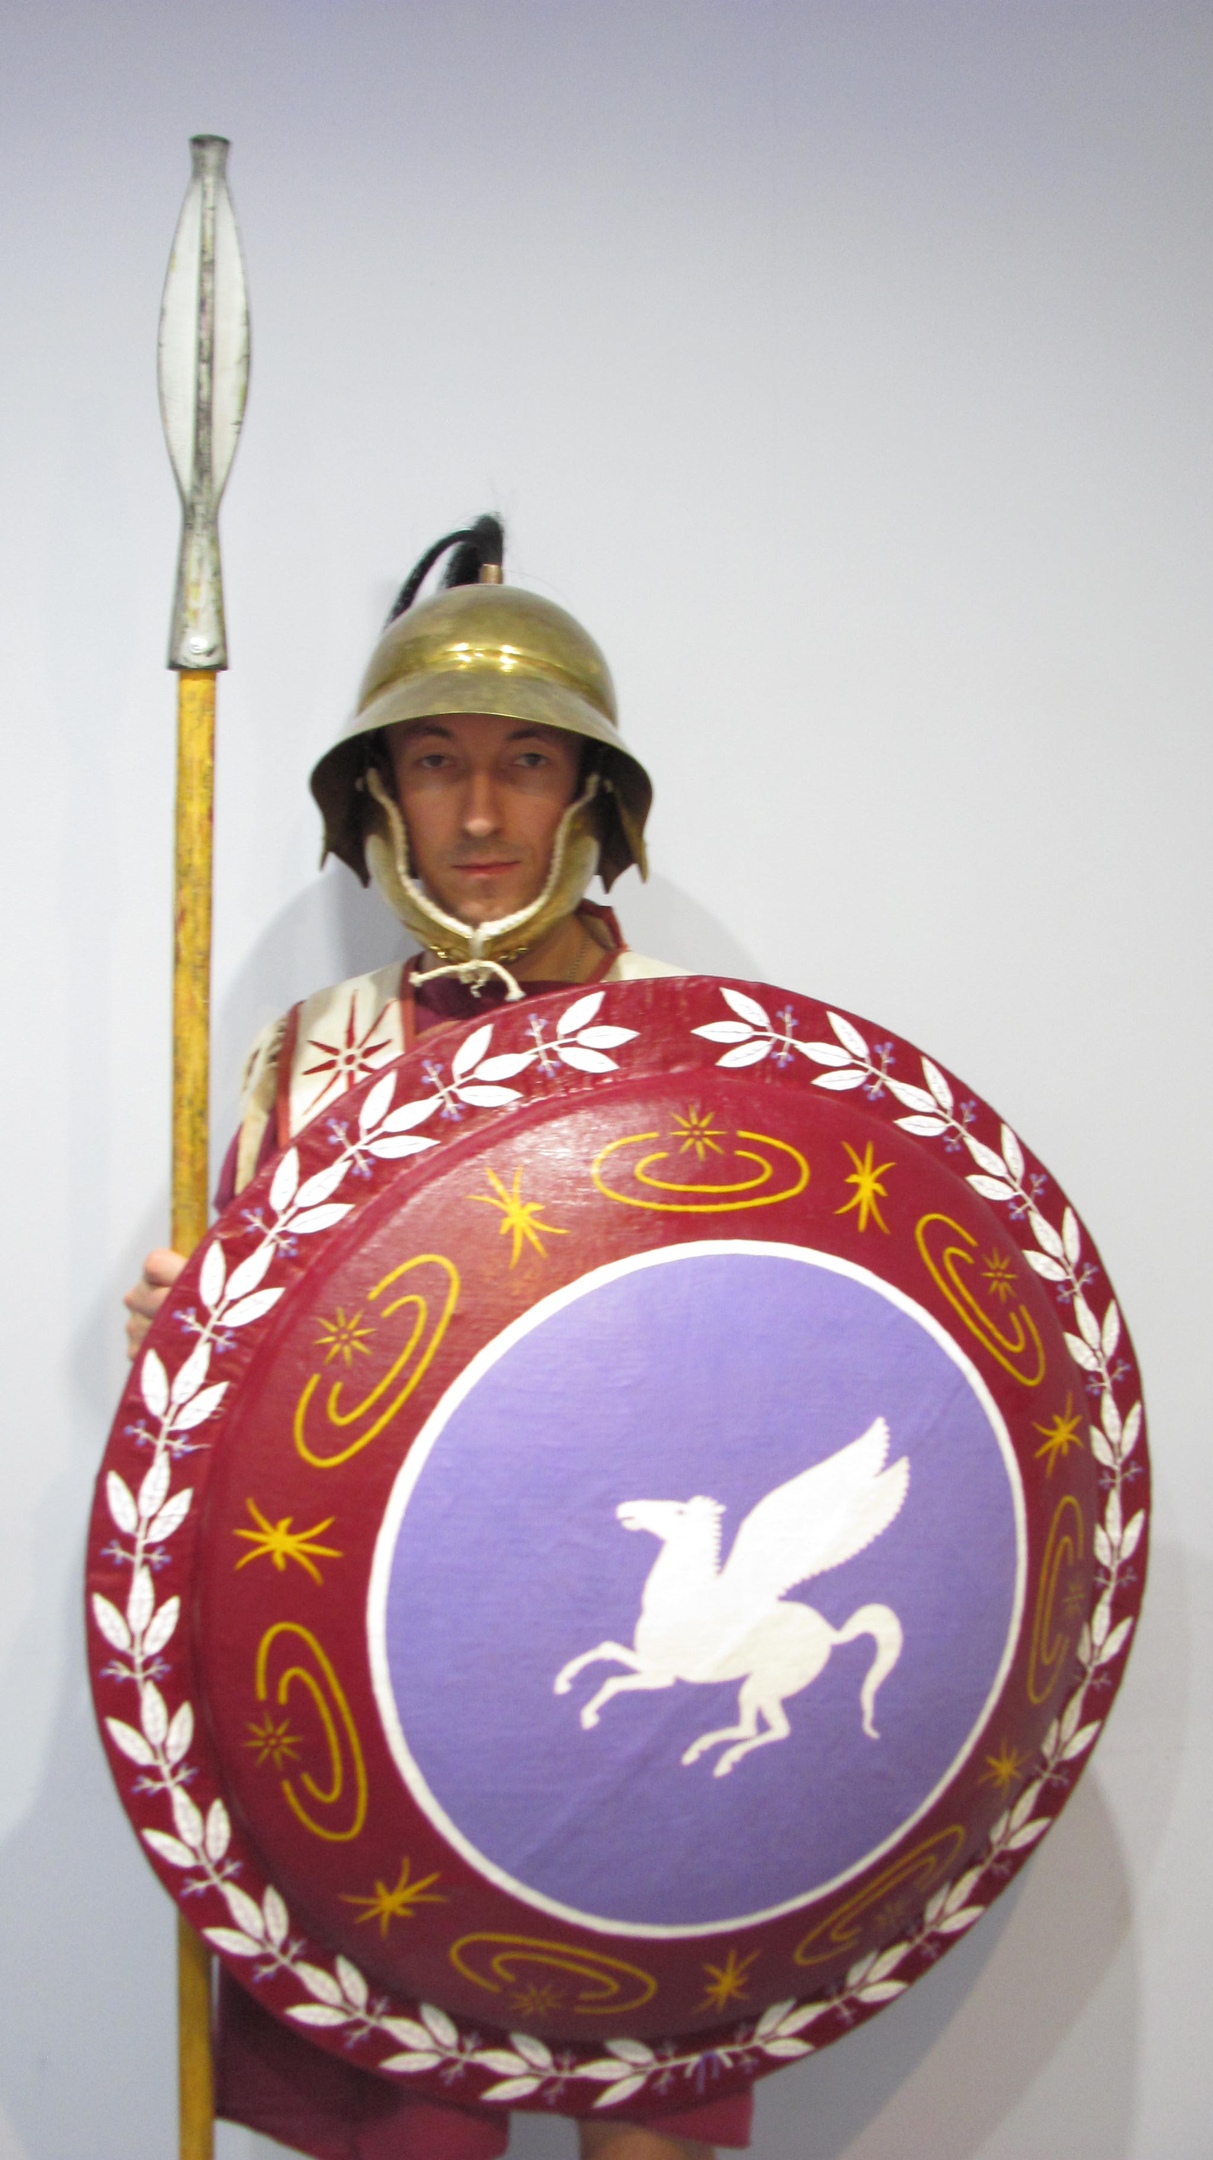
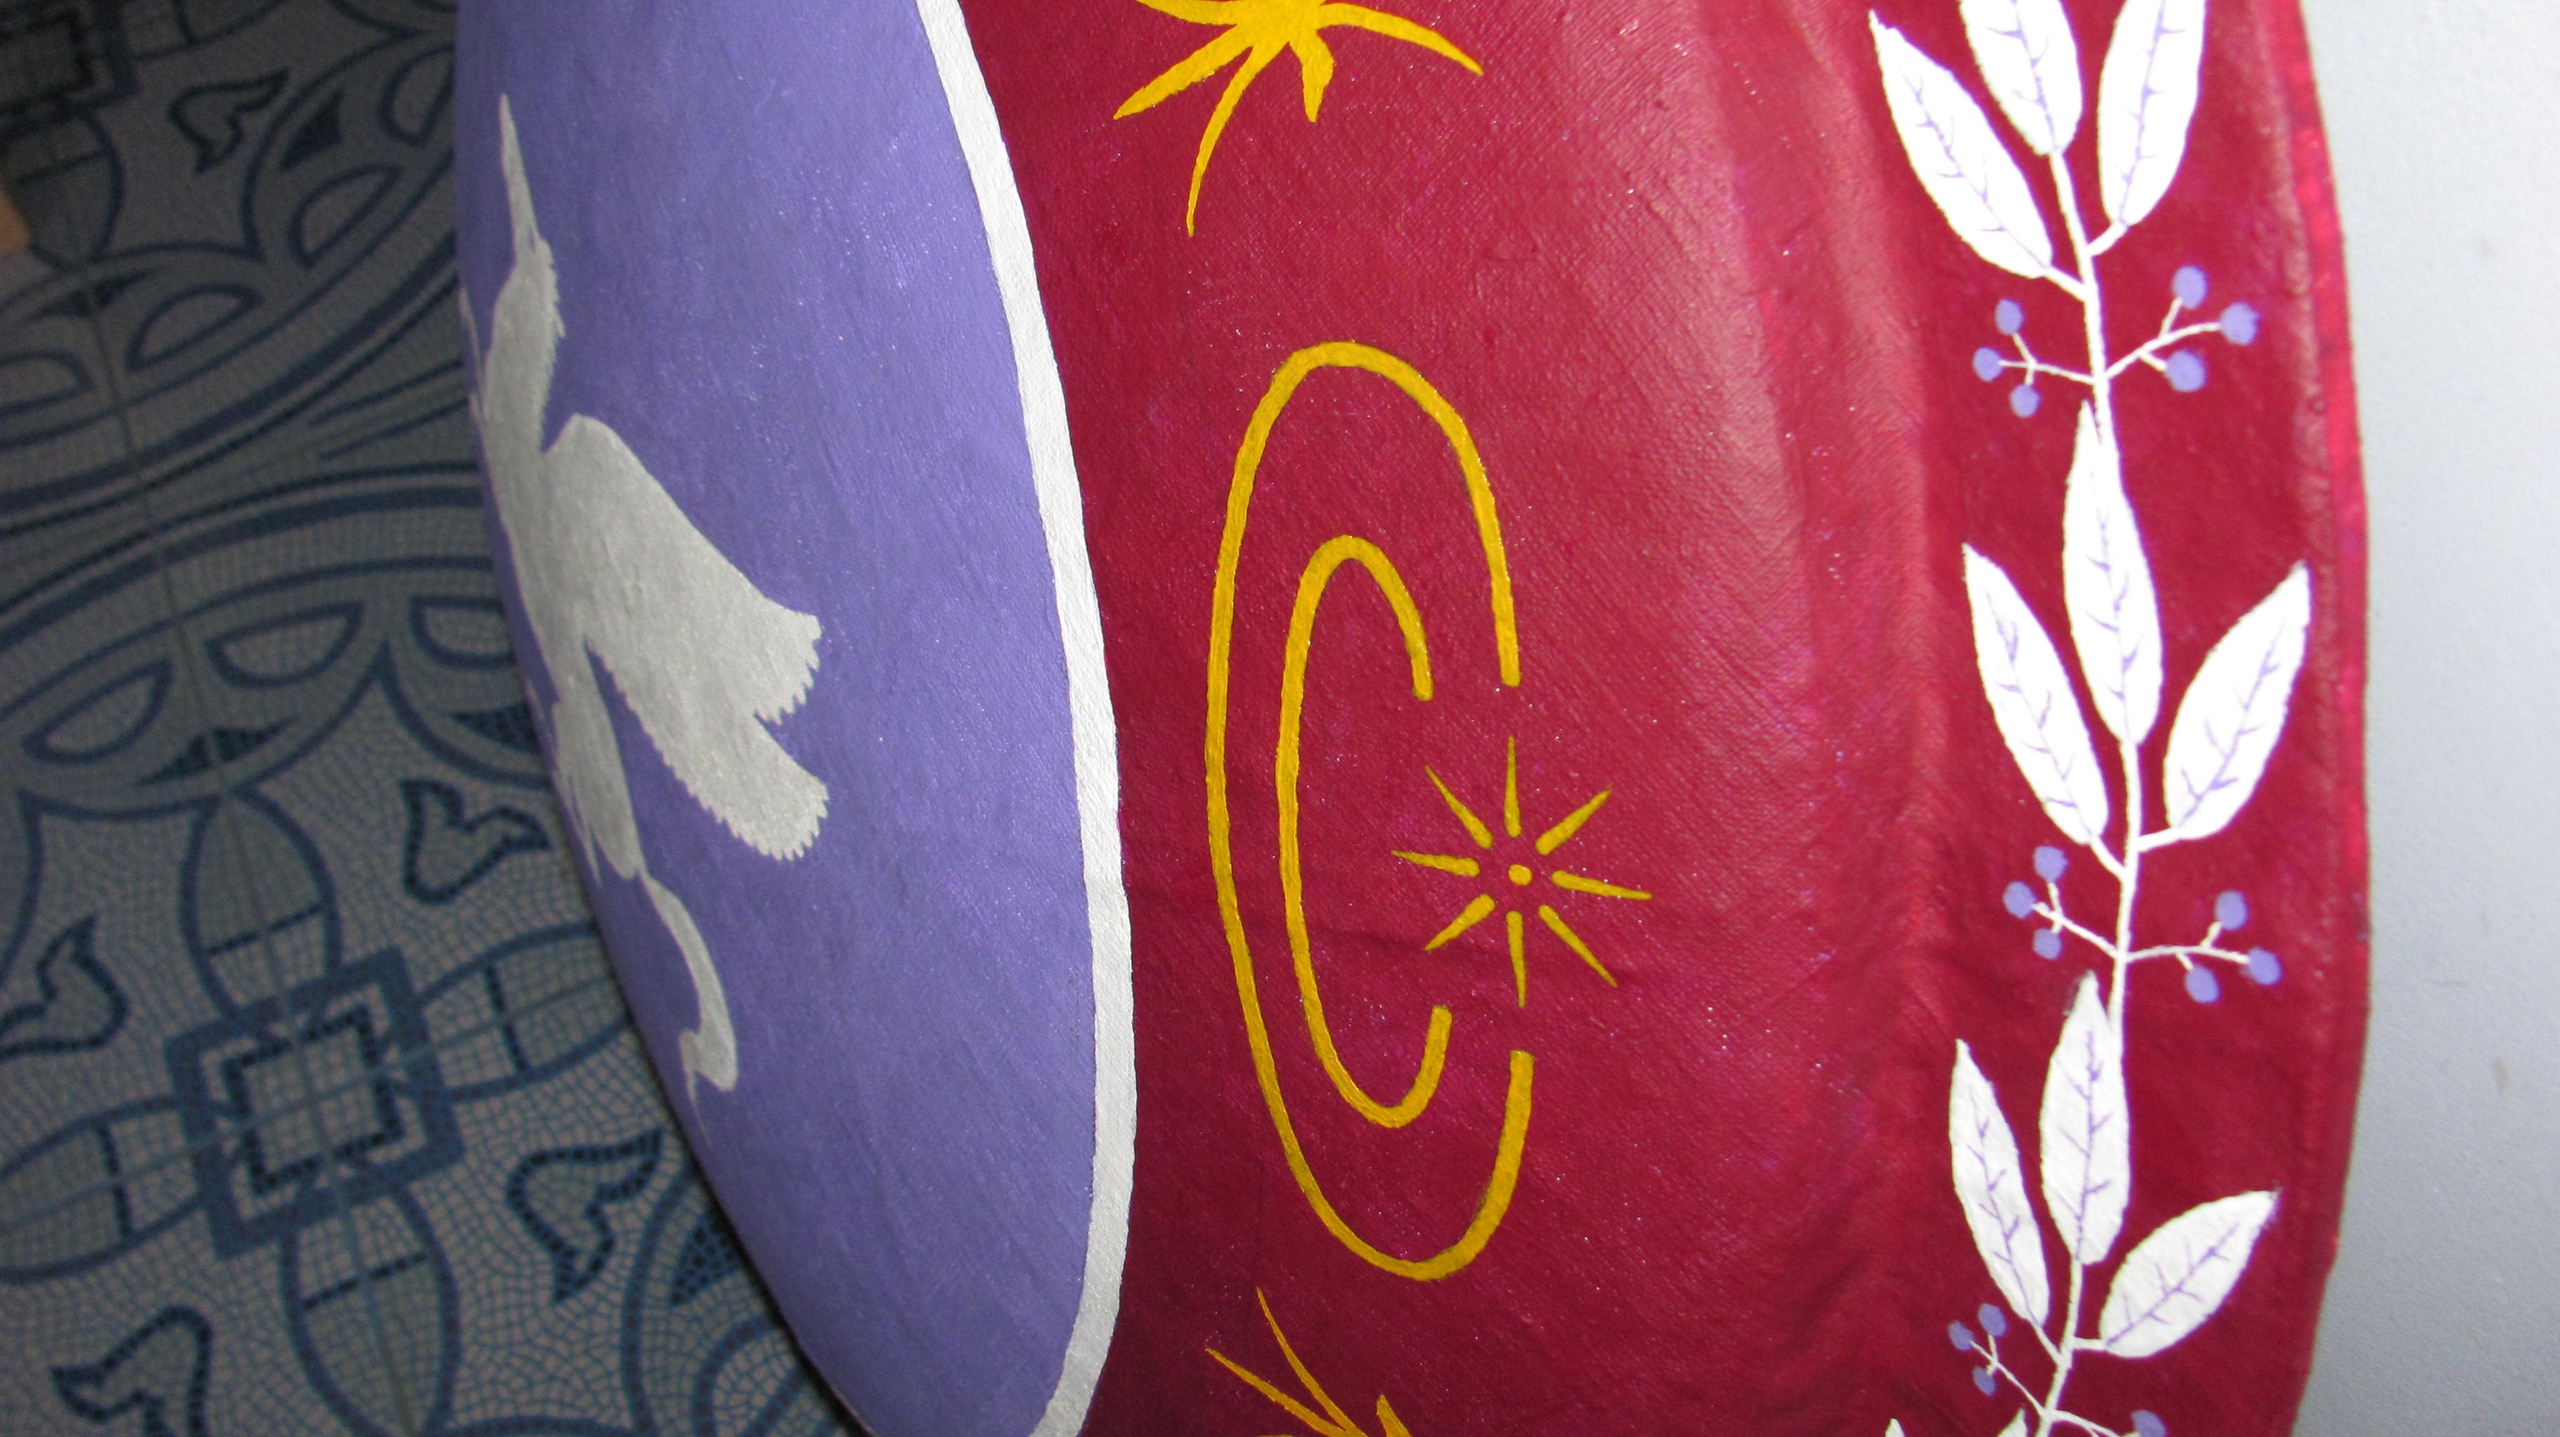 The result of painting hoplon
Results. My hoplon turned out to have a diameter of 84-85 cm,a "thickness" of 14.5 cm,a deflection depth of 13 cm,and a weight of about 5.9 kg. This is 2 kg less than the estimate given by Peter Connolly and than the weight of a hoplon made of plywood rings. I think you can make the hoplon even easier. You need to reduce the thickness of the ring,rim,and preferably the lens a little,although it already seems light when you take it in your hands. A bronze shackle,of course,would increase the weight,but then the wooden base can be made even thinner and lighter. In general,the use of metal instead of wood is a well-known technique that allows you to lighten the product while maintaining weight.
Prices are listed as of 2018. A lens,however,slightly less curved,can be ordered for 3000 rubles.,bars on the ring and a board on the rim for 1000 or 1500 rubles. For porpax,they asked for 2300 rubles.,for loops for the cord under the brush I don't know,let's say 500 rubles.,for a set of 6 rings,although not with ears,but cast on a rivet-900 rubles.,with the skin I was lucky,I bought it for only 1000 rubles.,two layers of linen – about 700 rubles. The paint and primer unexpectedly took about 1500 rubles,the glue about 650 rubles. Total: about 12,000 rubles. If you buy brass and make accessories yourself,then about 8000 rubles. And that's not counting work. Yes,a hoplon is one of the most difficult and expensive shields,but if you don't have a hoplon,you're not a citizen!)) Author of the article: Timur Petrakov


